Setting Contact properties based on external API data in Workflows
Imagine you need to create a workflow that updates a Contact property based on information from an external service. In this guide we’ll walk you through the entire process step by step, so by the end, you’ll be able to implement this solution or the similar one on your own.
Imagine you need to create a workflow that updates a Contact property based on information from an external service. In this guide we’ll walk you through the entire process step by step, so by the end, you’ll be able to implement this solution or the similar one on your own.
We’ll focus on Contacts here, but of course the same technique can be used with any other CRM objects, like Companies or even Custom Objects.
Case study
In this guide we’ll cover the following process:
Every time the email address is set in Contact object, we’ll send request to external service and check if this email is on the emails list returned by this service. Based on the response, we’ll set a value of custom Contact property.
Preparation
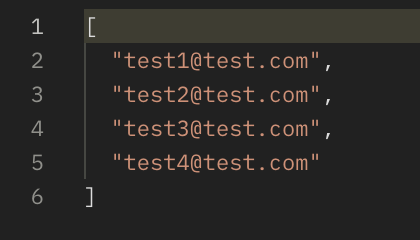
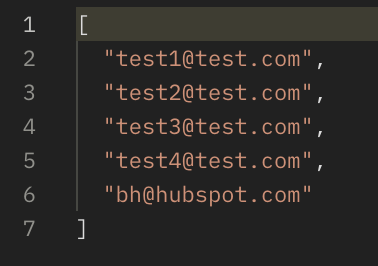
For the purpose of this guide, I prepared a simple external API, which we’ll call during the workflow action. The API sends a simple list of test email addresses
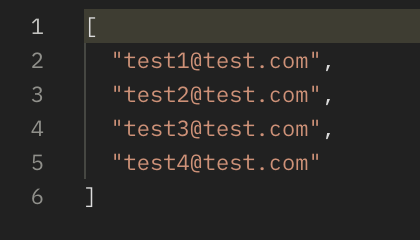
We’ll use this API in the workflow we are going to create.
I also created a custom property in Contact, with a name `Found in external API`. This is just a true/false property and we’ll be setting it based on the response from external API.
Just in case you are not familiar with setting up custom properties, below is the simple guide. If you already know how to do that, you can just skip to `Step 1 - Setting up private app`.
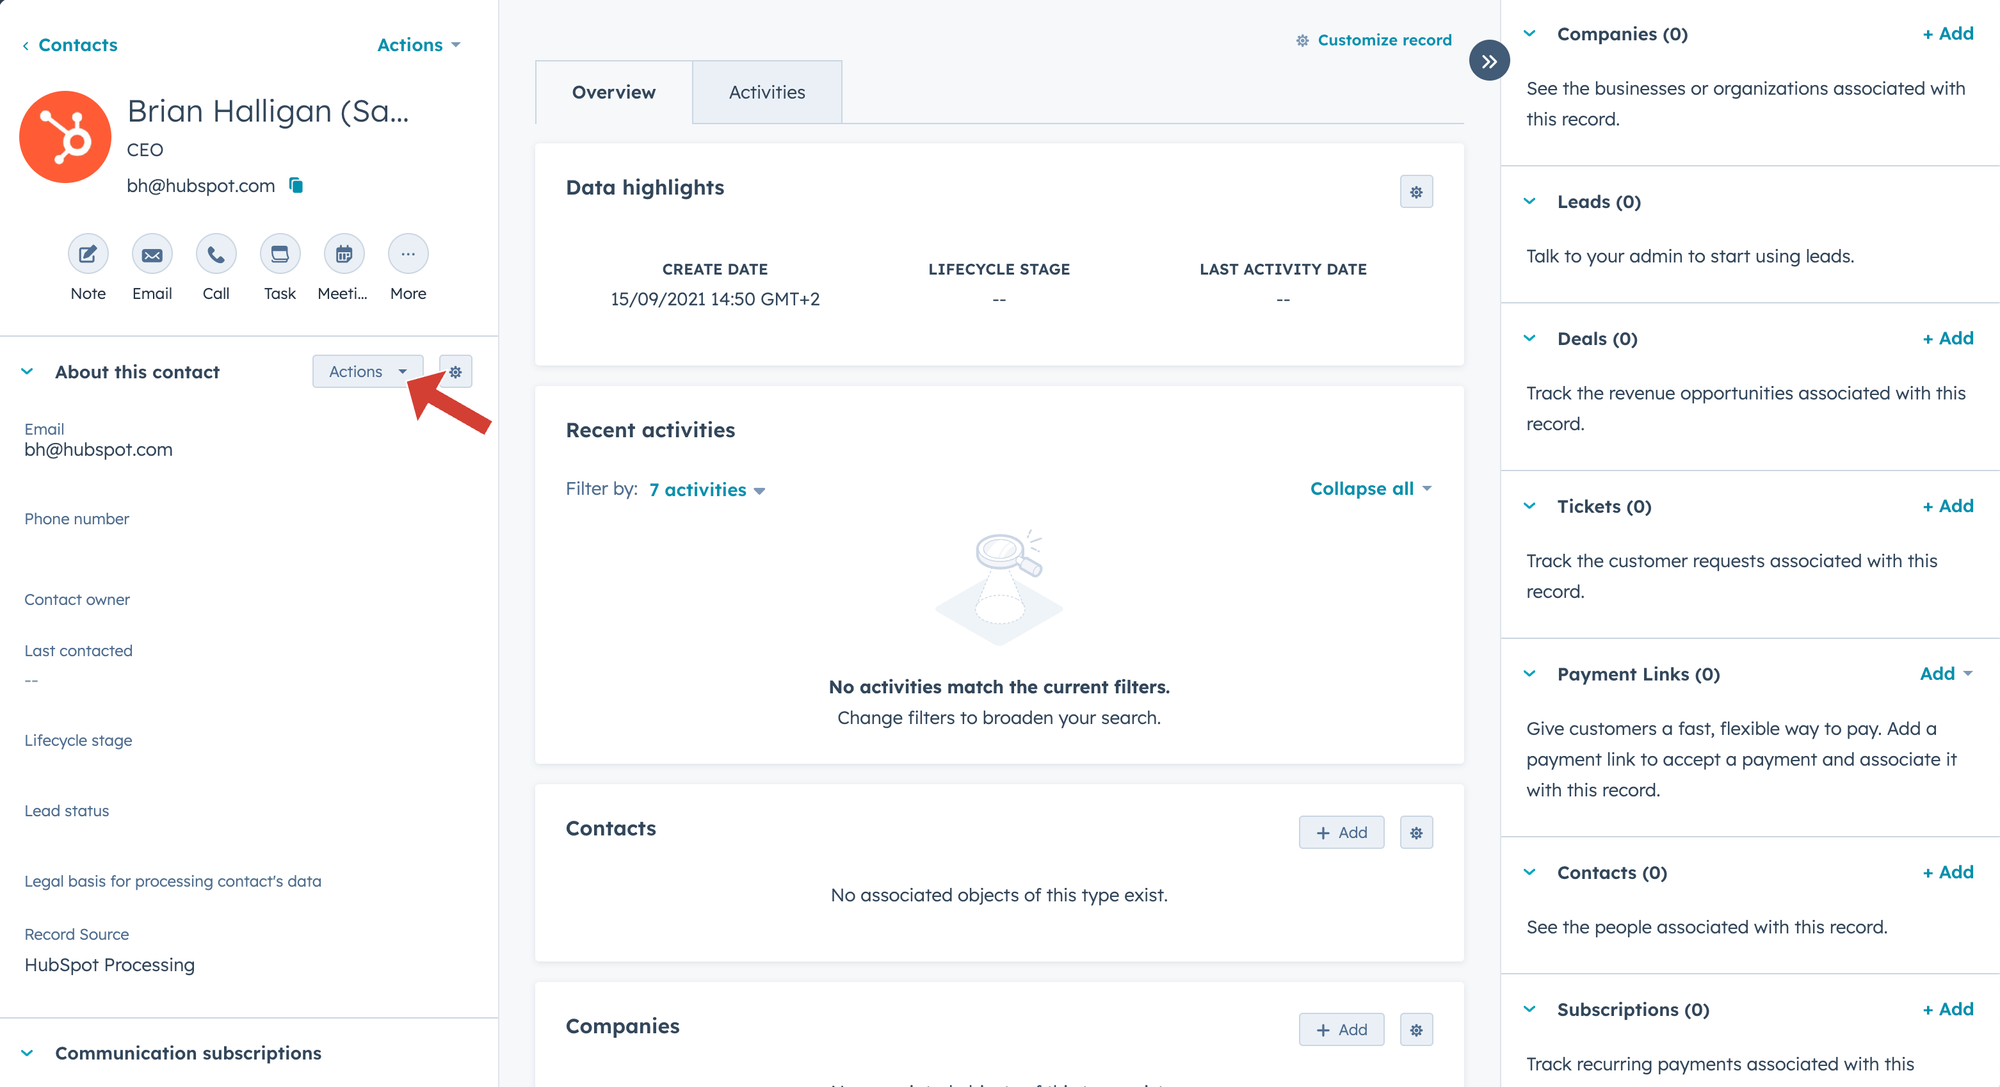
- Go to Contacts and select one of your contact from the list

- In the left sidebar, you’ll see `Actions` dropdown. Select `View all properties` from it
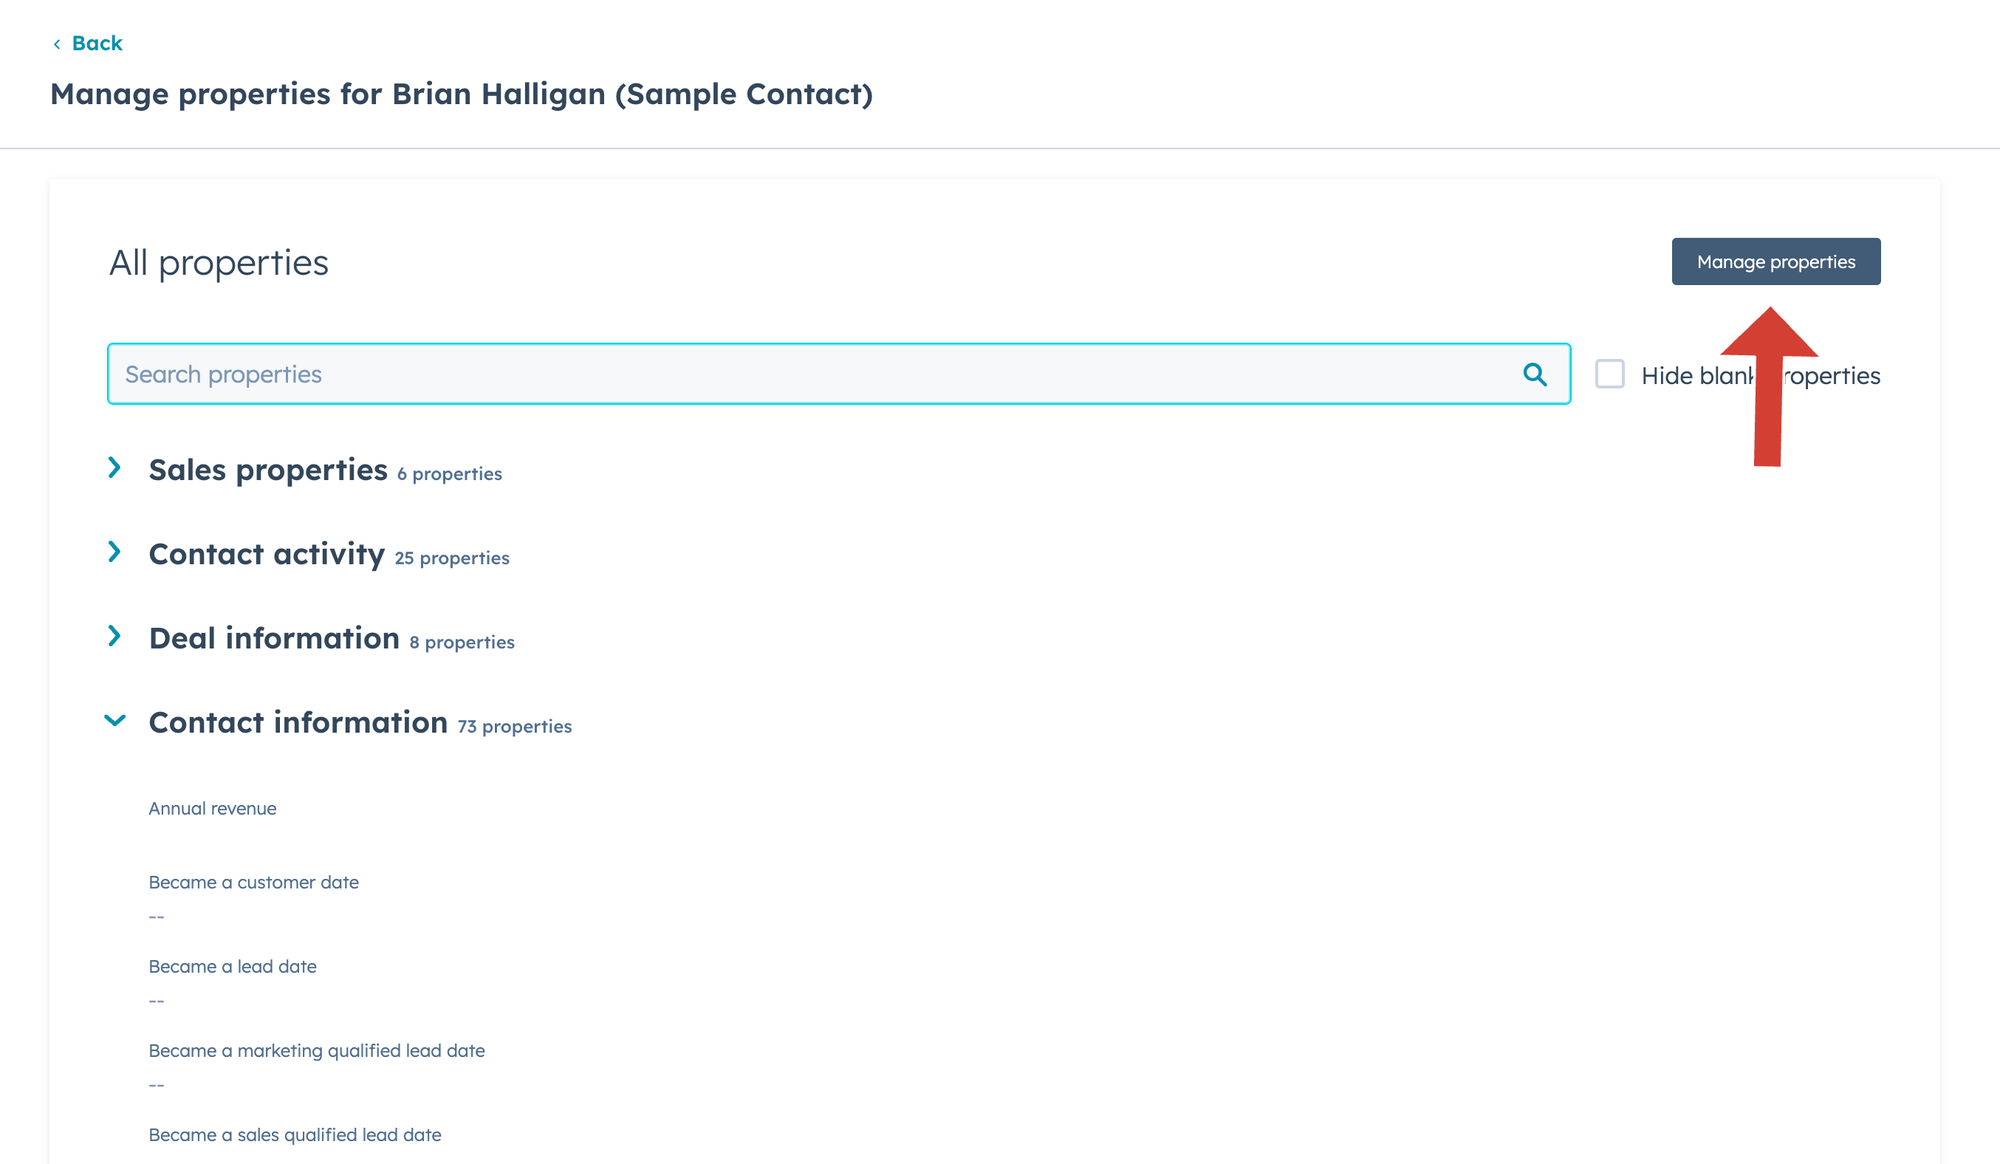
- Click `Manage properties`
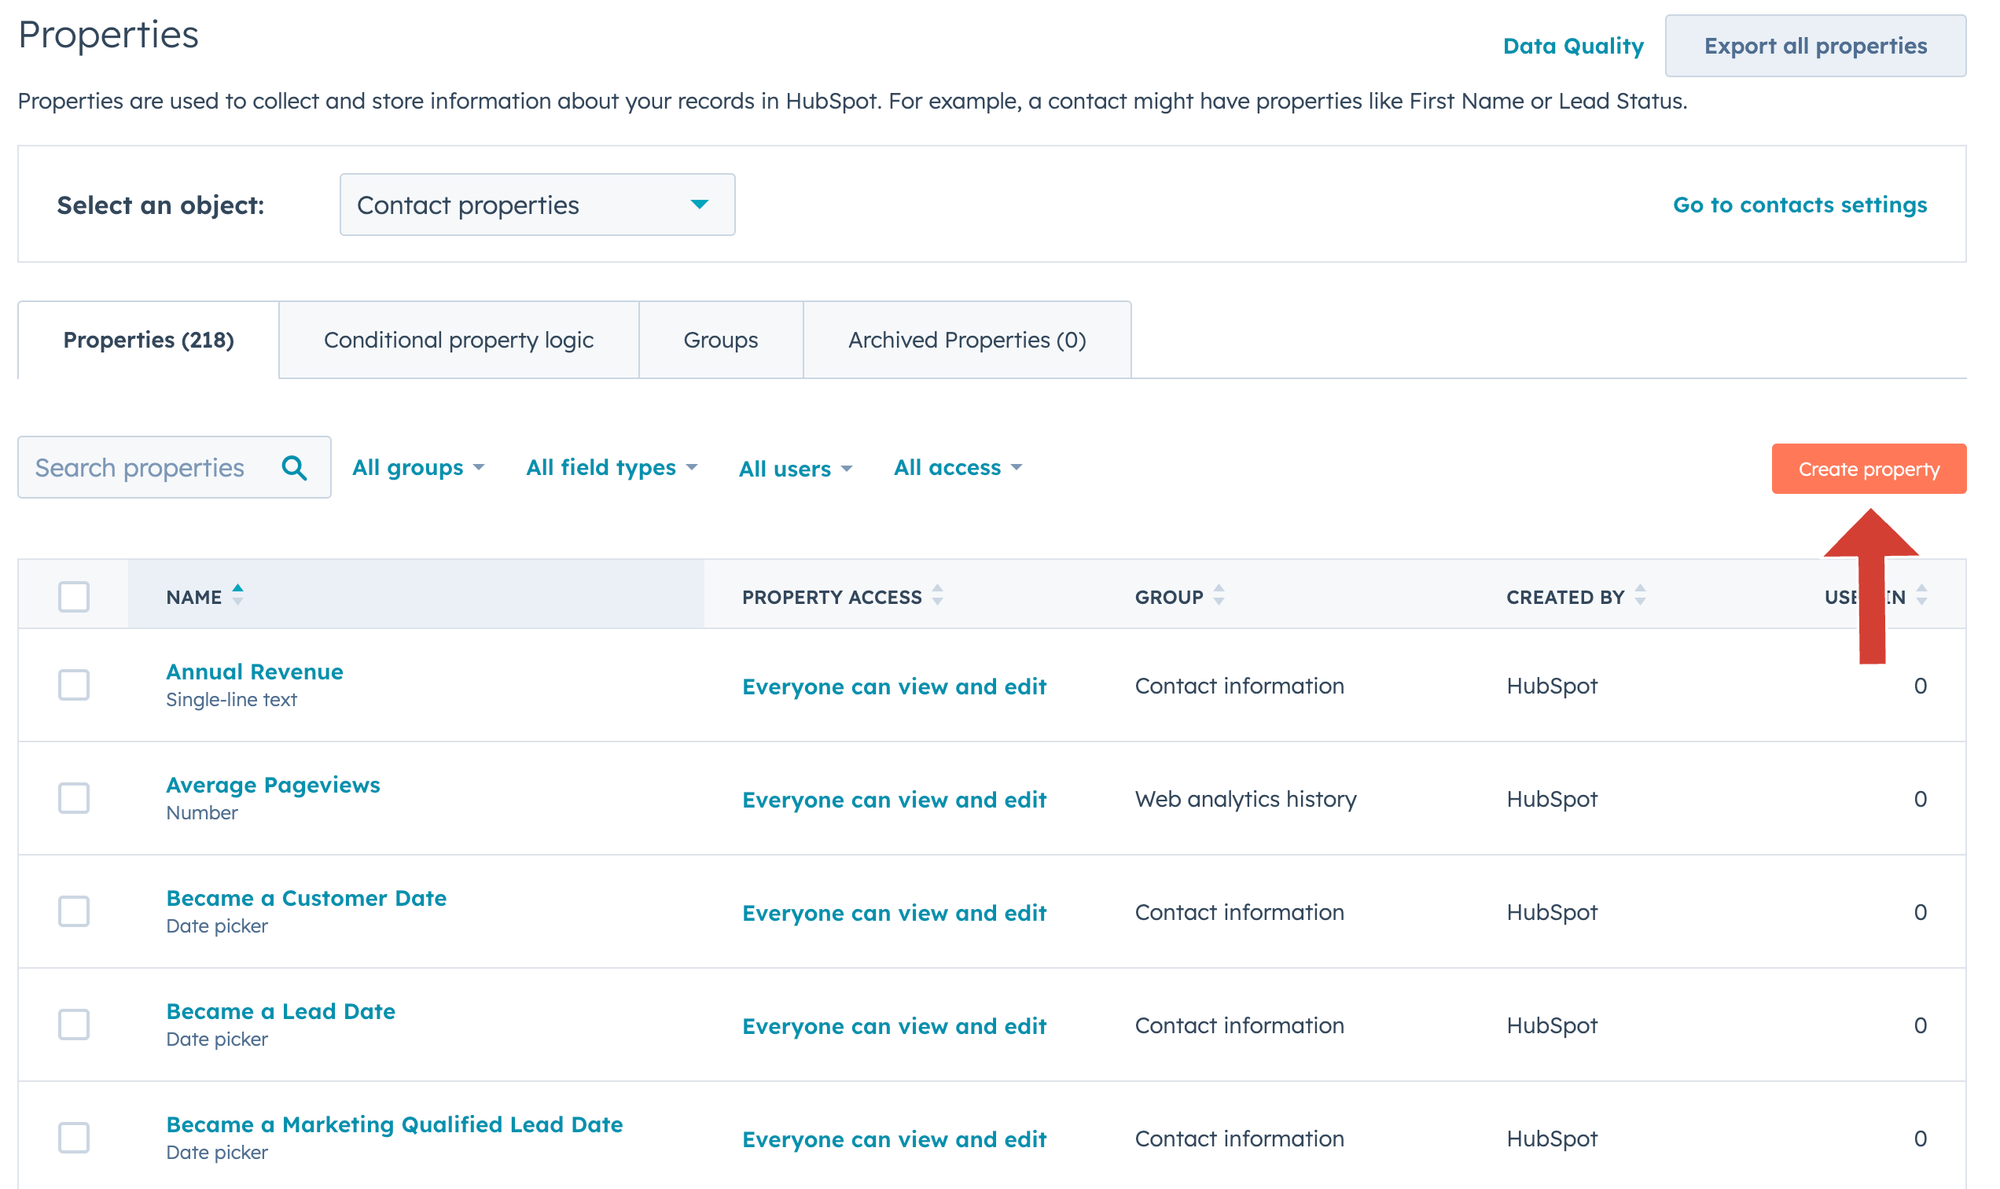
- Click `Create property` and the simple form will appear
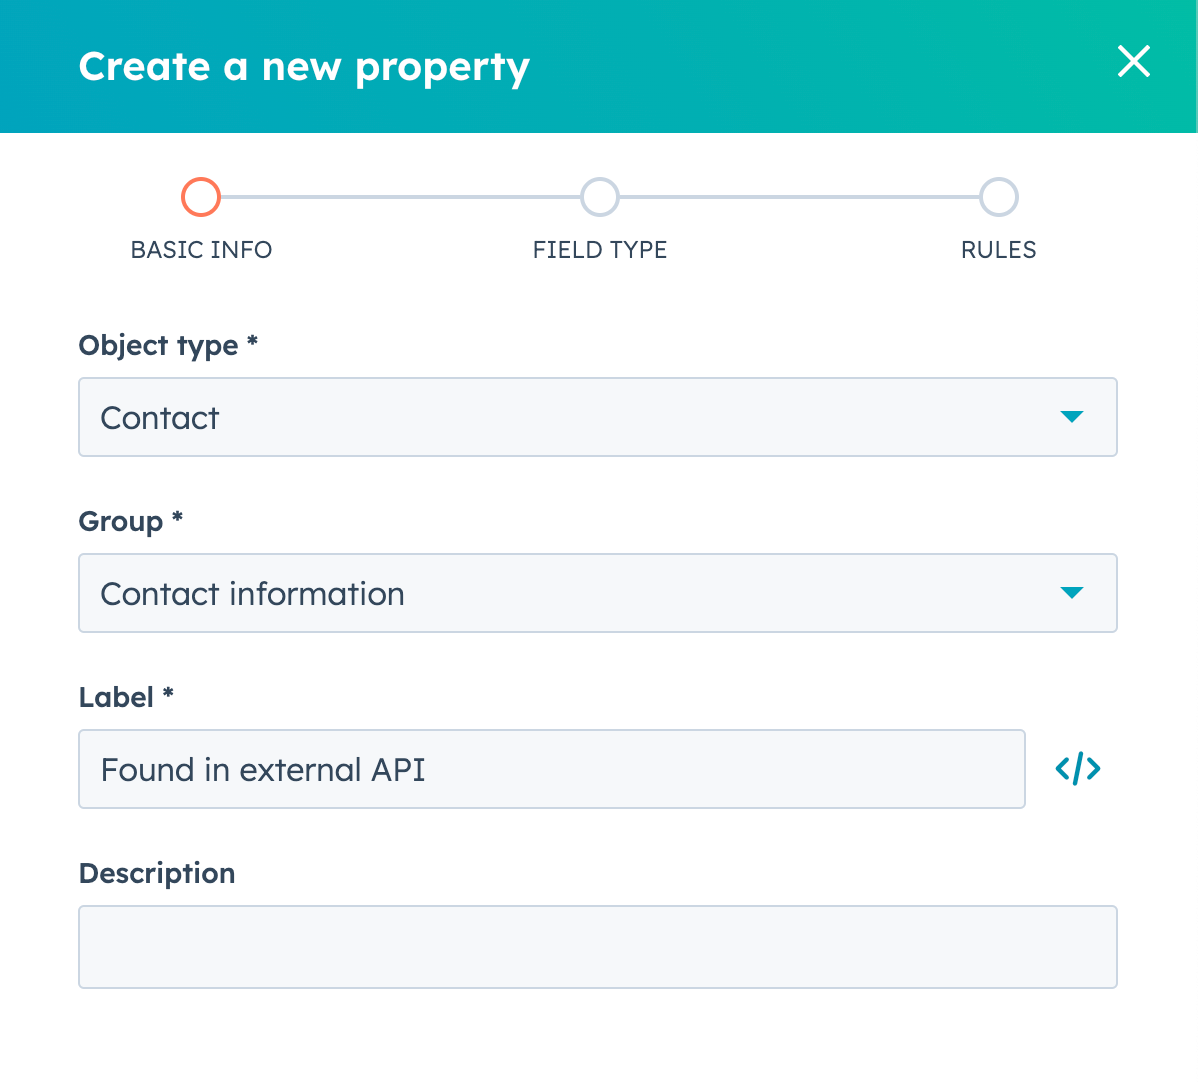
- Fill the form using values from the screen below:
- Object type: `Contact`
- Group: `Contact information` (you can select different one if you want)
- Label: `Found in external API` (you can choose different name)
- Description can be left empty
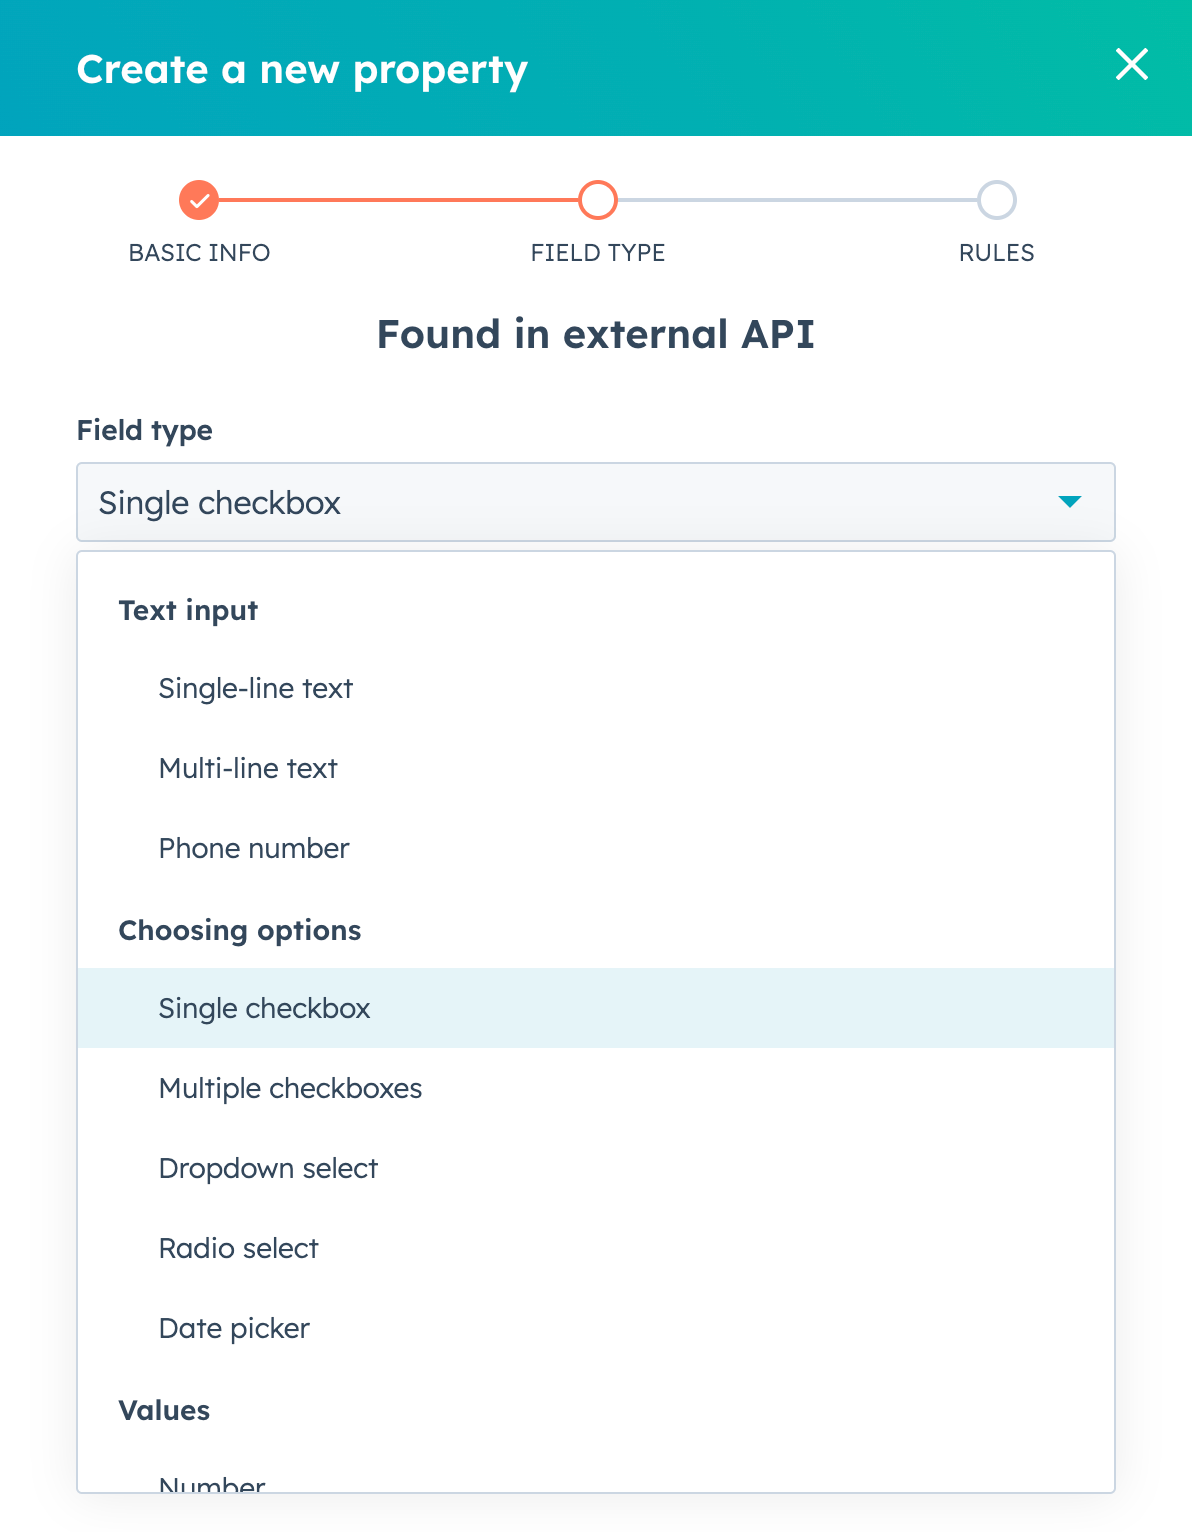
- Click `Next` button at the bottom and you’ll see a `Field type` form. Select `Single checkbox` and click `Next`
- The last screen of the wizard is just a selection box where you define whether you want to see this property in forms or not. You can uncheck it.
- Click `Create`
After coming back to `All properties` view, you can check if the property has been created. Write its name in search field and you should see it on the list.
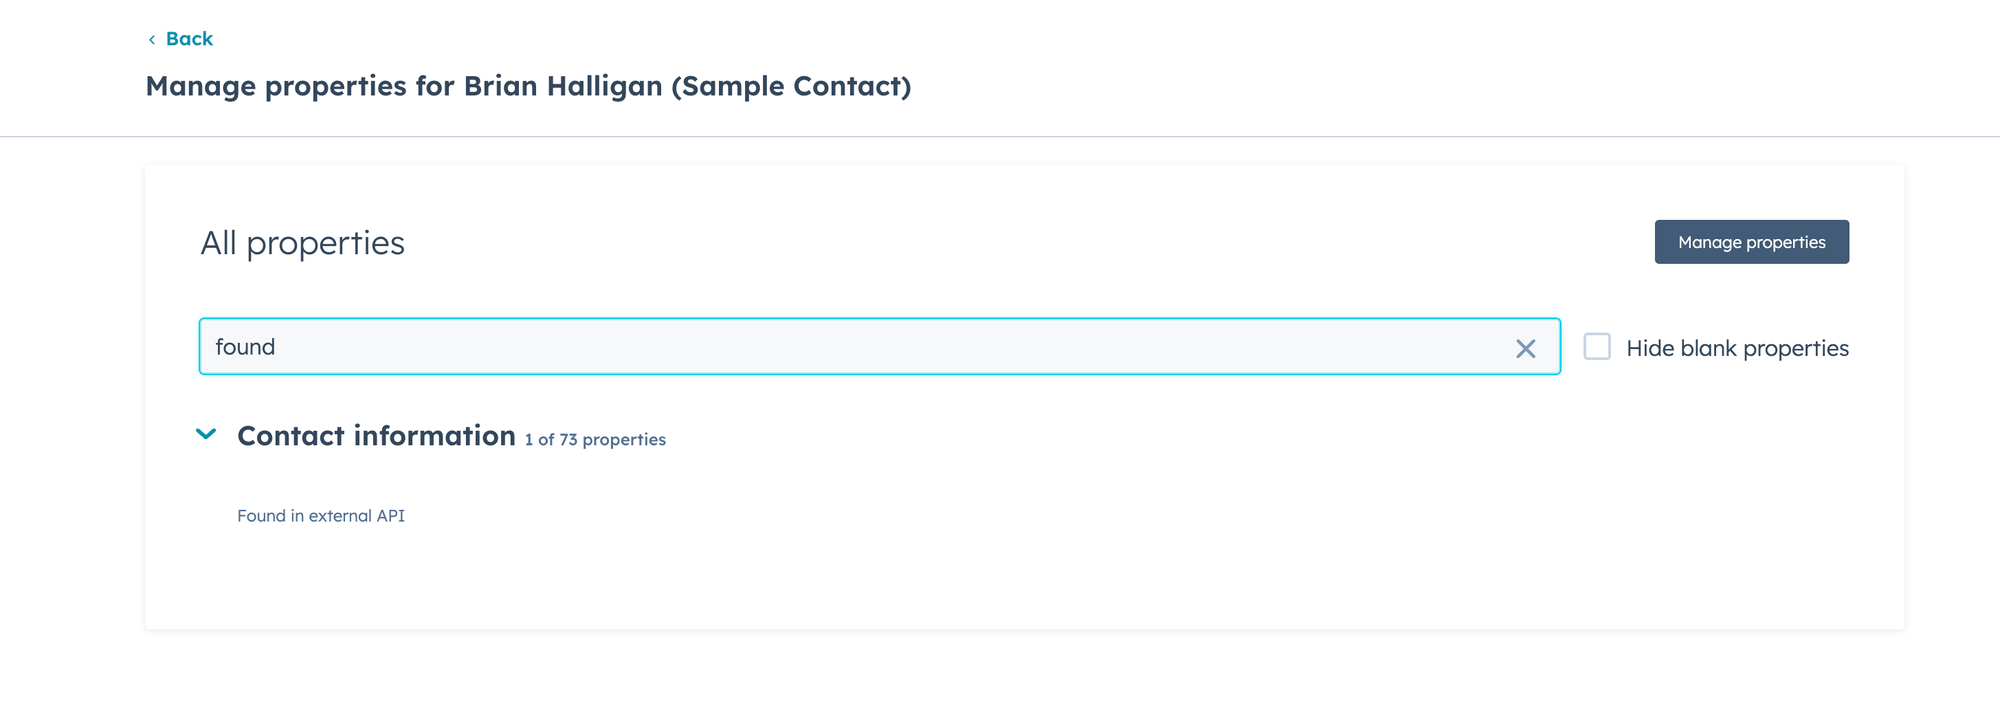
The preparation is done, now we are ready to move further.
Step 1 - Setting up private app
Since we are going to connect external API, we will have to choose slightly different workflow then usual. We will also have to write a piece of code (don’t worry, I’ll guide you through it).
First, we have to set up the private app in HubSpot. Private app is a gateway for external services or pieces of code, which allows them to connect and manage parts of your HubSpot system. In this guide, our private app will have access to Contacts.
- First, go to settings

- Choose `Integrations` in the left sidebar and then `Private apps`
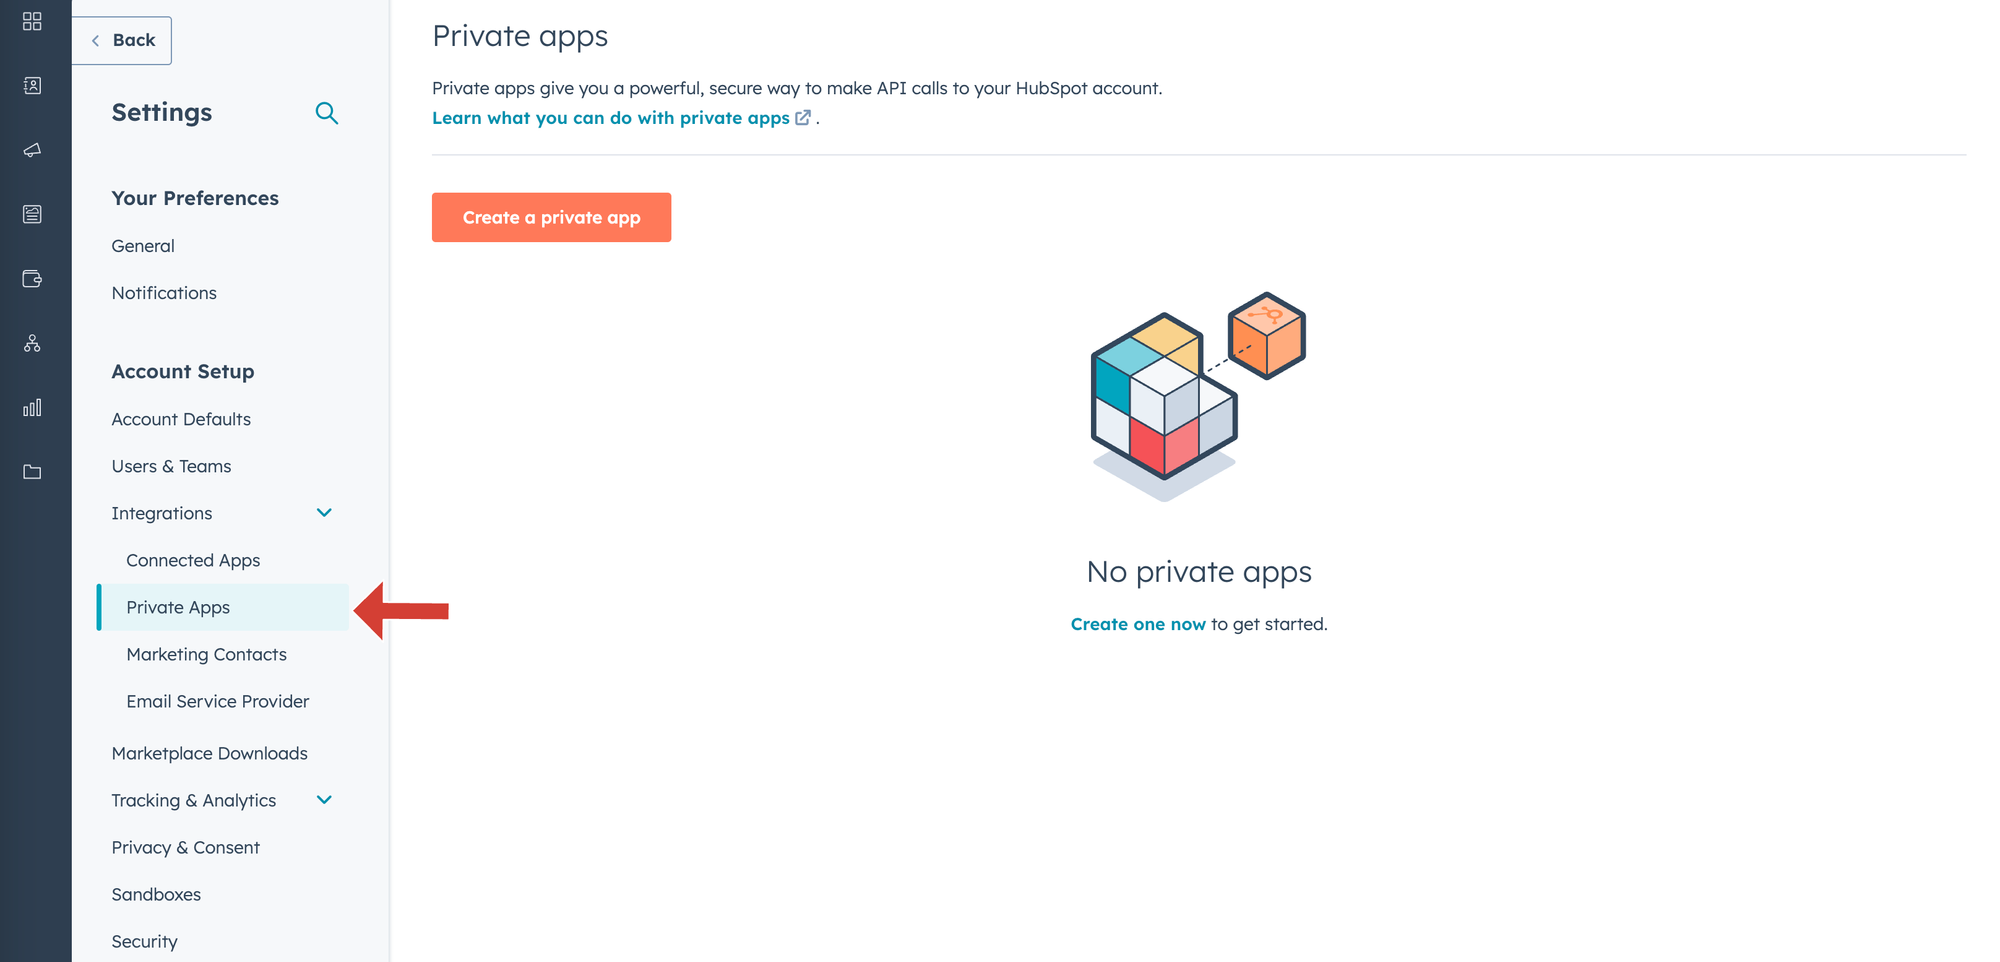
- Click `Create private app` button
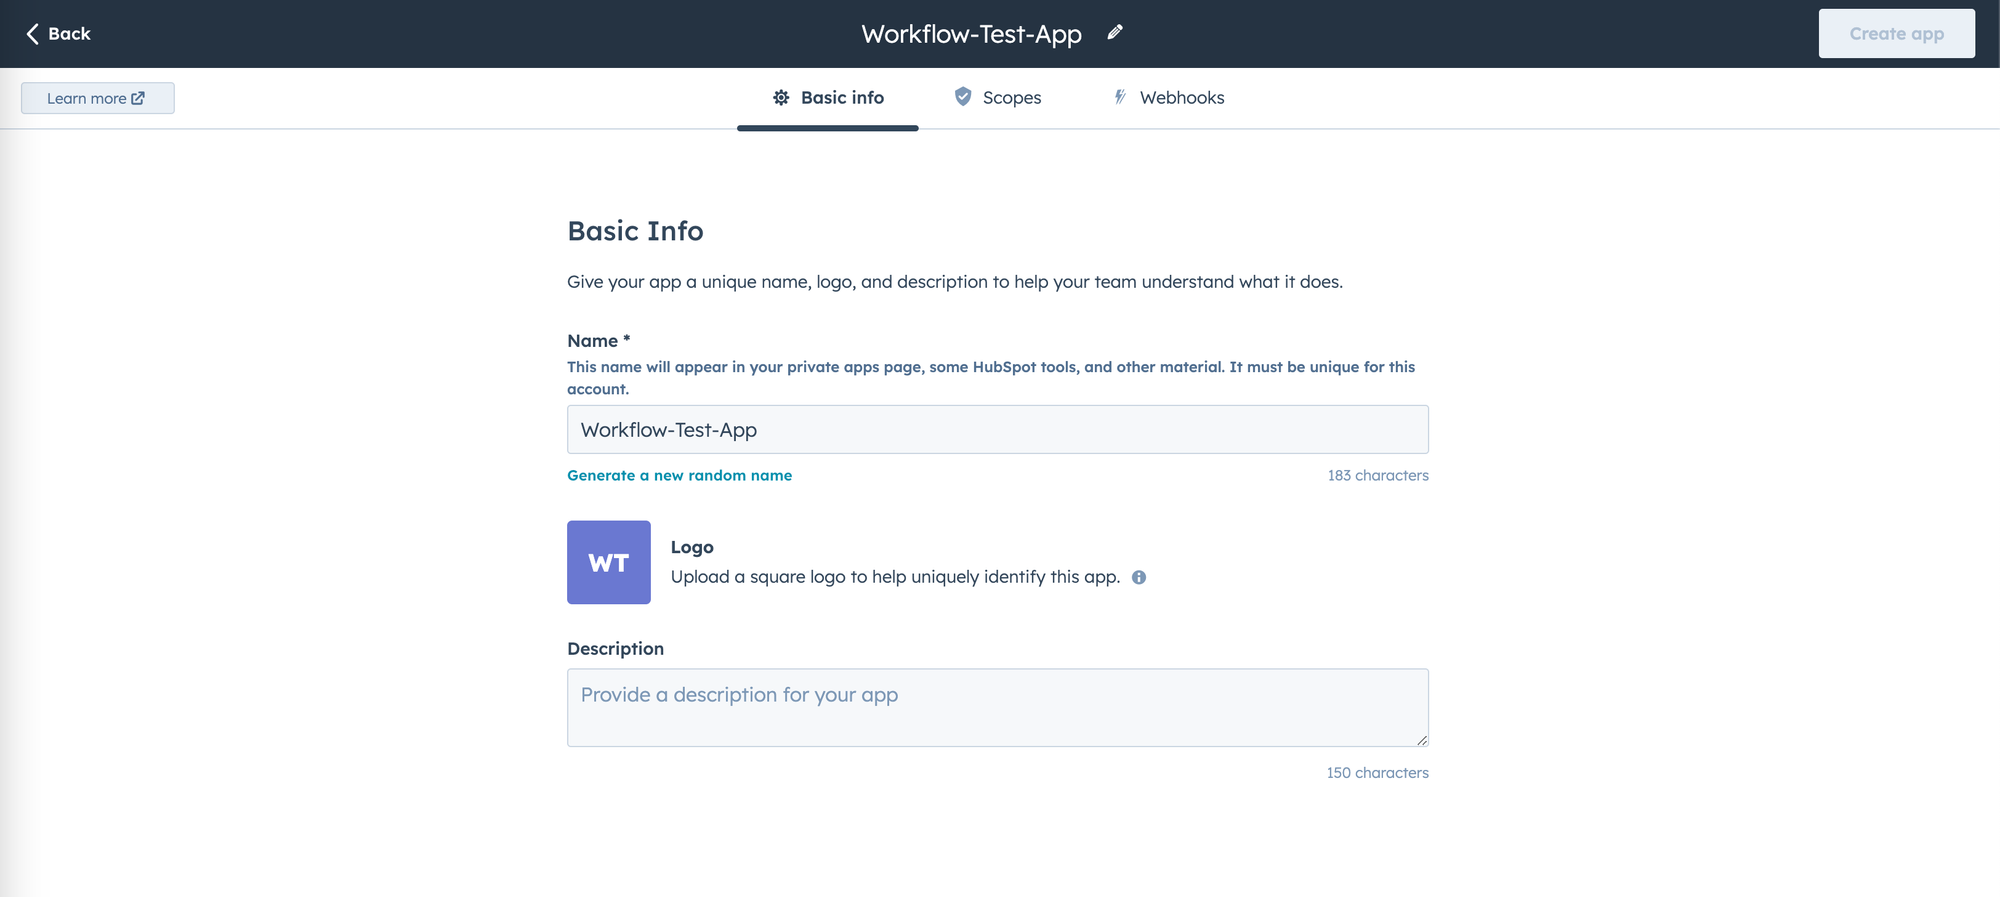
- The app creator will appear and you’ll have to set up a few parameters. First one is a name
- Next, click the `Scopes` tab in the middle of top bar above the form
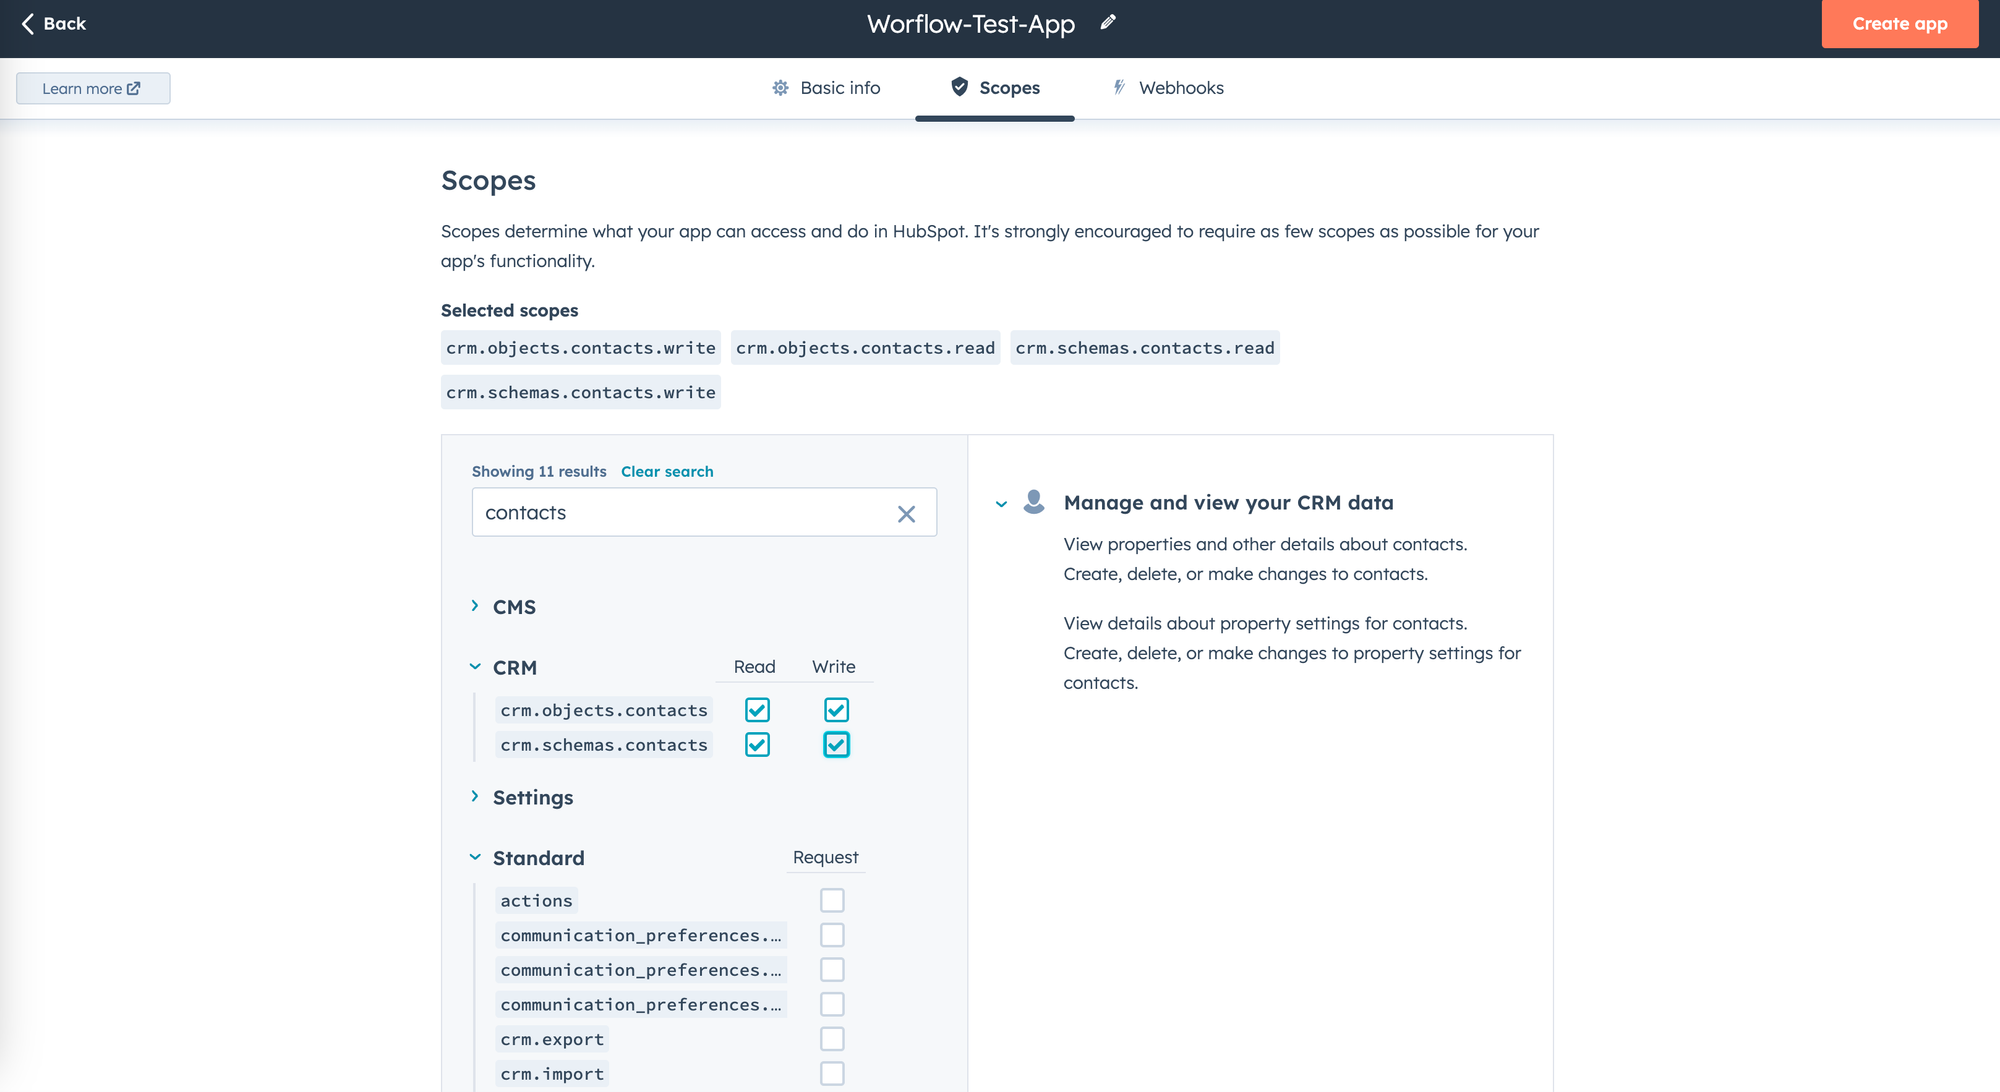
- You need to define the available scopes that the application will have access to. Just write `contacts` in the `Find a scope` input, and you’ll get the list of possible scopes related to Contacts
- Choose `crm.objects.contacts` and `crm.schemas.contacts` from the CRM section. Select both - `Read` and `Write`.
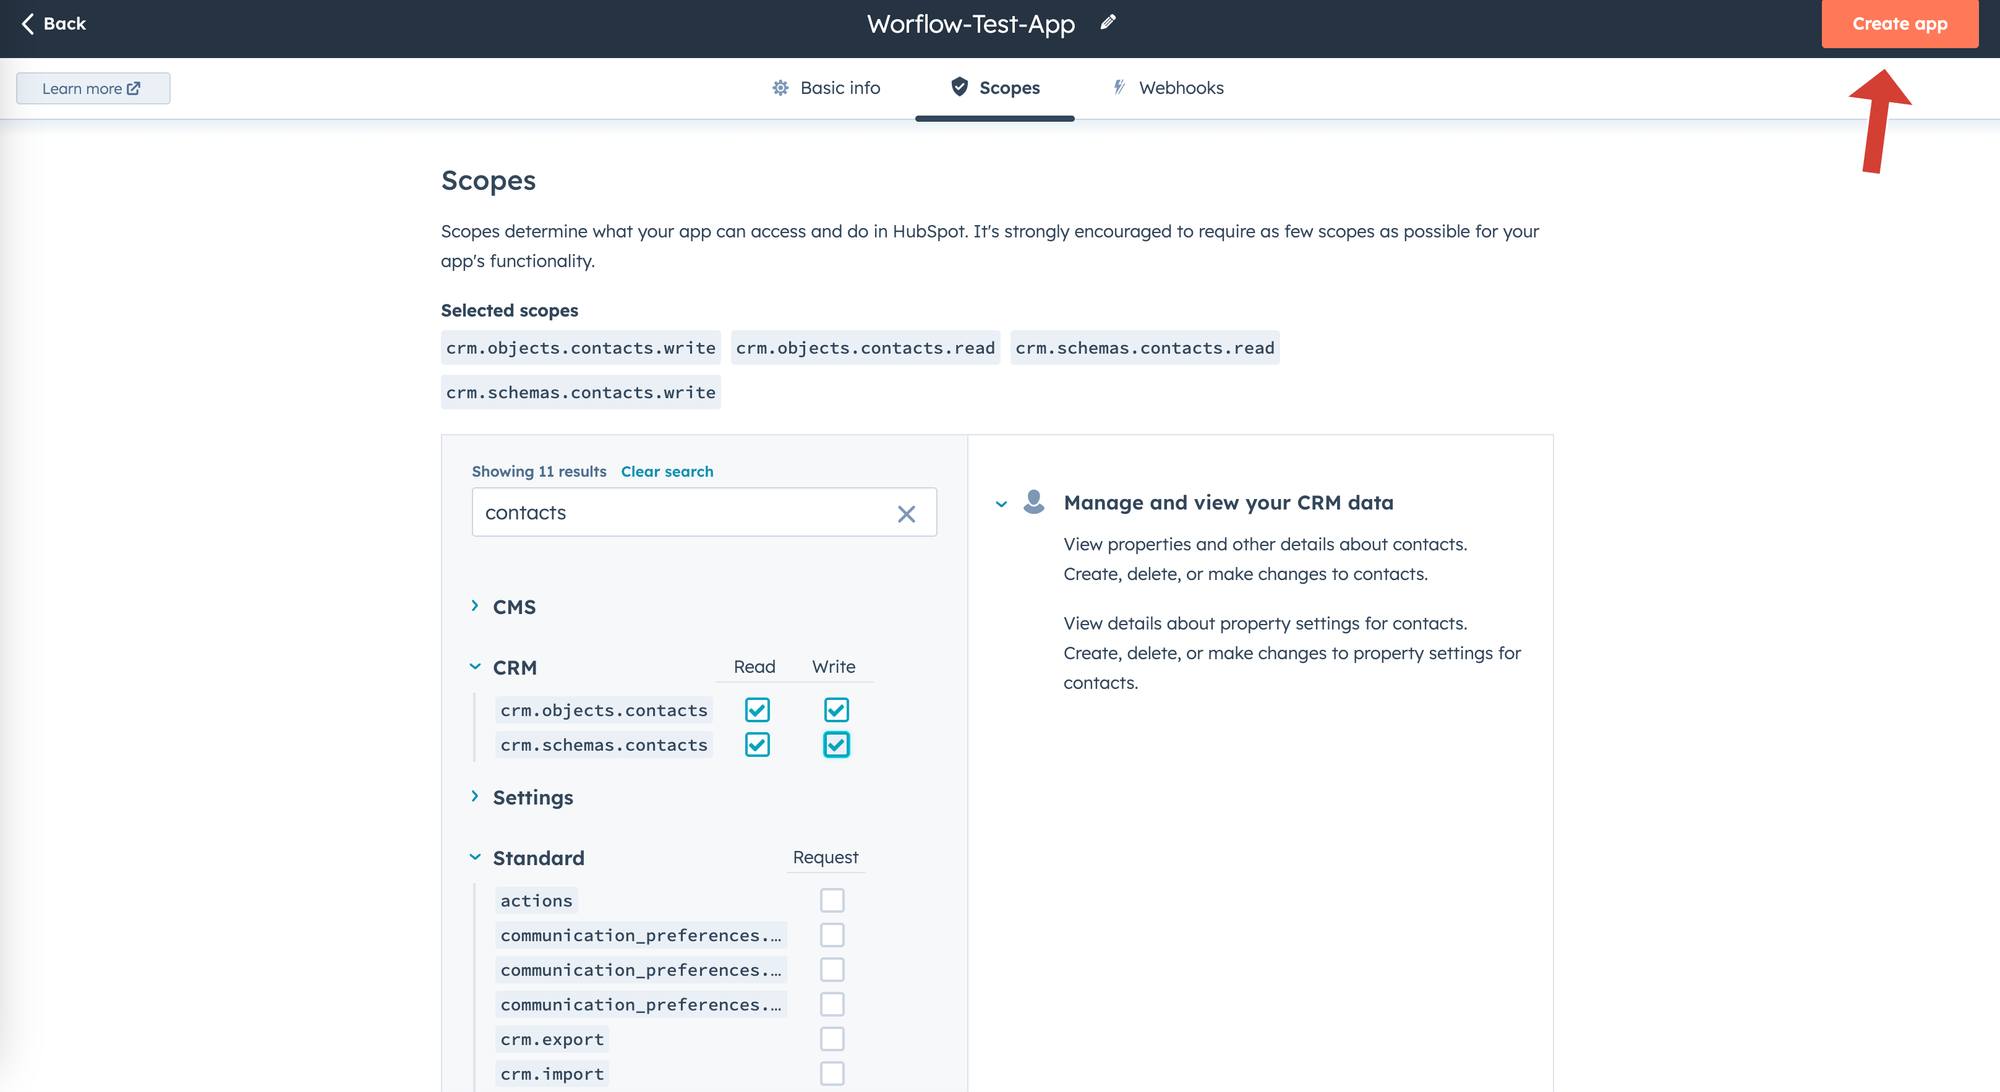
- Click `Create app` button which will be enabled and turned to orange after you selected the scopes
- You’ll see a modal with confirmation that the app has been created. There will be a partially hidden token, which you will use in the workflow
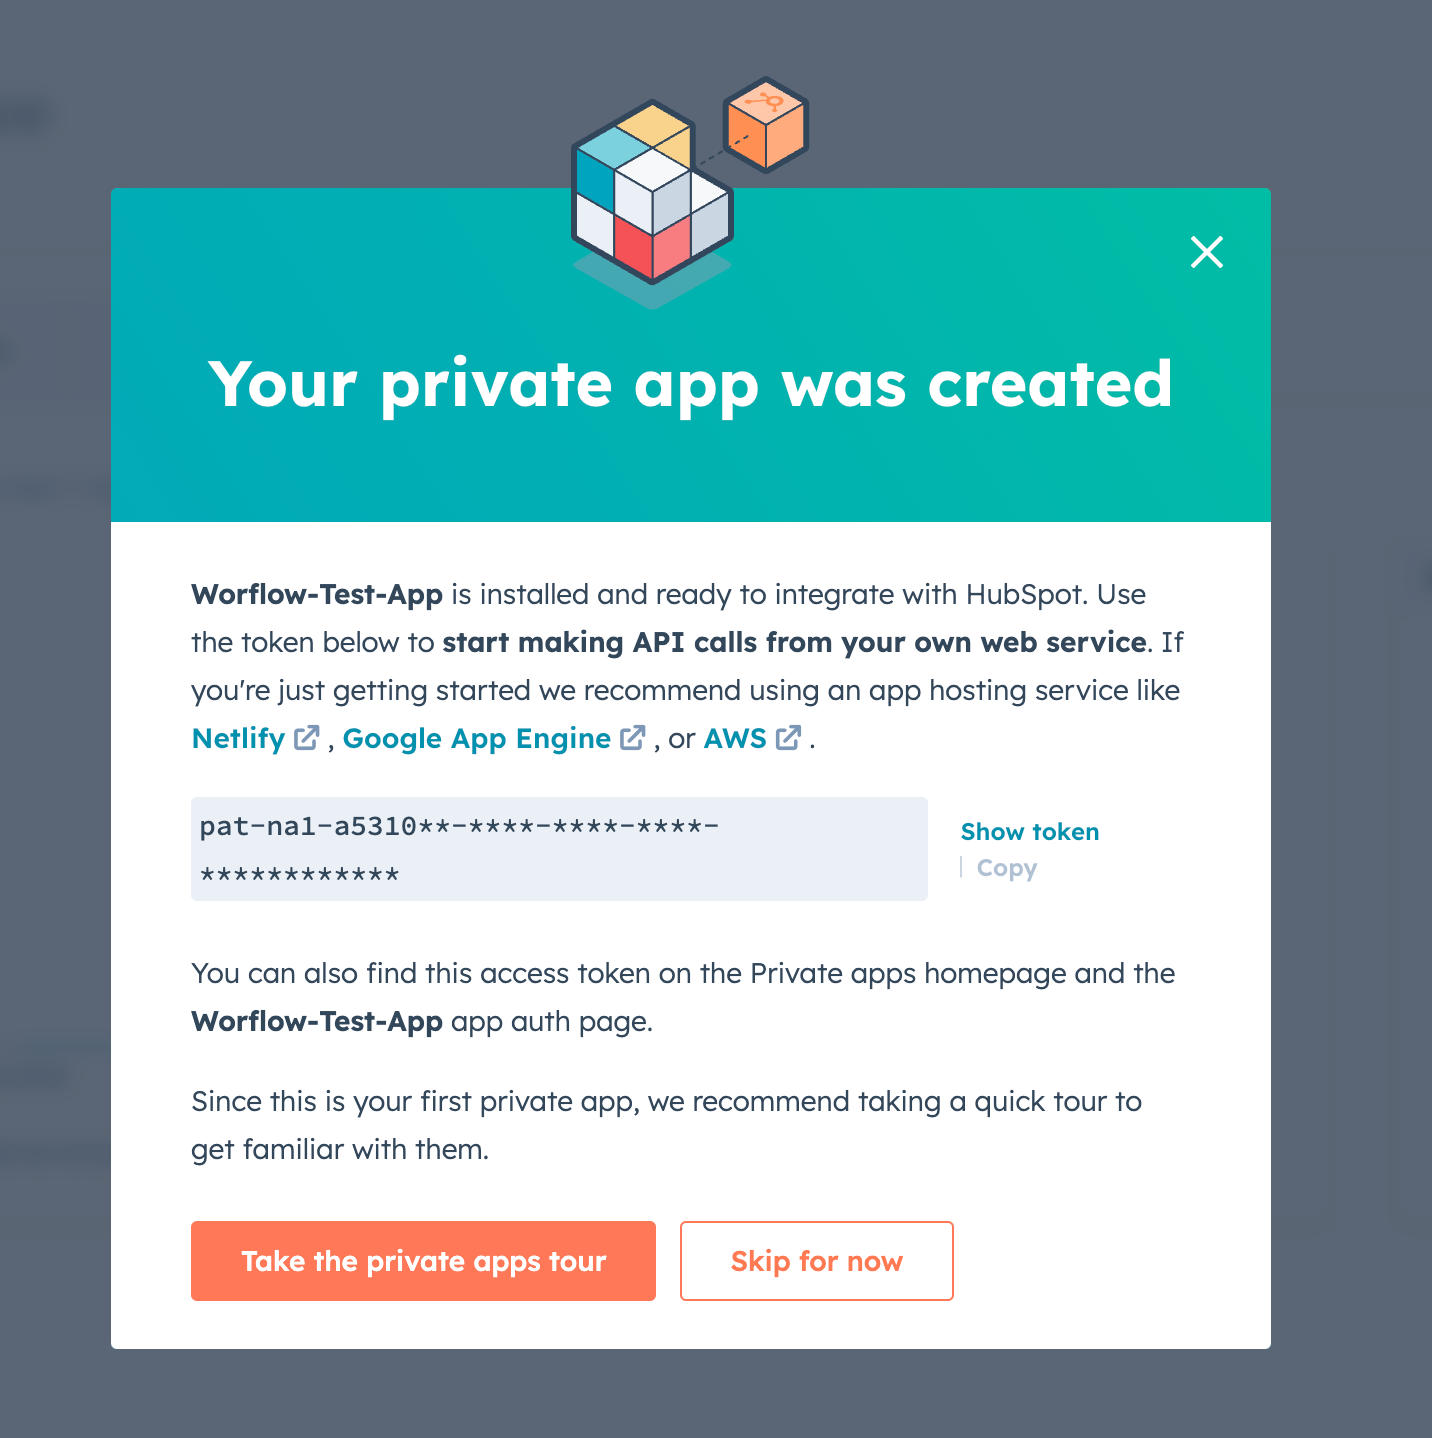
- Click `show token` next to the token input, and then copy it
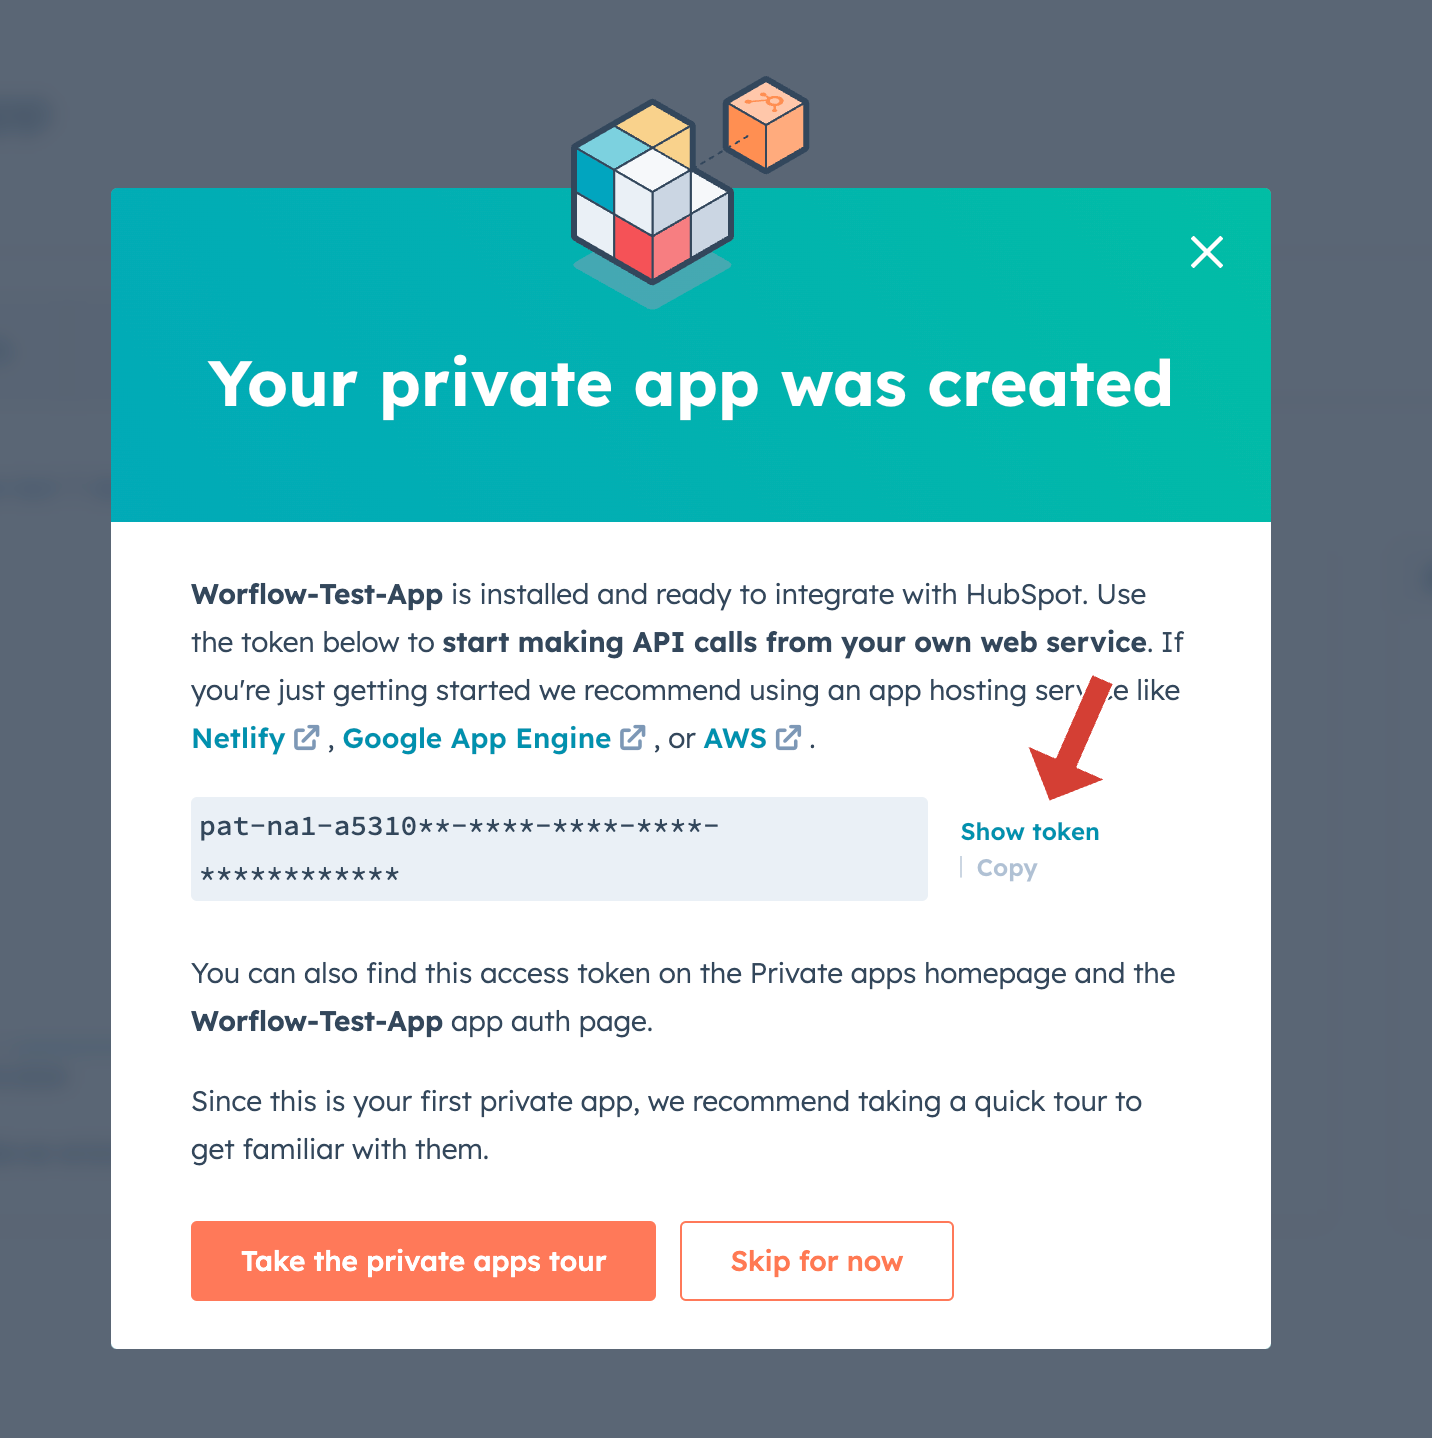
Your app is ready to use, so we can jump into the next step.
Step 2 - Creating workflow
This is the biggest and the most important section of the tutorial, so let’s go straight into the step-by-step guide.
- Go to Automation->Workflows view from the main menu
- Click `Create workflow` and select `From scratch`

- Our workflow will be `Contact-based` so select that box on the left. Select `Blank workflow` in the middle section and click `Next`
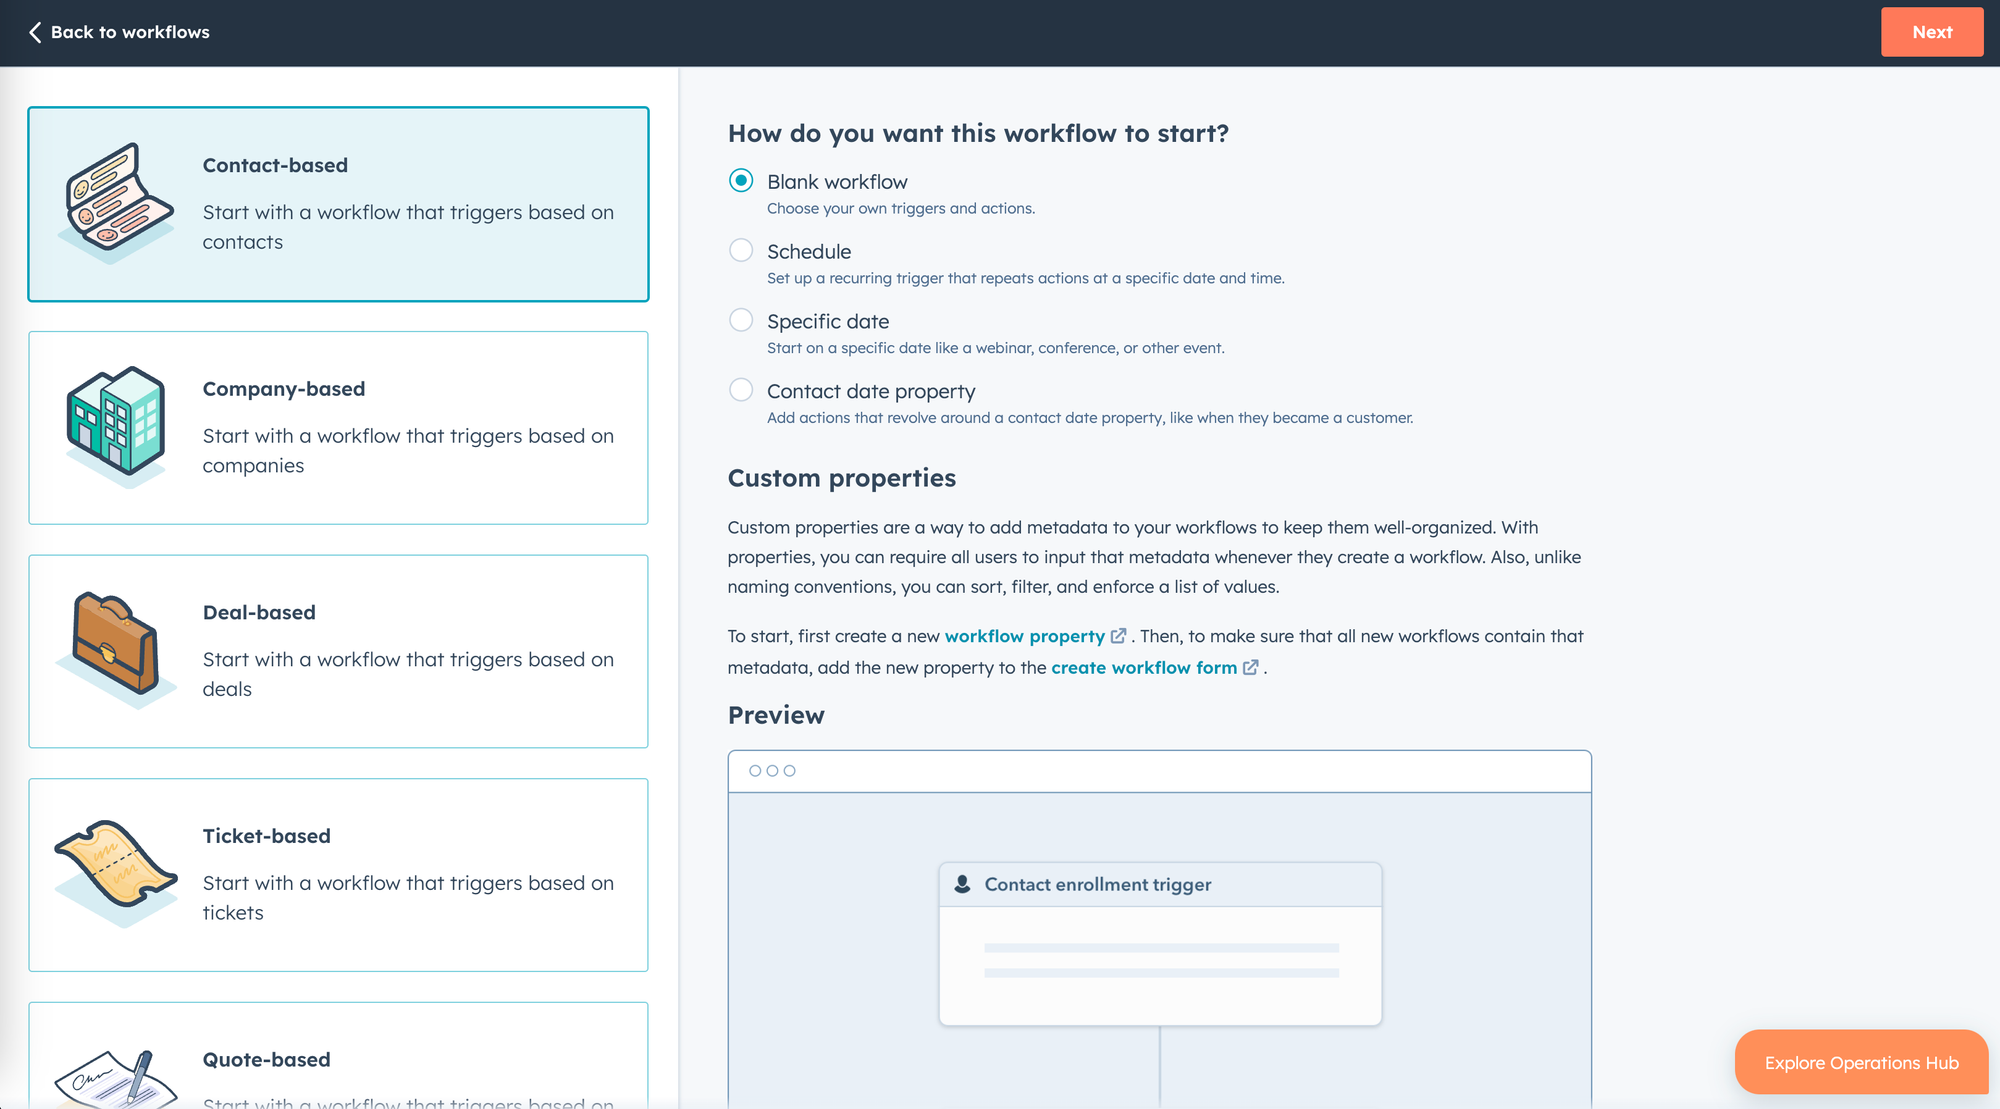
- You’ll see the initial workflow screen. Click on the trigger box (right arrow on the screen below) to set up the trigger
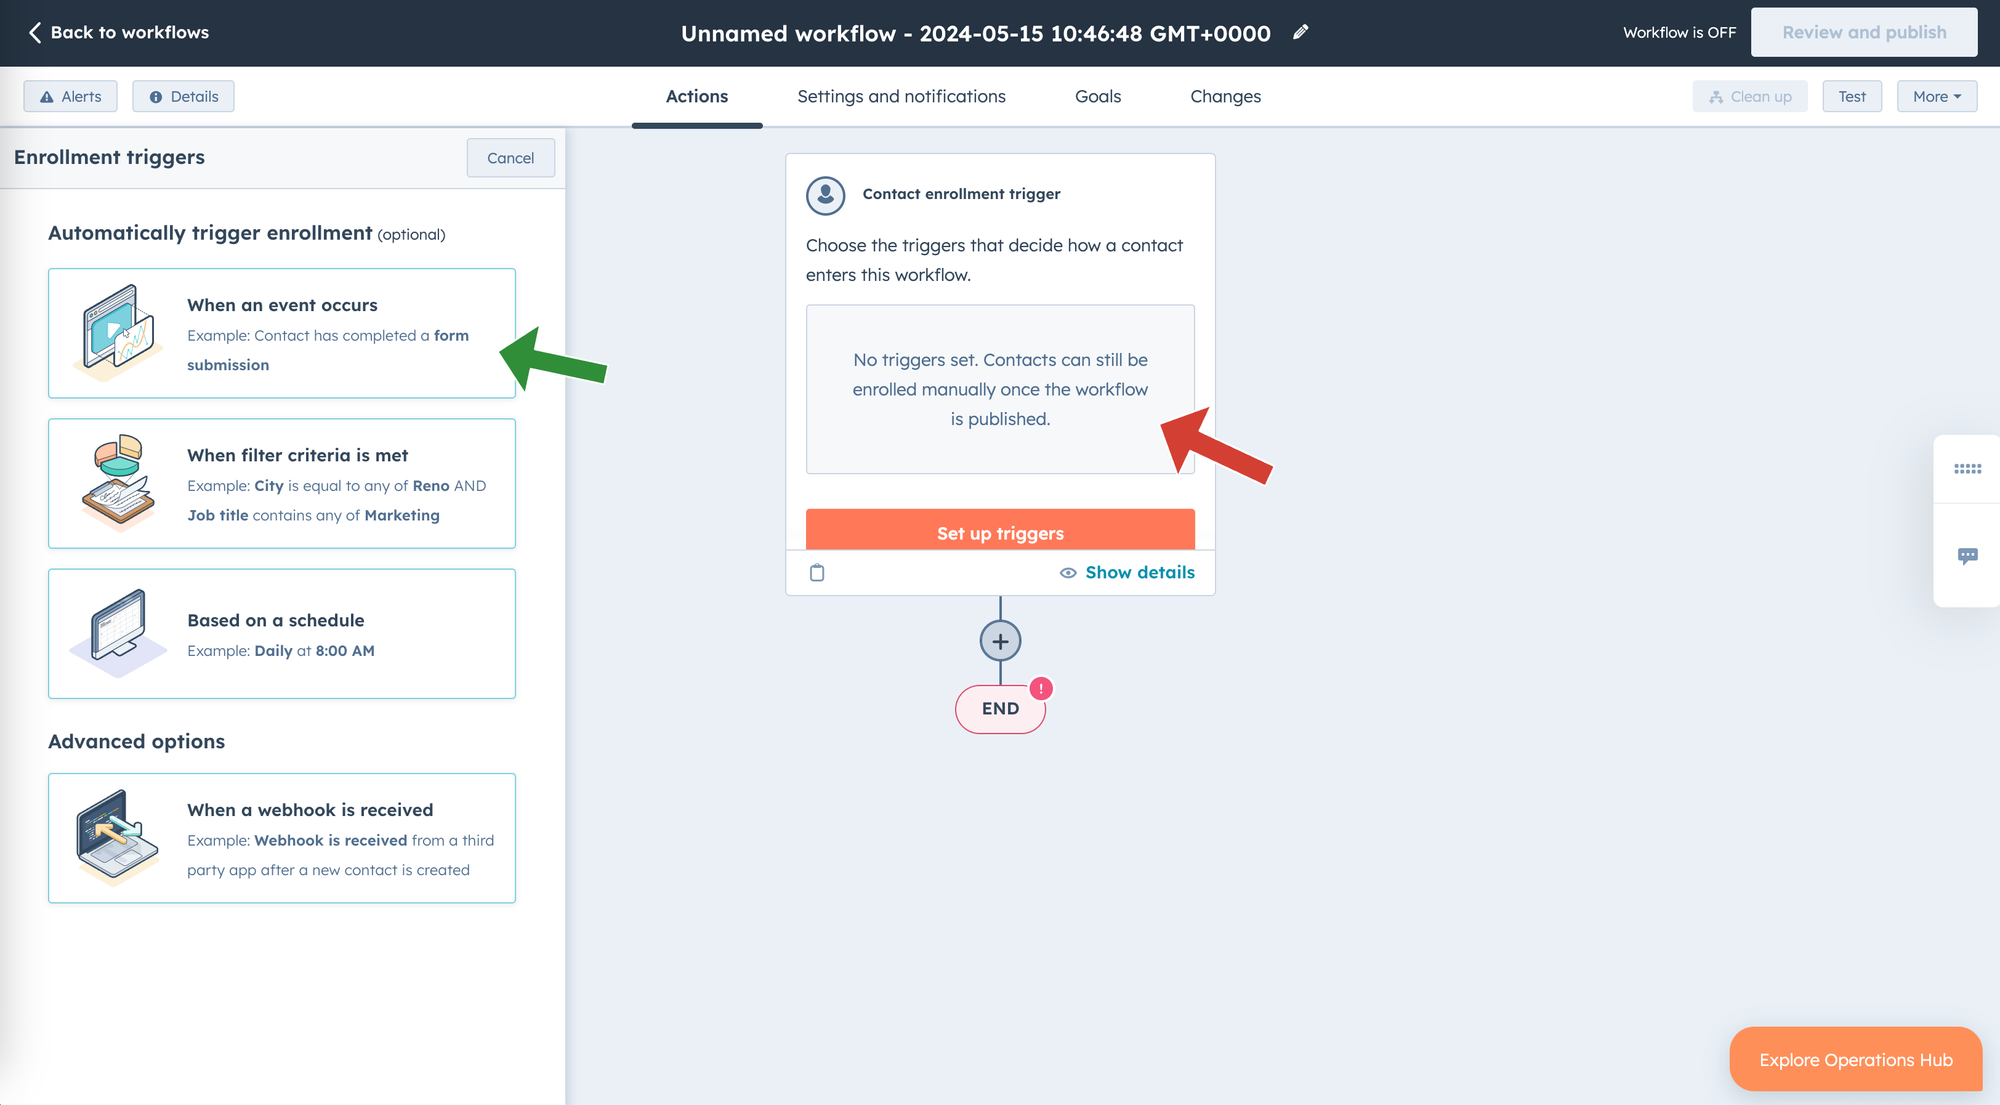
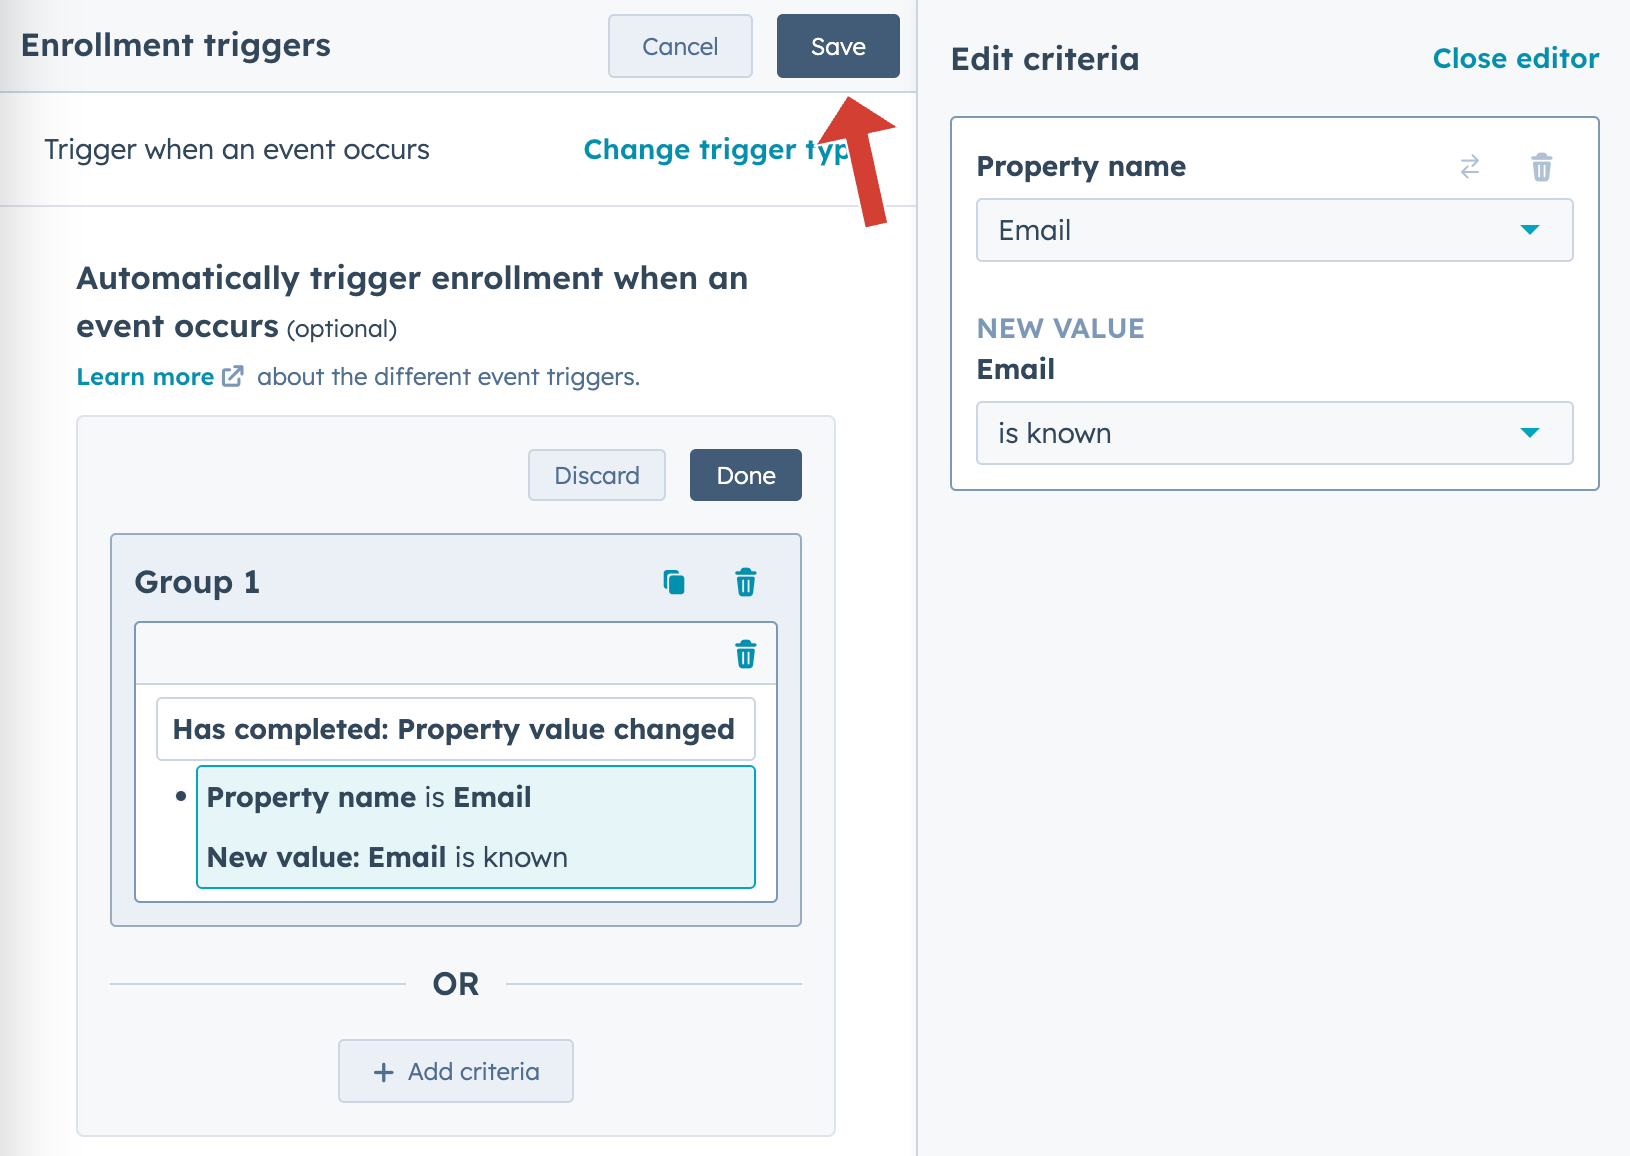
- On the left side, click `When an event occurs` box (green arrow on the screen above)
- You’ll see a list of all accessible properties in Contact object
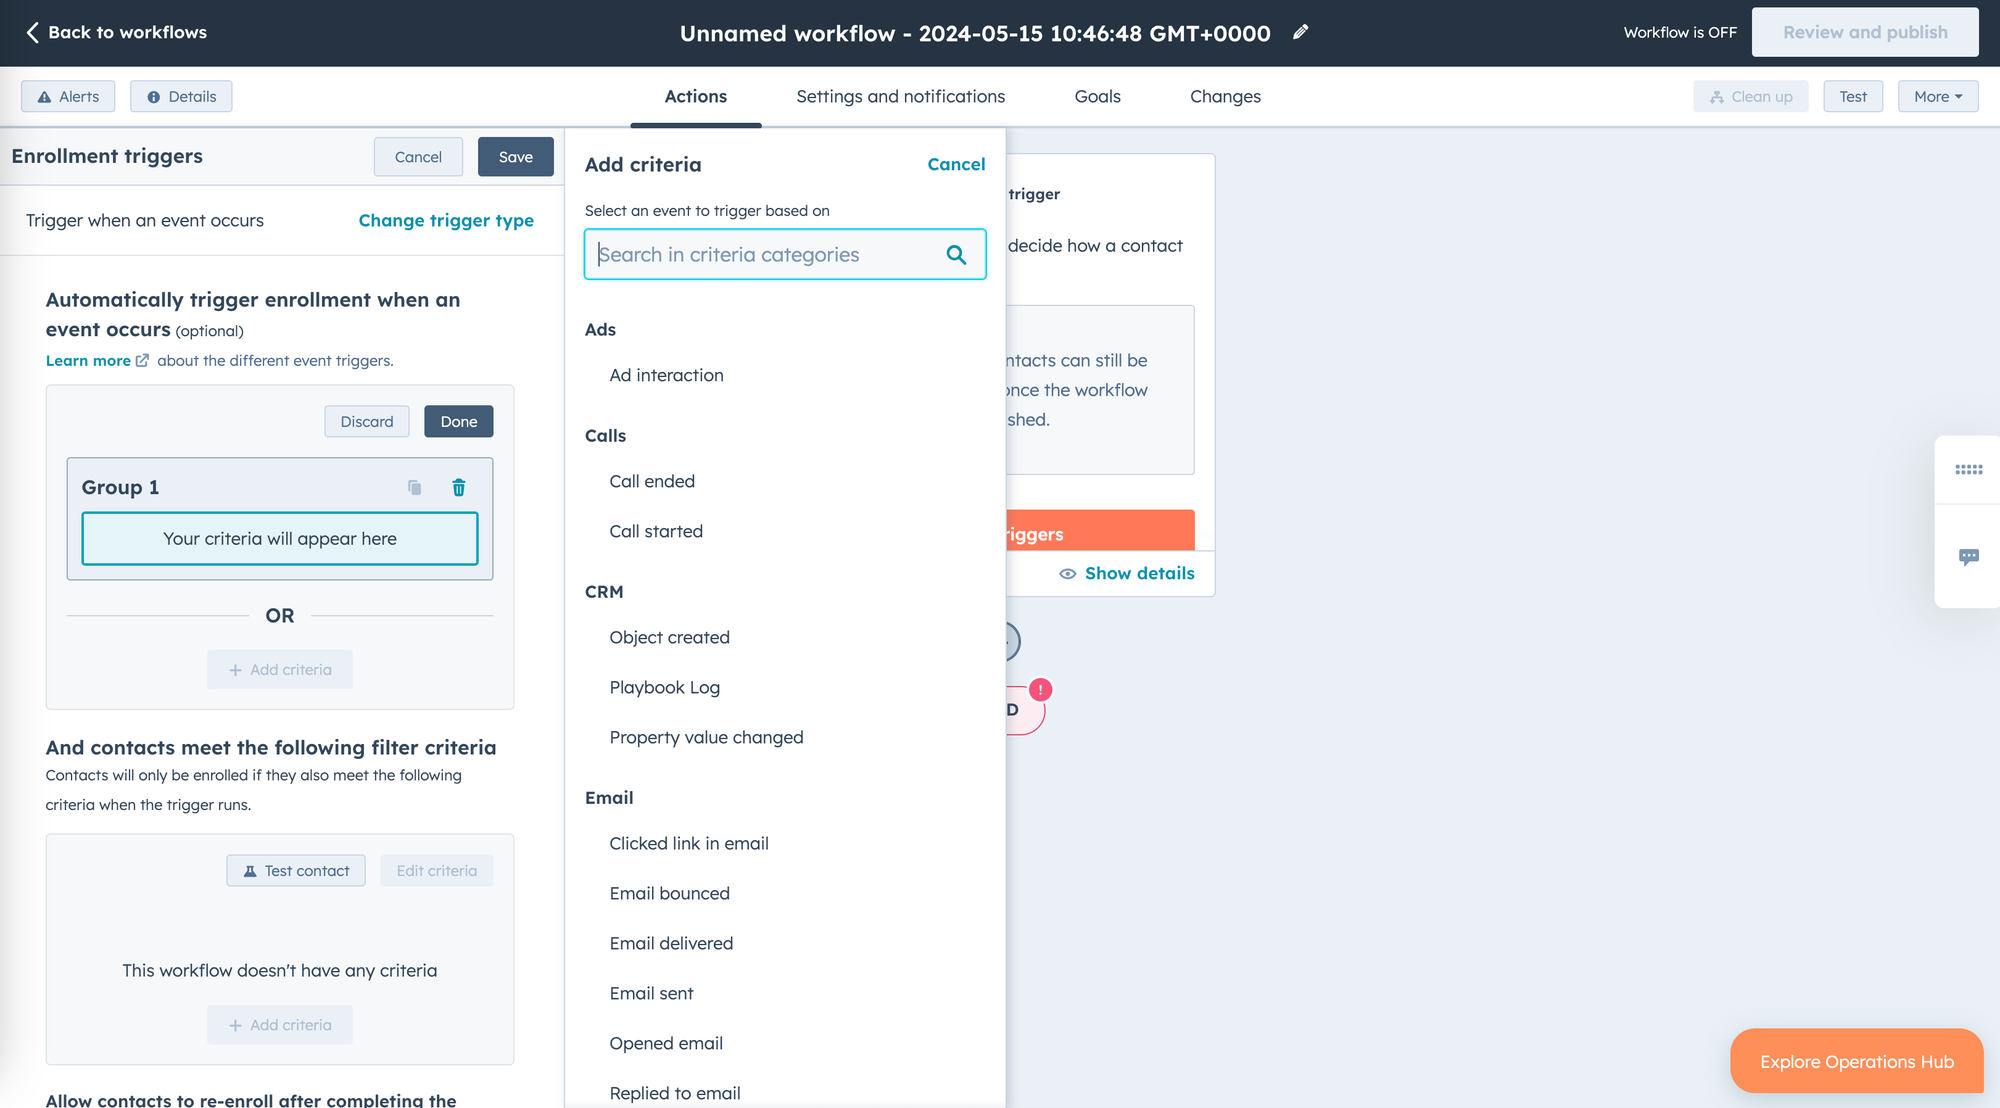
- Select `Property value changed`, which is under `CRM` section. You can also search for it by starting writing the name in `Search field` input
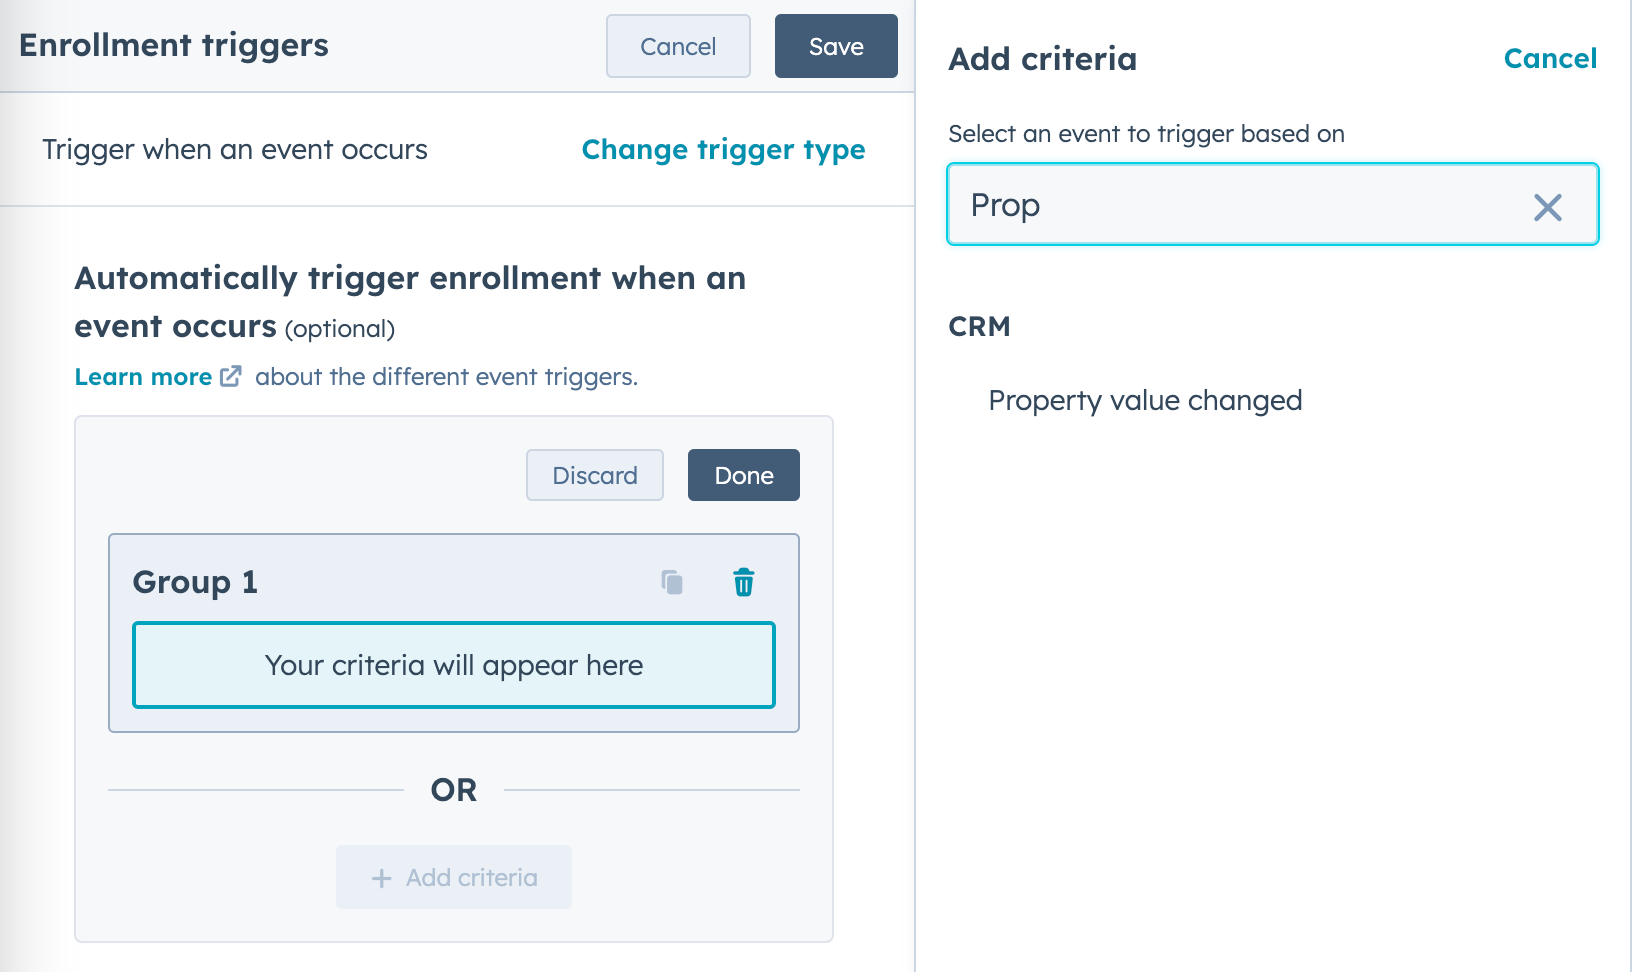
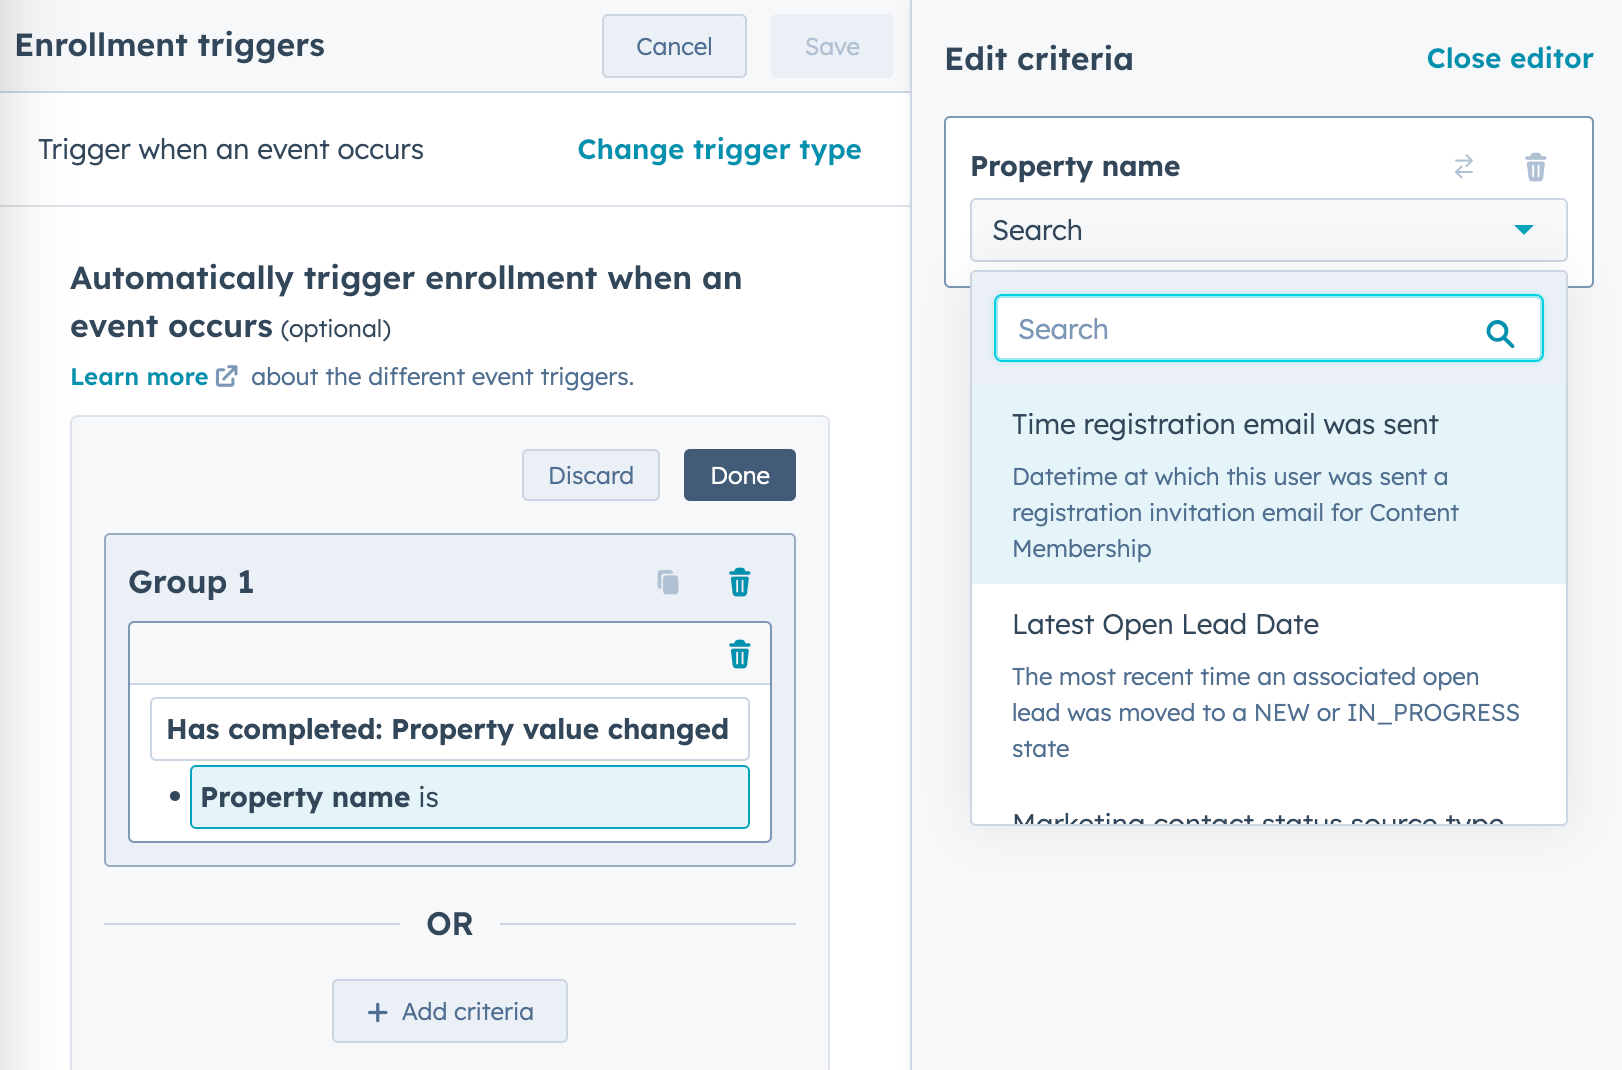
- When you click on it, you’ll have to select the property name, which the workflow will listen to. Find the `Email`
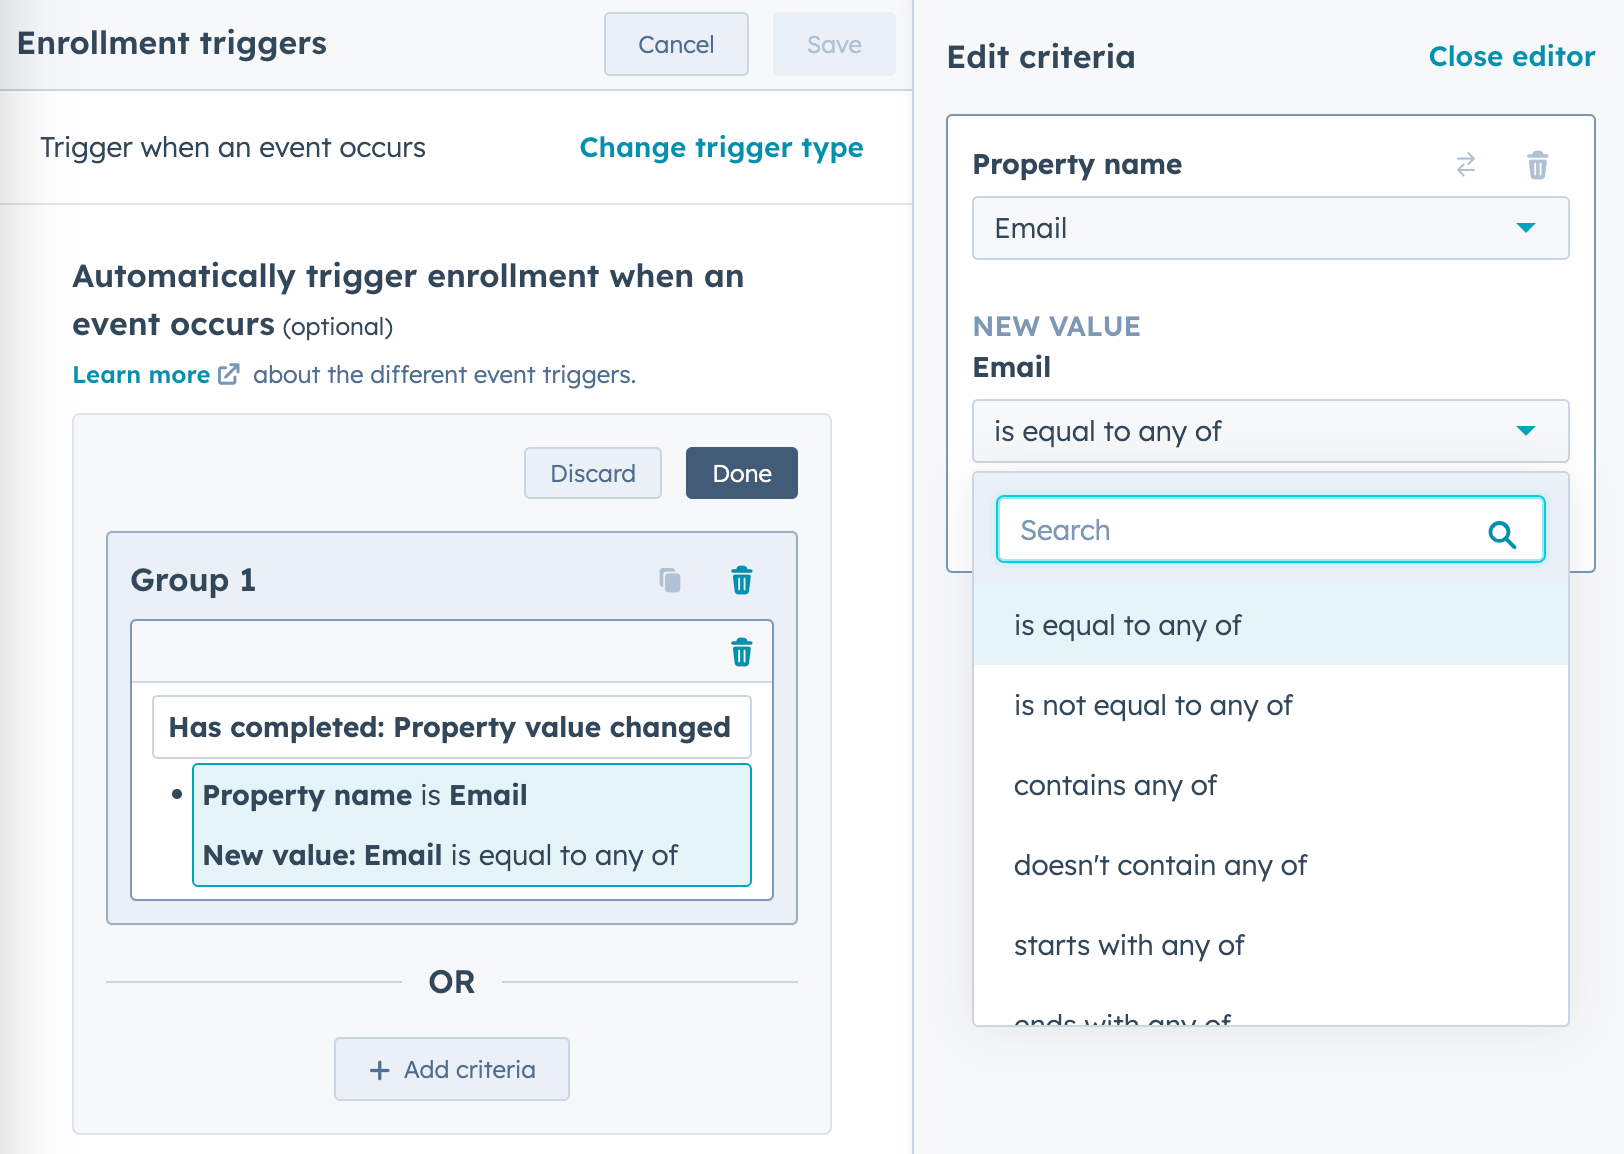
- Now you have to define the property value. Since we just want to check if the email is set, select `is known`
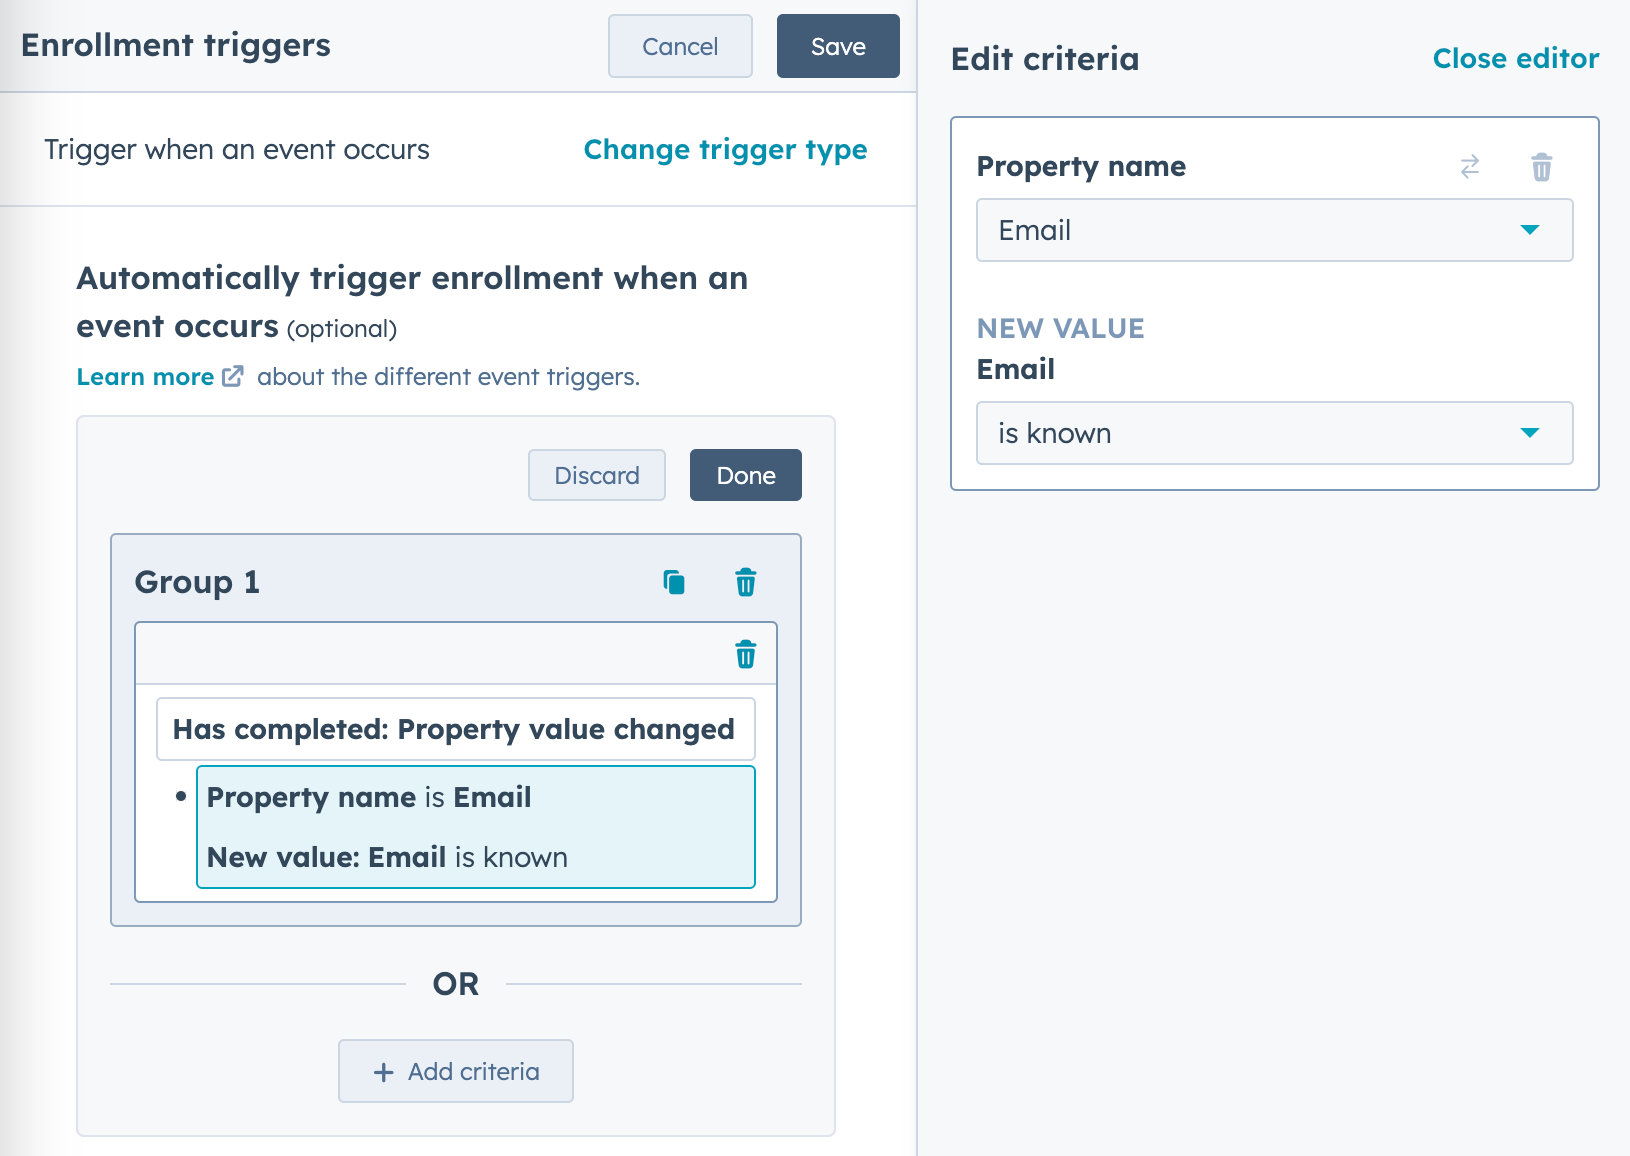
- Click `Save`
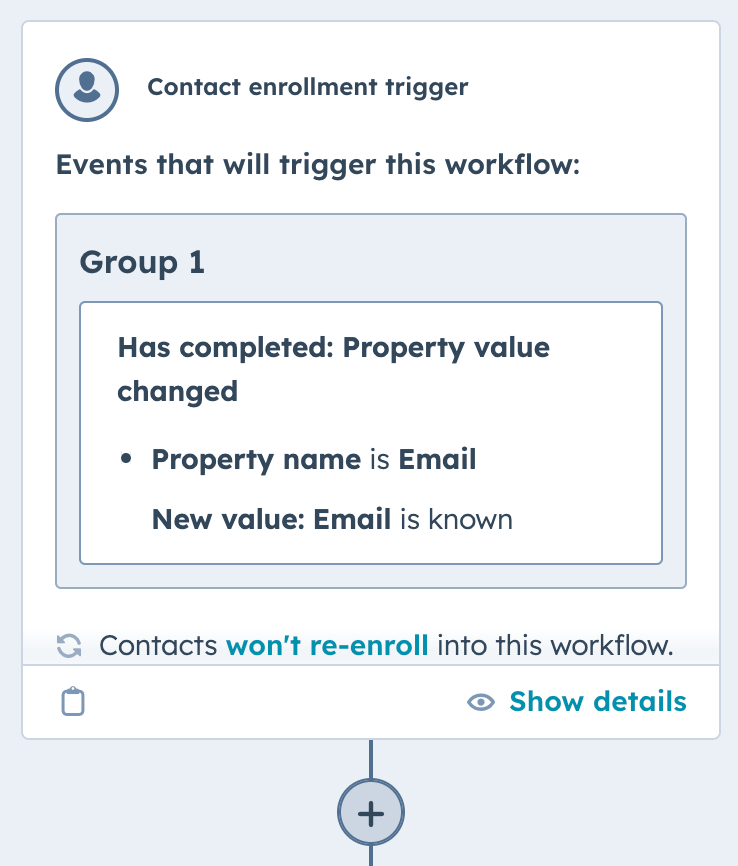
- You should see the trigger box similar to the one on the screen
Now let’s create another action.
- Click on a `plus` button below the box with created trigger
- Select `Data ops` and `Custom code` from the left sidebar
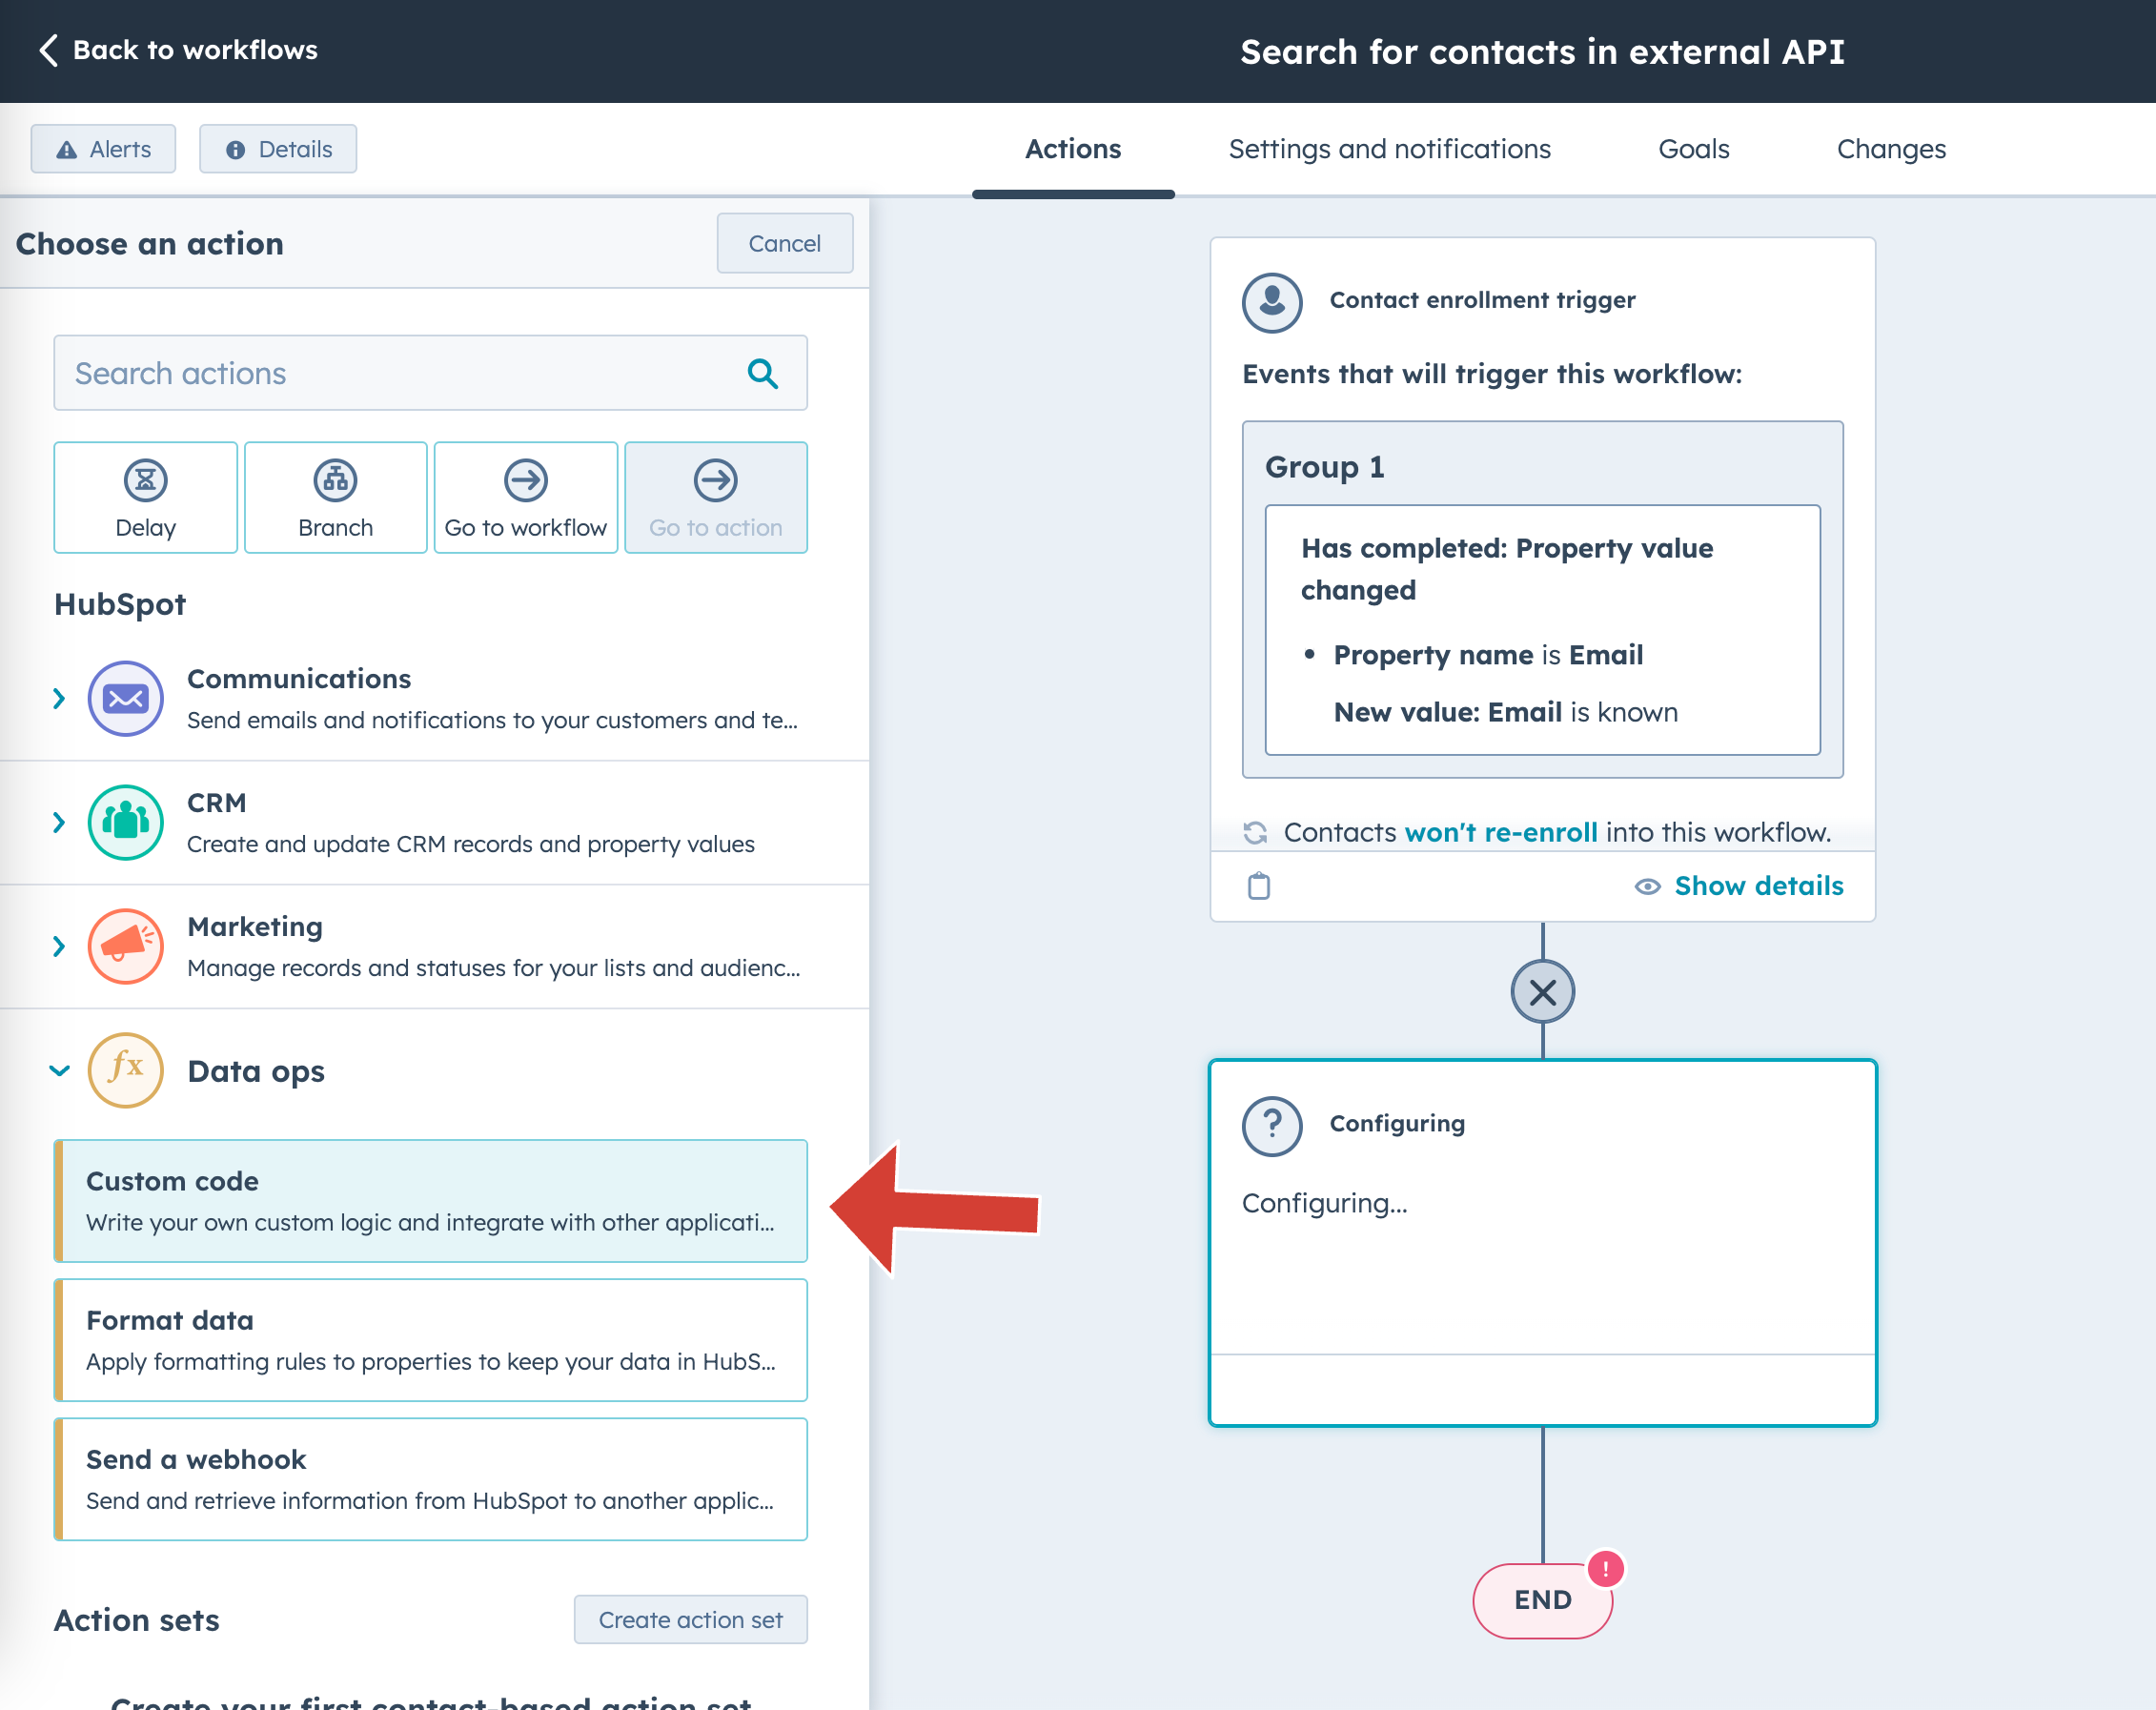
- Sidebar will change and you’ll see a form with couple of properties to set, as well as the code editor
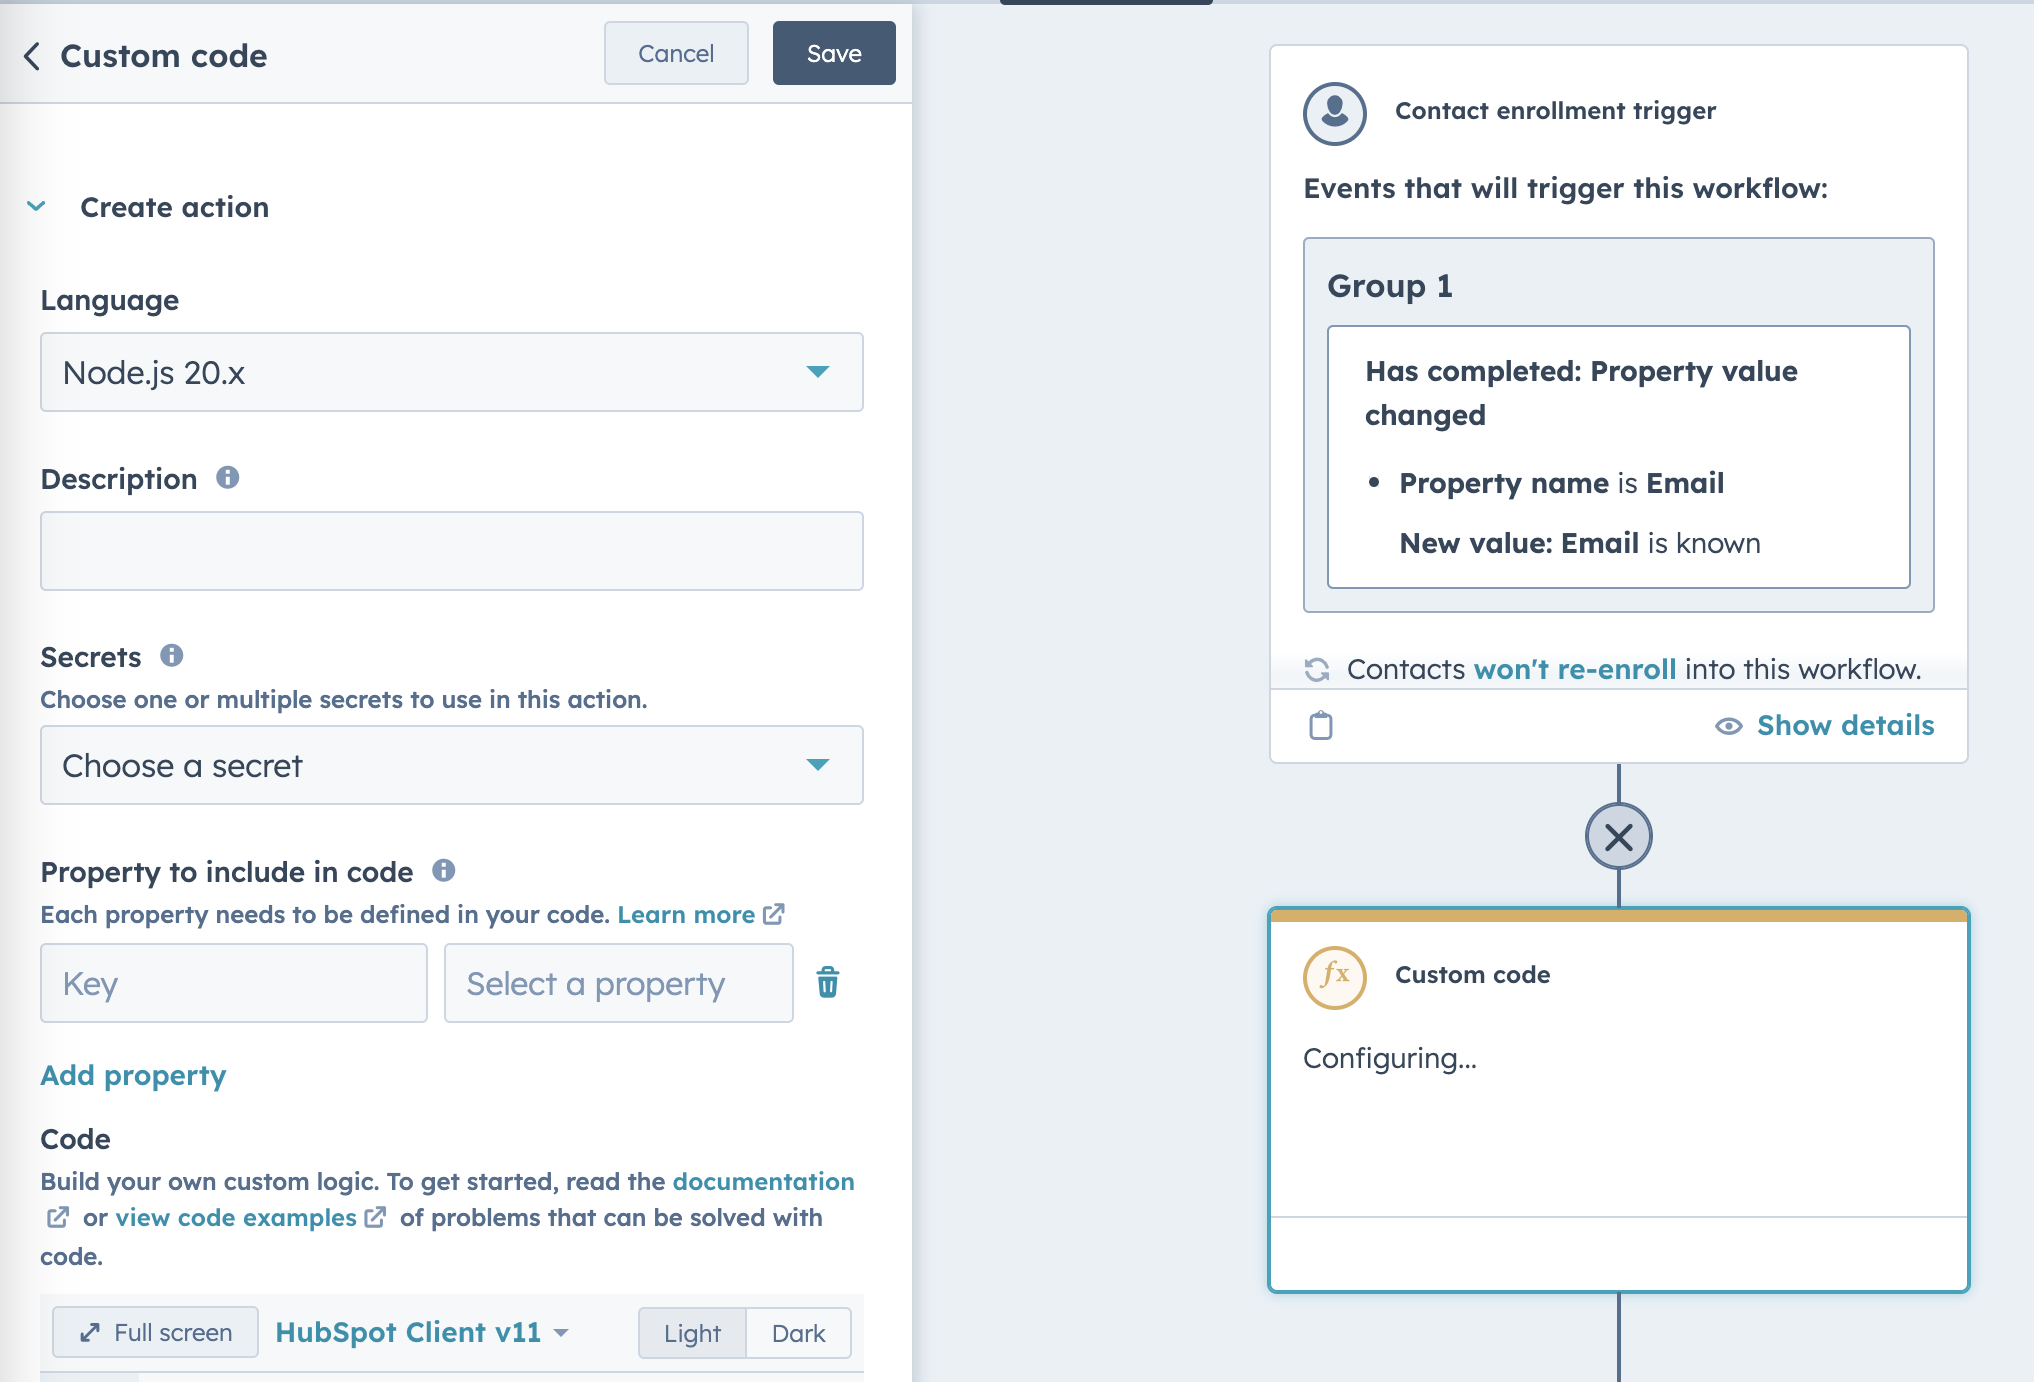
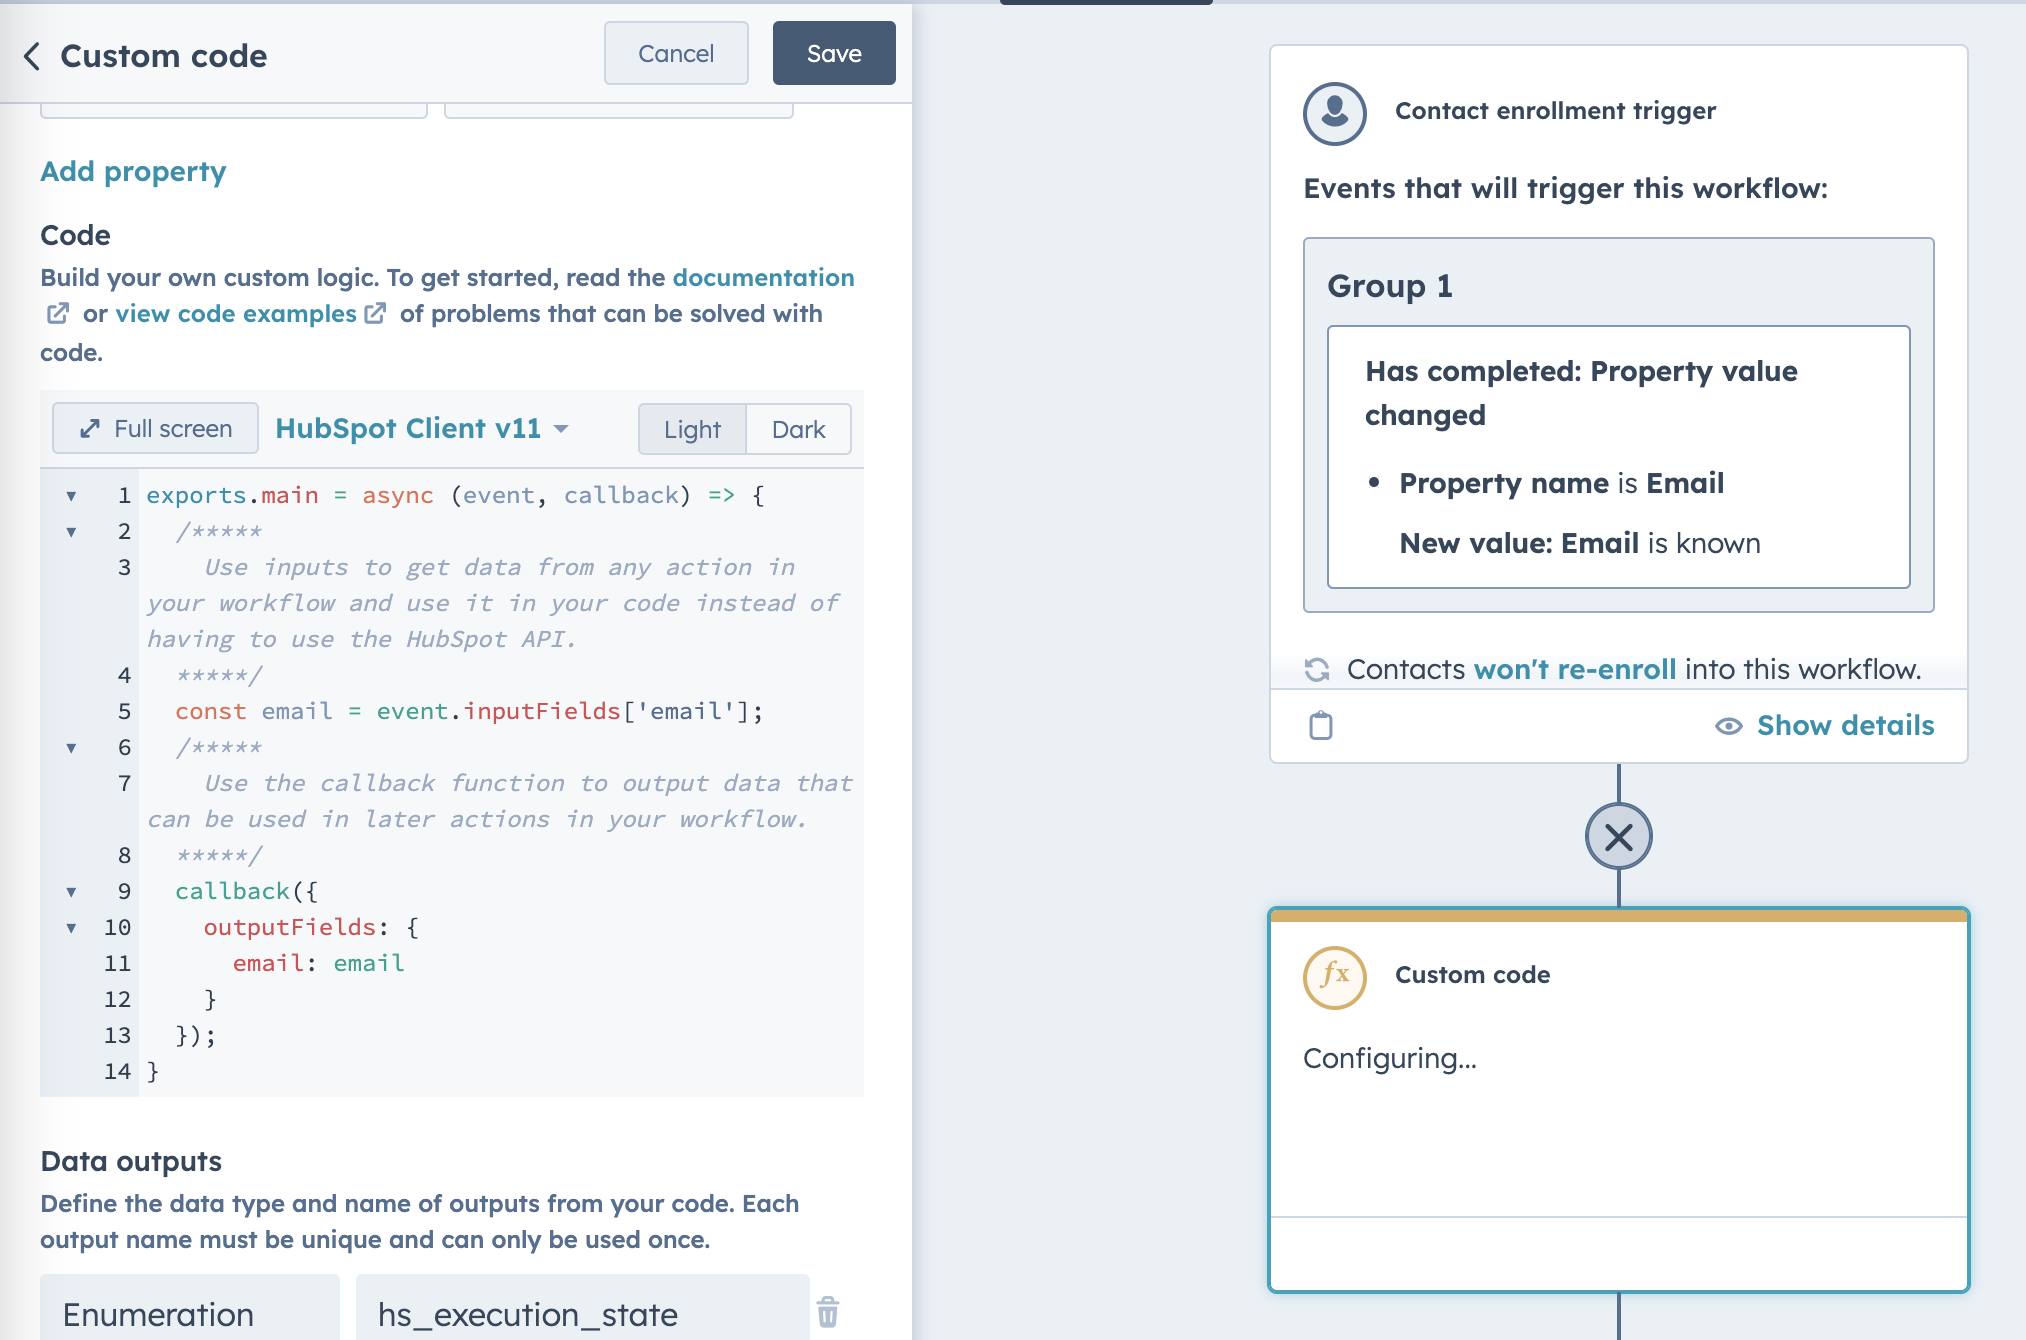
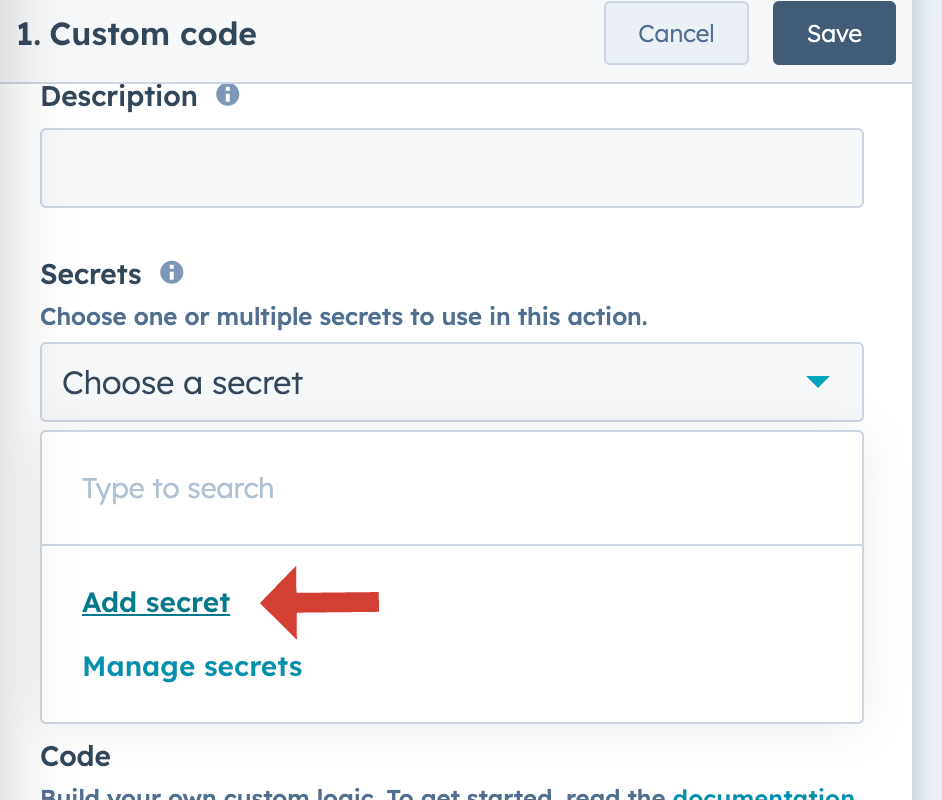
- To be able to connect our code to HubSpot Contacts, we have to use our previously created private app. Click the `Secrets` dropdown and select `Add secret`
- Write a name (can be just `SECRET`) and paste private app access token into the value field

- Click `Save`
Let’s take a look at the code editor. It’s written in NodeJS and by default it looks like this:
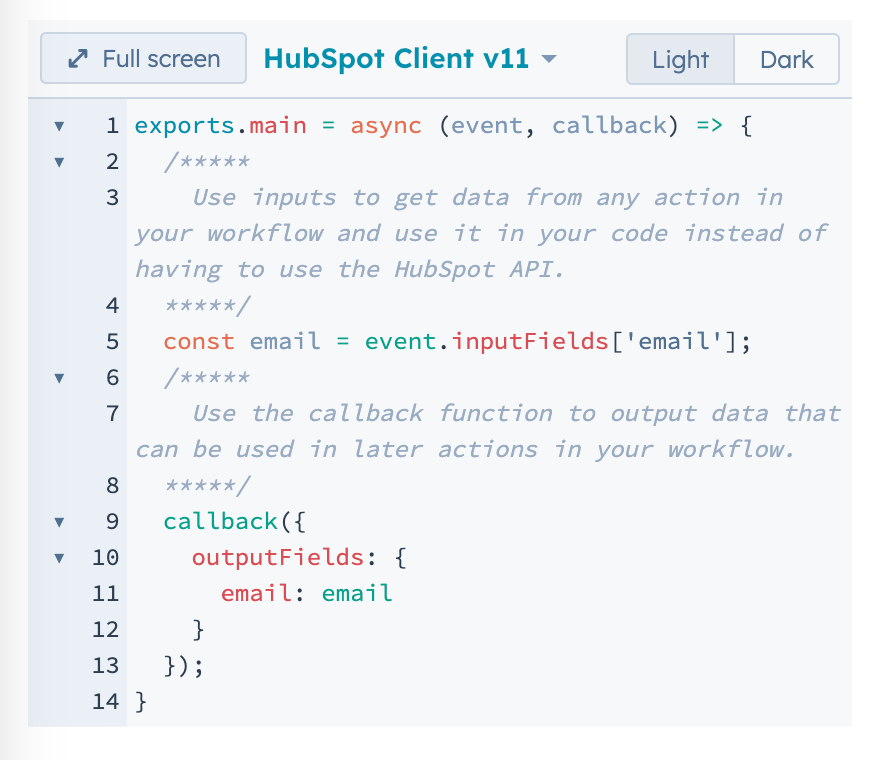
There are some elements which have to be present to execute the code. First one is export.main :
exports.main = async (event, callback) => { ... }
It takes 2 arguments:
- event which is the workflow event we are working on
- callback which is a function which returns values to next workflow actions
Second must-have part is a callback function execution, which defines the output of the code
You can see that there is also a part which gets email from event.inputFields list.
To make it all work, we have to do some configuration.
- Find a section under `Secrets` with name `Property to include in code`. It has two inputs - `key` and `value`
- Write `email` as a `key`
- Select `Email` as a `value`
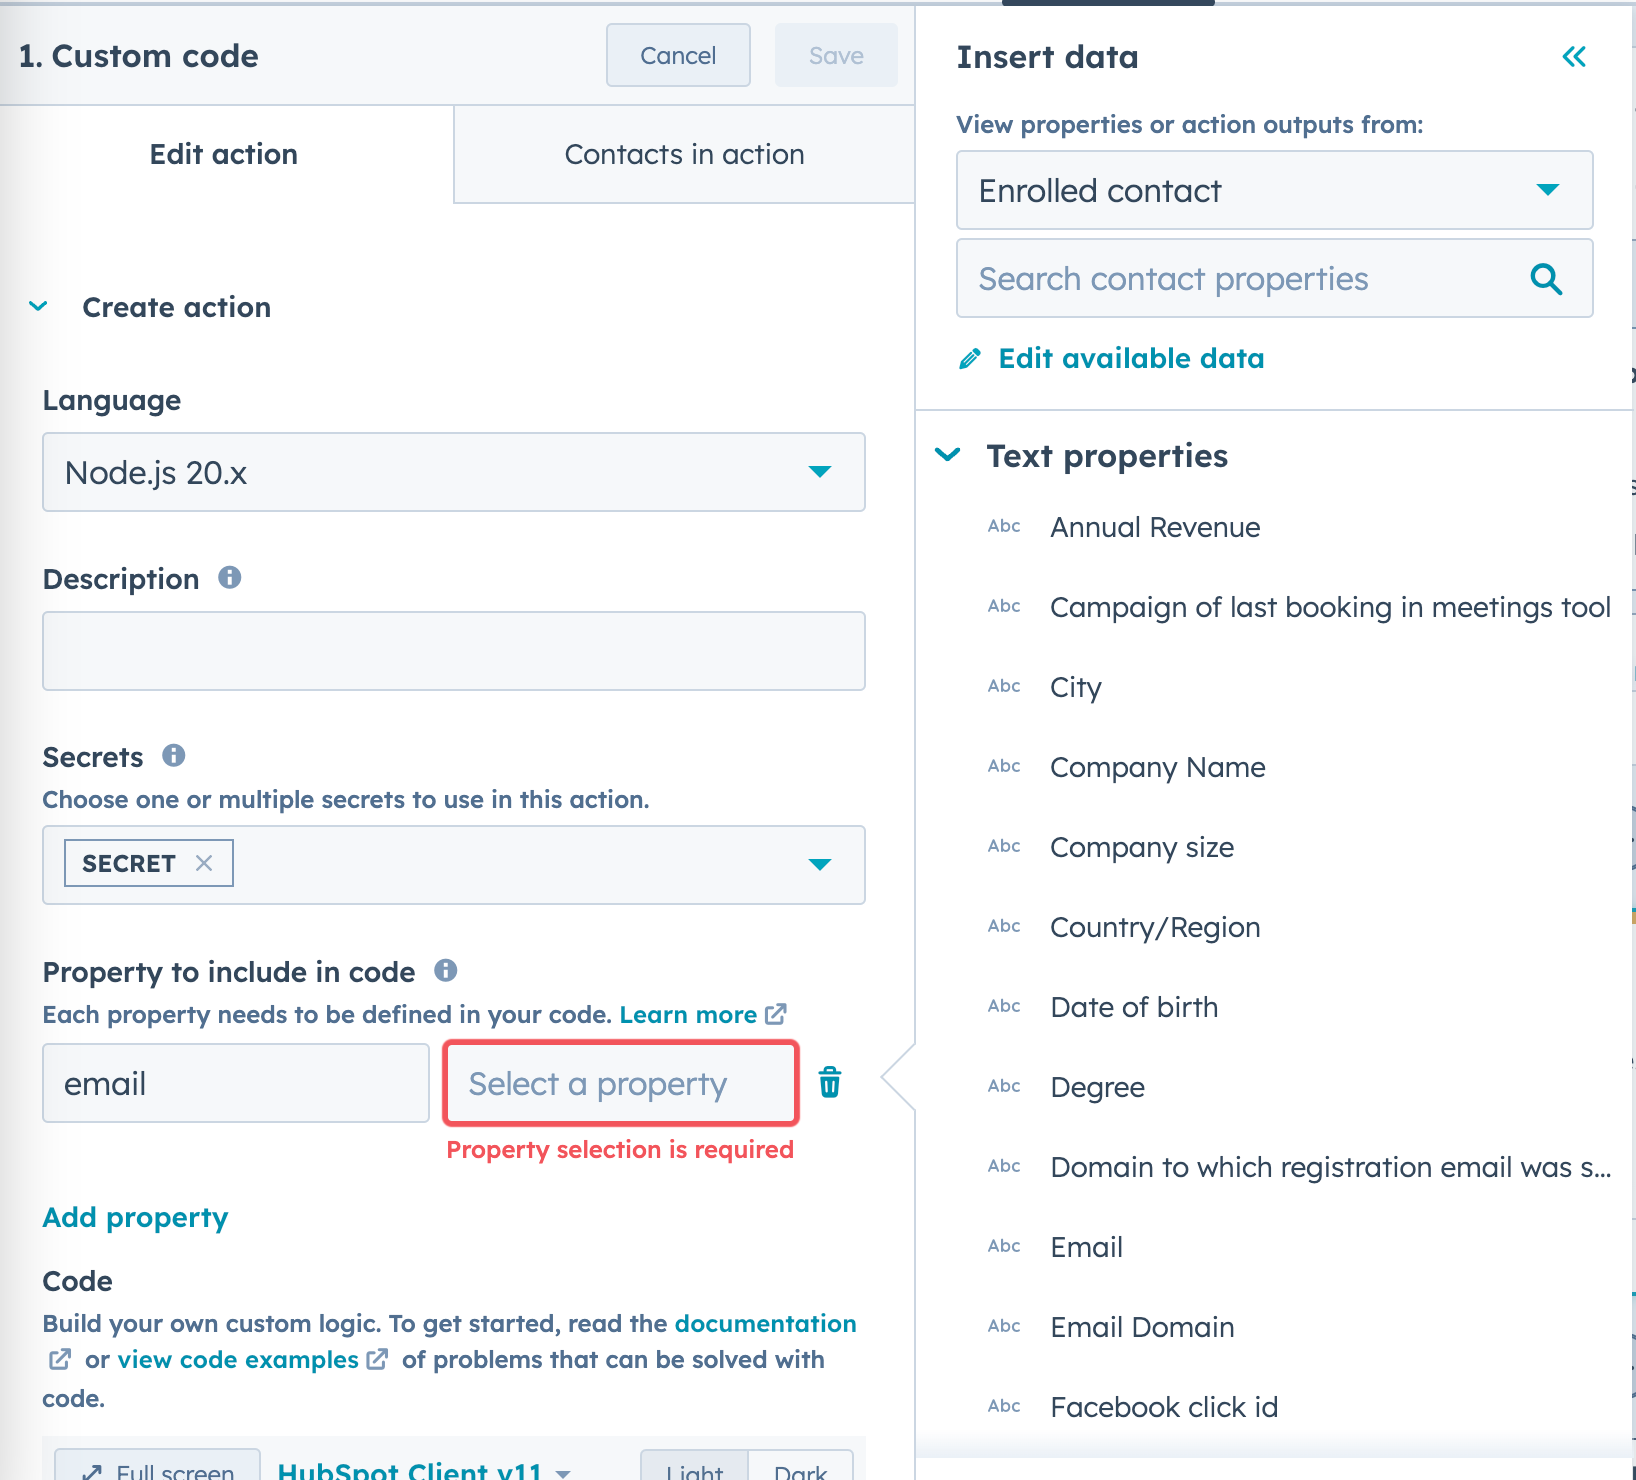
- You’ll end up with filled form like the one on a screen
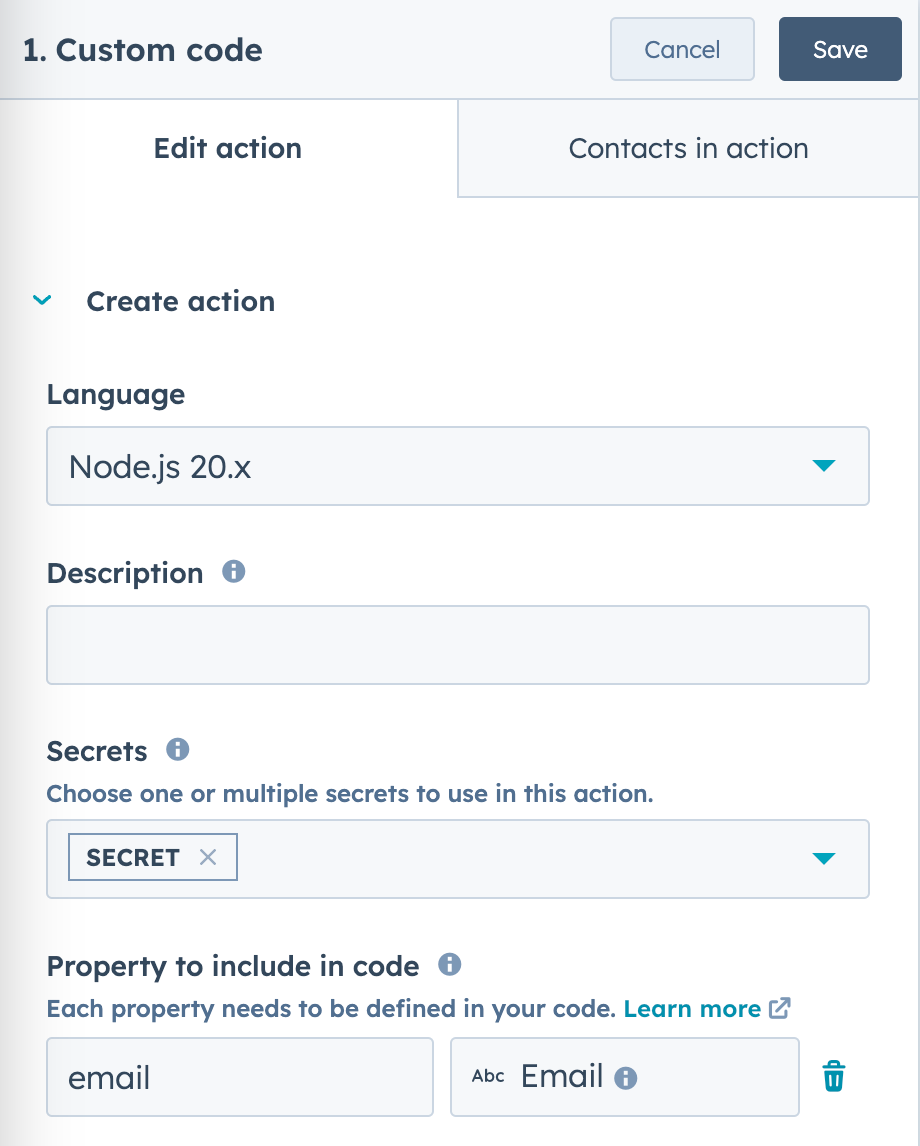
Below is the full code we’re going to use in this action. You can copy it and paste into your editor.
const hubspot = require('@hubspot/api-client');

exports.main = async (event, callback) => {
  let contactFoundInExternalAPI = false;
  const email = event.inputFields['email'];

  const response = await fetch('https://d127-87-206-14-190.ngrok-free.app/v1/api/test');
  const data = await response.json();

  if(data) {
    contactFoundInExternalAPI = data.includes(email);

    const hubspotClient = new hubspot.Client({
      accessToken: process.env.SECRET,
    });

    const contactID = event.object.objectId;
    await hubspotClient.crm.contacts.basicApi.update(contactID, {
      properties: { found_in_external_api: contactFoundInExternalAPI },
    });
  }

  callback({
    outputFields: {
      contactFound: contactFoundInExternalAPI,
    }
  });
}
Let’s go through it so you can understand, what’s going on:
- In workflows custom actions we have access to some basic NodeJS libraries and one of them is
@hubspot/api-clientwhich allows us to connect to HubSpot API. We import it into the code:
const hubspot = require('@hubspot/api-client');
- The main code section contains a result variable declaration and getting
emailfrom input fields we declared above
exports.main = async (event, callback) => {
  let contactFoundInExternalAPI = false;
  const email = event.inputFields['email'];

  ...
- Now we can connect to external API. We’ll use simple
fetchlibrary which is natively available in NodeJS
const response = await fetch('https://d127-87-206-14-190.ngrok-free.app/v1/api/test');

const data = await response.json();
https://d127-87-206-14-190.ngrok-free.app/v1/api/test is an url of my simple API, which I created only for the purpose of writing this guide. Replace it with the url you want to connect to.
- if server responded and we have the data, we can proceed and set a variable `contactFoundInExternalAPI` based on the response
if(data) {
  contactFoundInExternalAPI = data.includes(email);
- now we have to connect to our Contacts through HubSpot API. We’ll use `SECRET`, which we defined in one of the previous steps. It is availble in
process.envobject
const hubspotClient = new hubspot.Client({
  accessToken: process.env.SECRET,
});
- after setting the connection, we can update our Contact object. We’ll update only the Contact which triggers the workflow, so we have to get its
idfromevent.object.objectId
const contactID = event.object.objectId;
- we are updating only the property which we created previously - `Found in external API`. HubSpot automatically creates property names with underscore based on labels, so in our case, the property name is `found_in_external_api`. We’ll use it in the code
await hubspotClient.crm.contacts.basicApi.update(contactID, {
  properties: { found_in_external_api: contactFoundInExternalAPI },
});
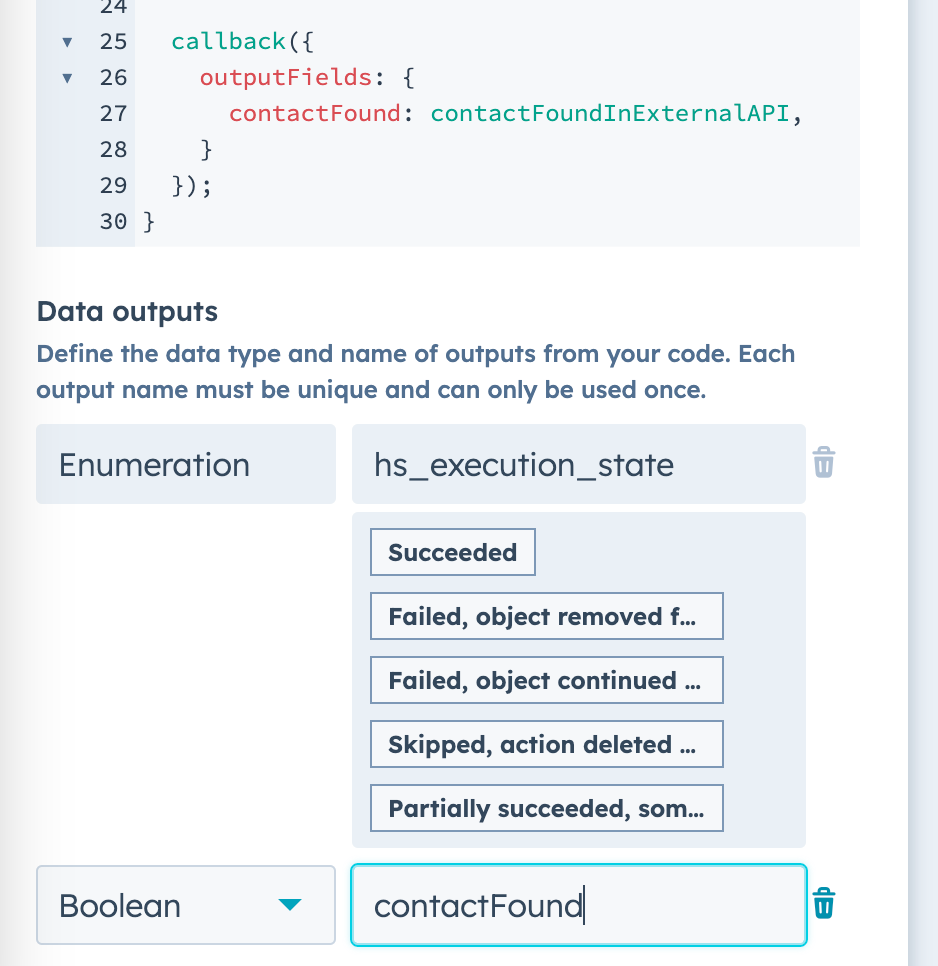
- last part of code is just a callback which pass `outputFields` to another action (if needed). In our example, we’ll pass `contactFound` parameter, which will have `true` or `false` value
callback({
  outputFields: {
    contactFound: contactFoundInExternalAPI,
  }
});
Even if we defined `outputFields` in the code, we still have to add them to action output. To do that, find the `Add output` link placed below the code editor. Click it.
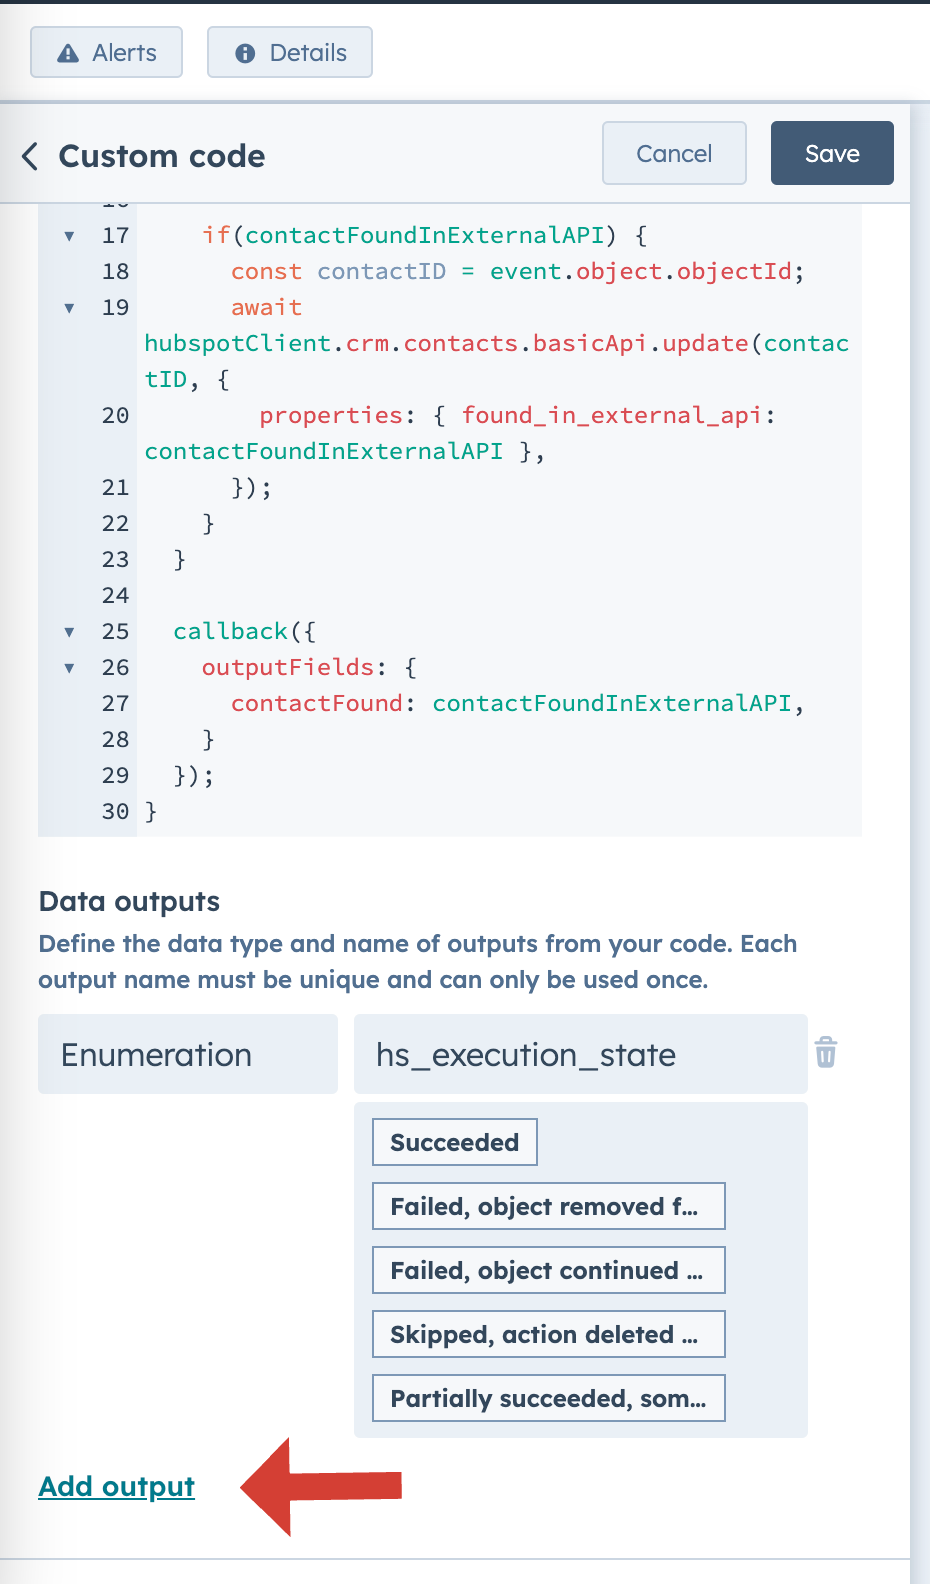
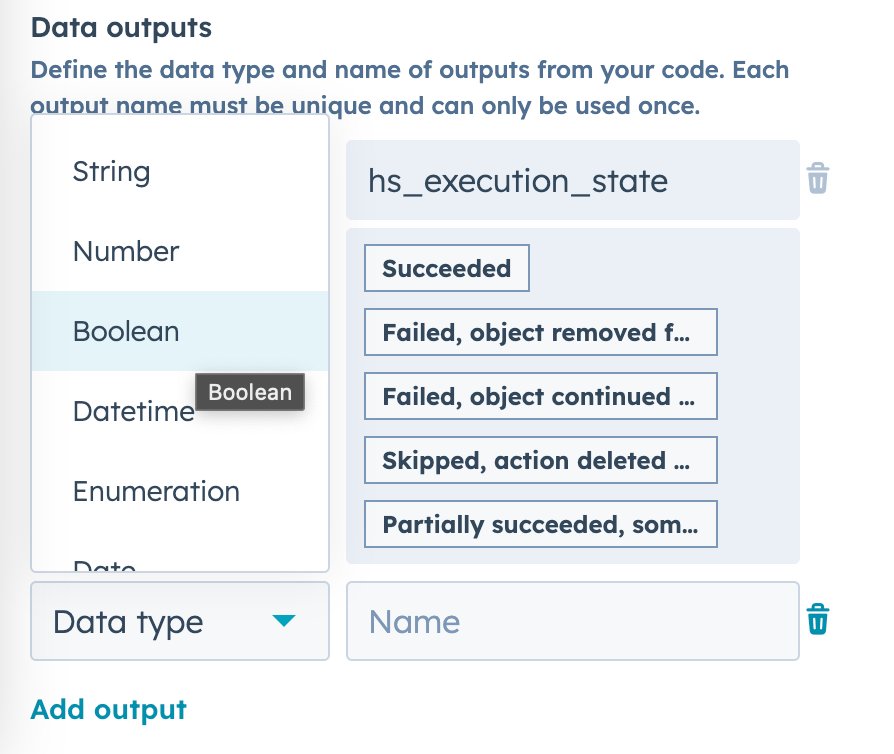
- Fill the `Data type` which should be `Boolean`
- Fill the `Name` which should be exactly the same as in the `callback` action above. In our case it’s `contactFound`
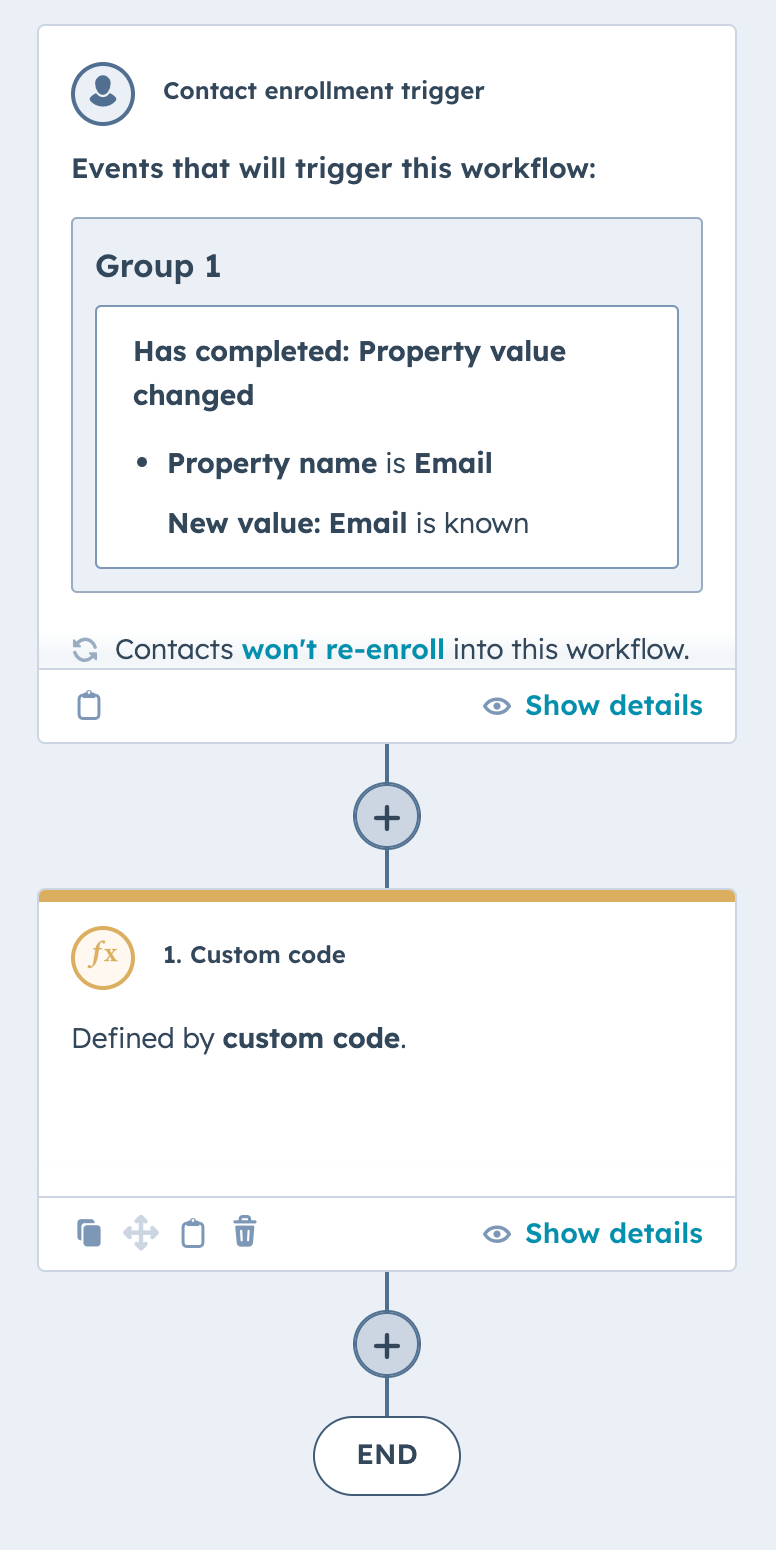
`Save` the action and you’ll see 2 boxes in workflows like on the image below.
Step 3 - Testing
We are ready to test what we’ve created so far. If your left sidebar disappeared after save, you can bring it back by clicking the action box in the workflow - the one with `Custom code`.
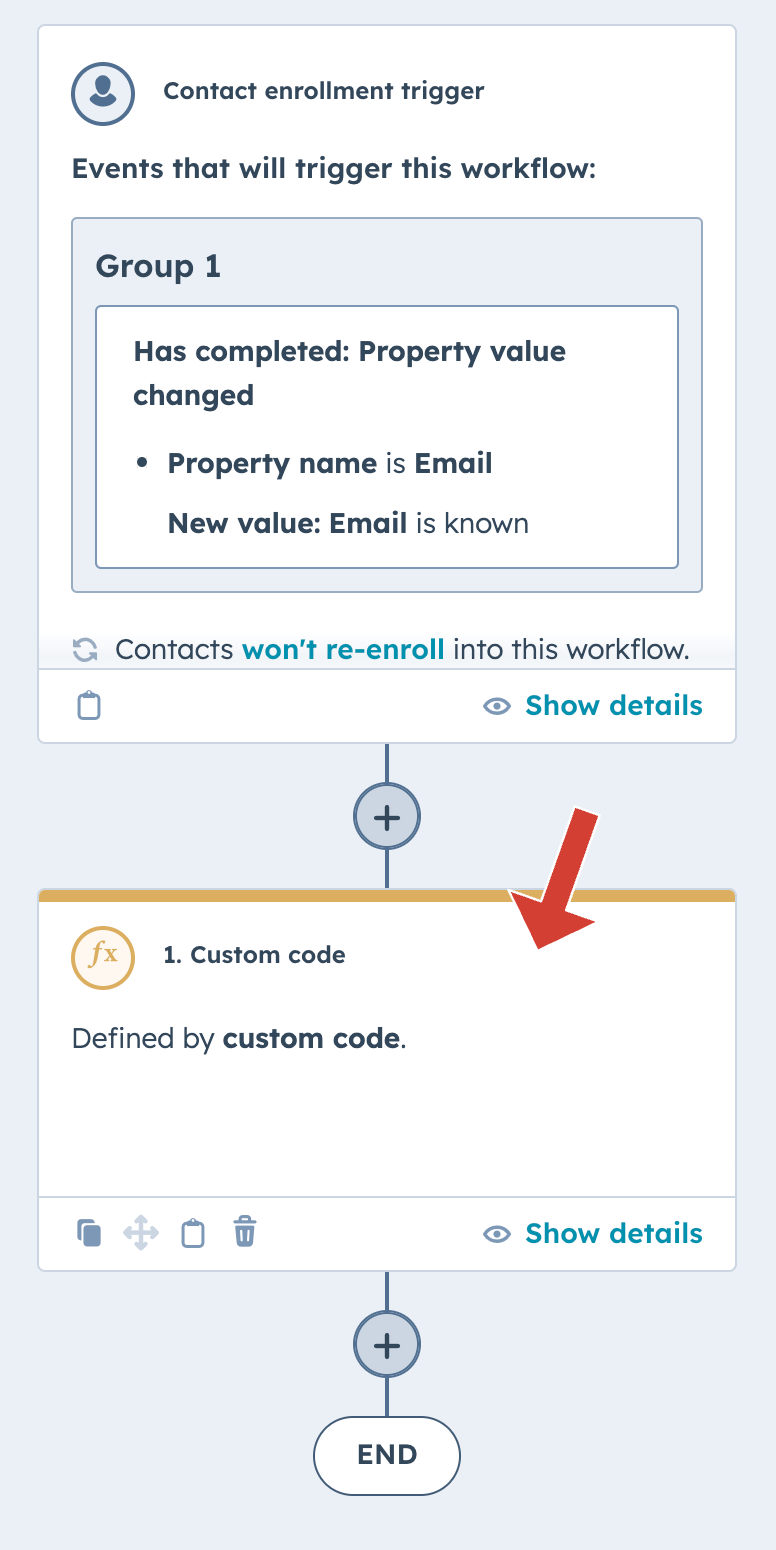
Now you are ready to test the action.
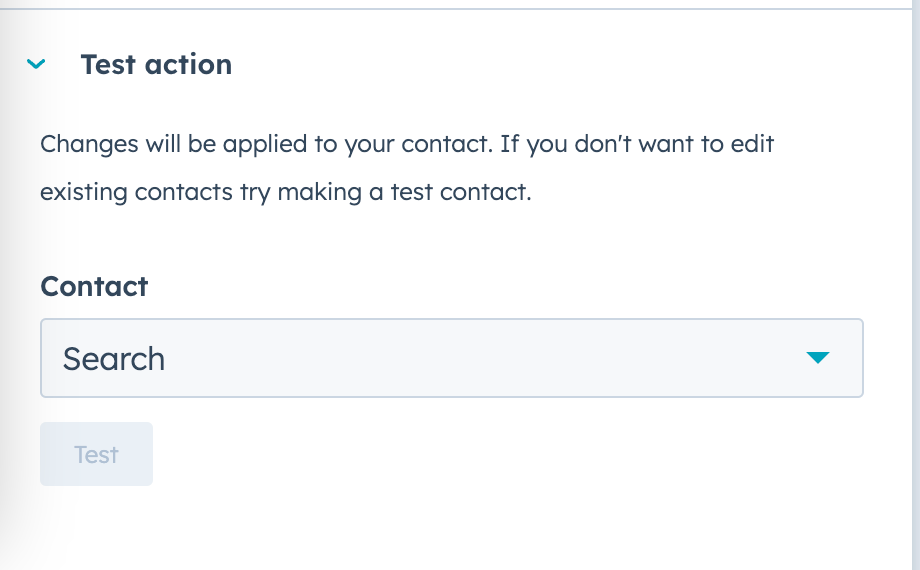
- Scroll the sidebar to the very bottom. You’ll see the `Test action` expandable section. Click it.
- Select any of your contacts you would like to test. For testing I strongly recommend using test contact
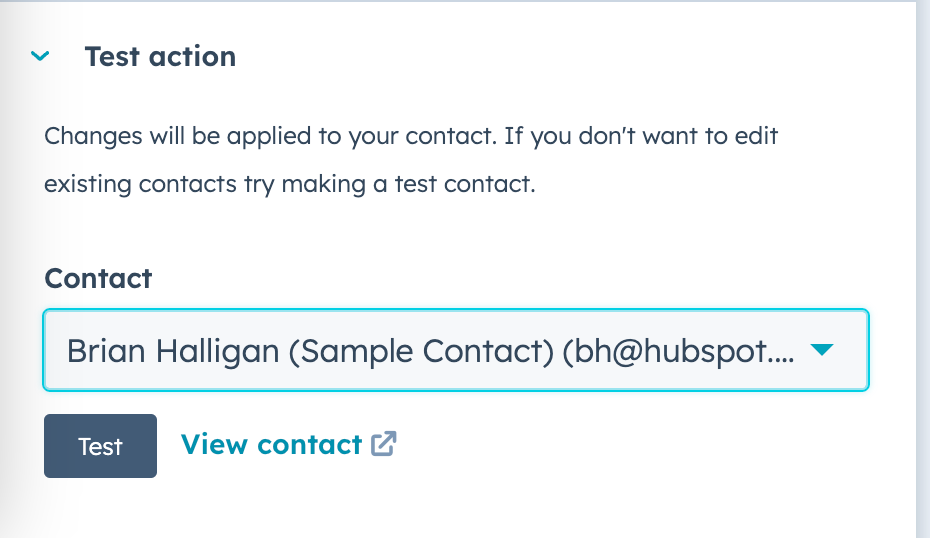
- Click `Test`
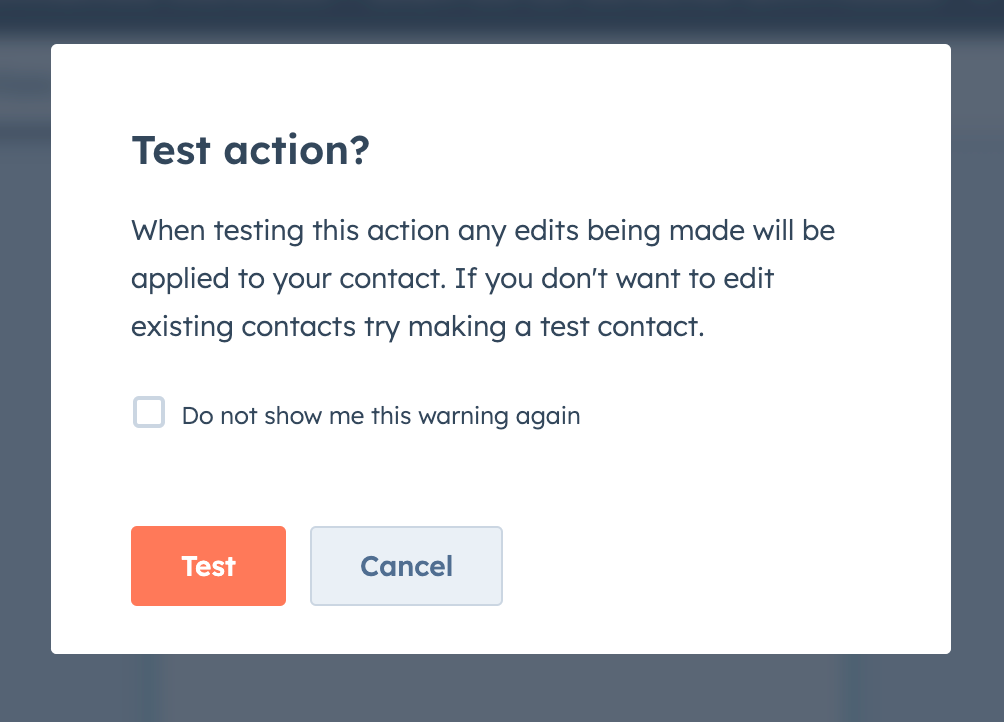
- You’ll see the confirmation modal, click `Test`
- Just to remind, my simple API is responding with a list of the following email addresses
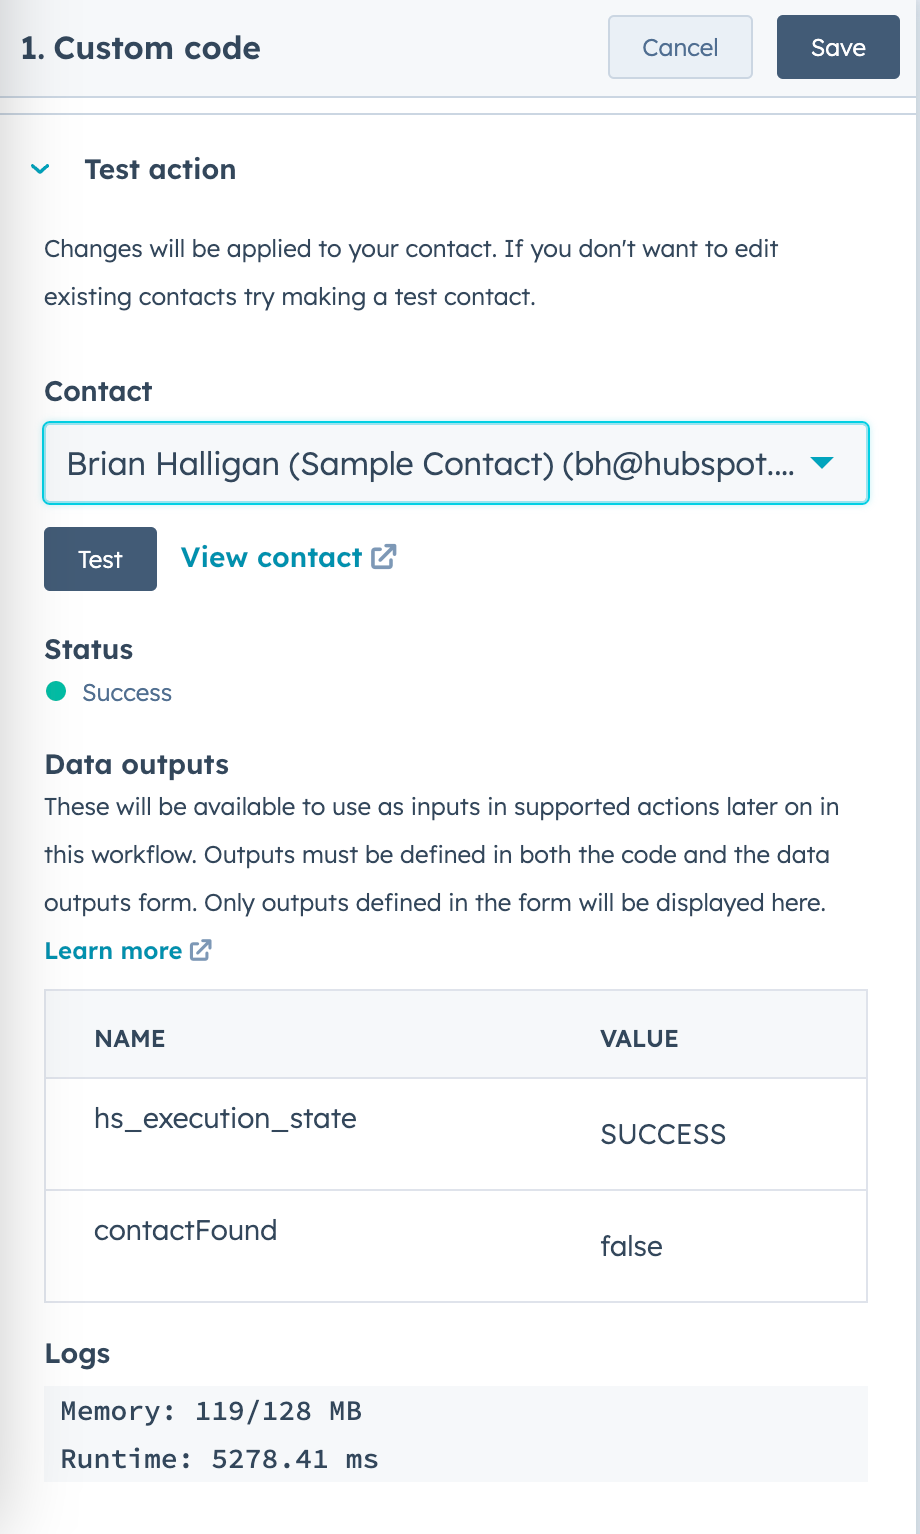
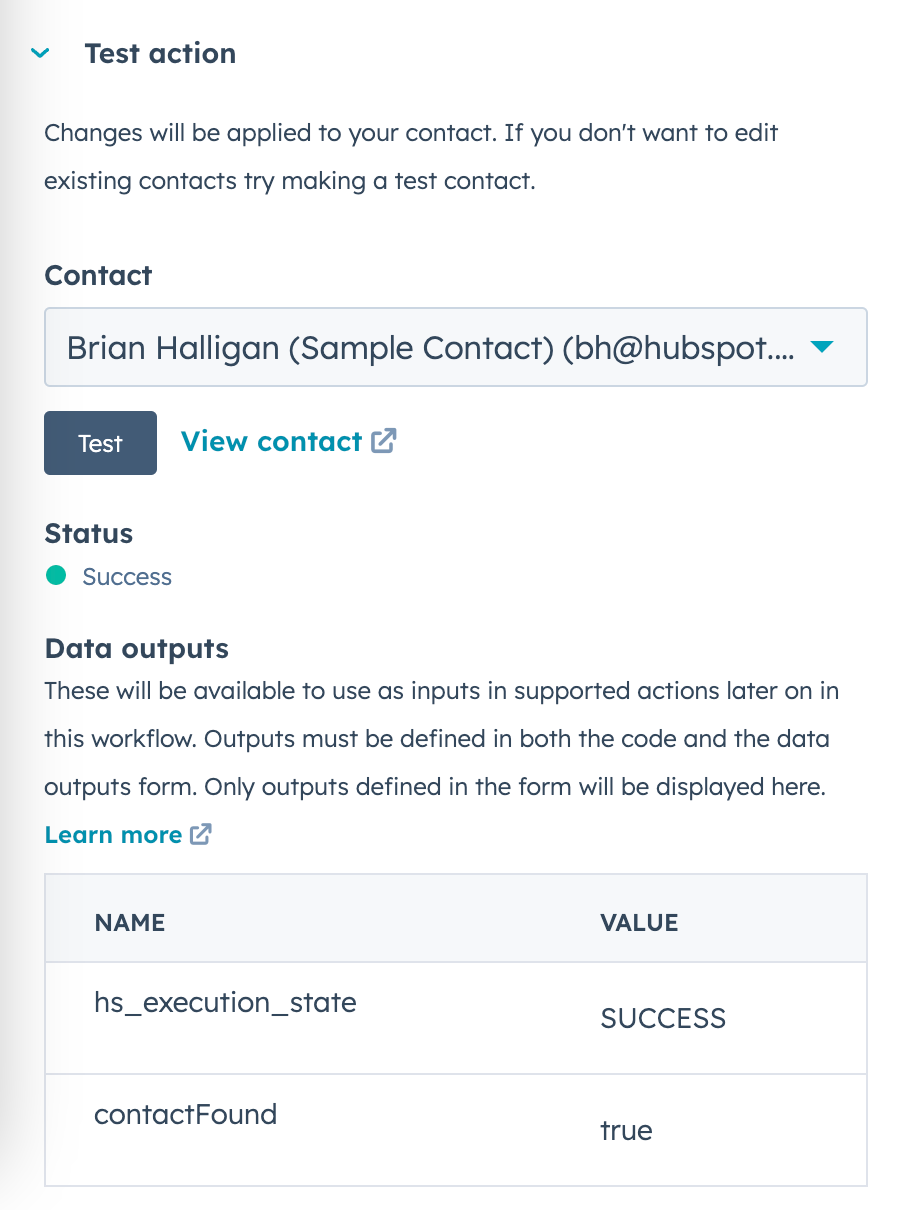
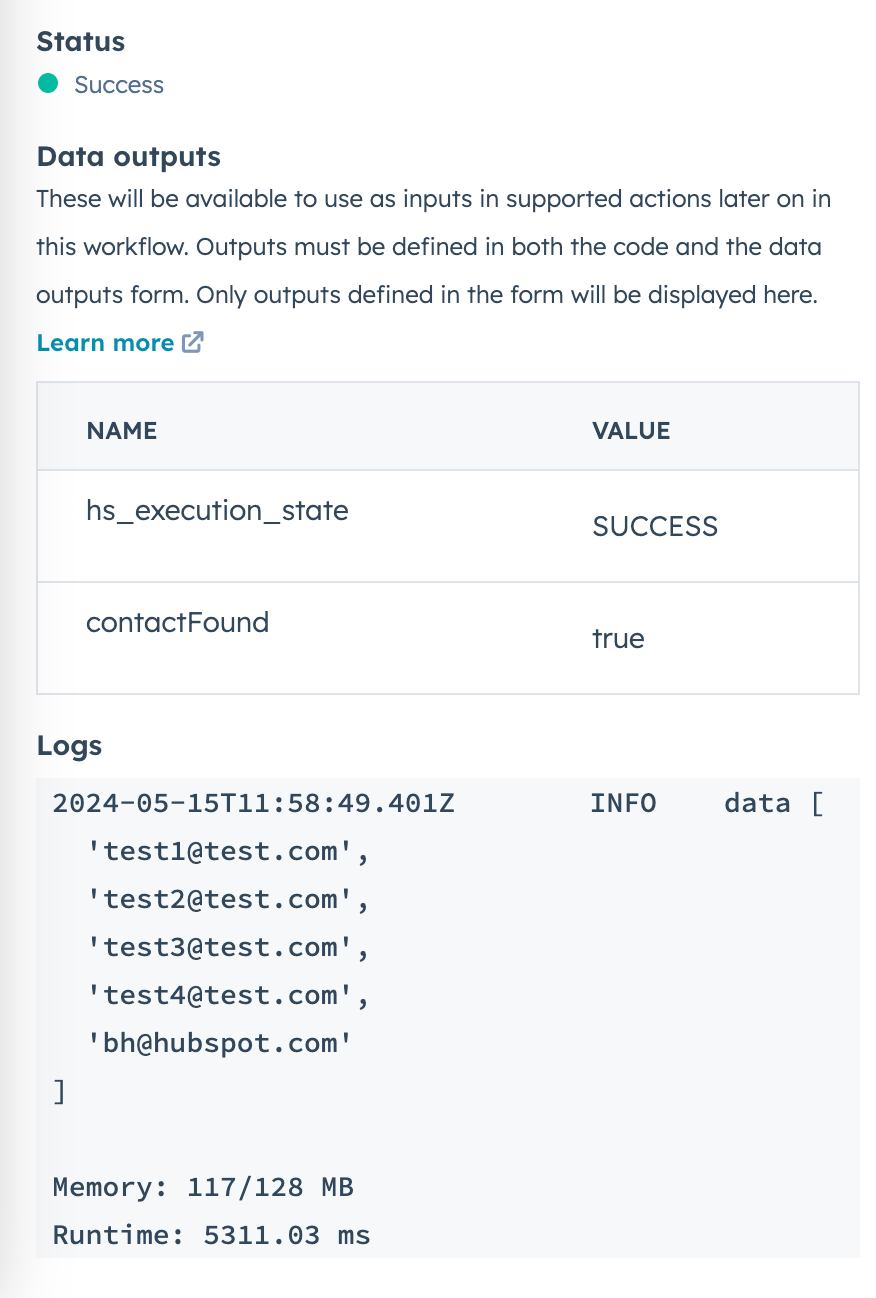
- When the test ends, you’ll see the response, like on the screen below. You’ll see the status of response (for example `Success` like on the screen), output fields which we defined previously and a few logs.
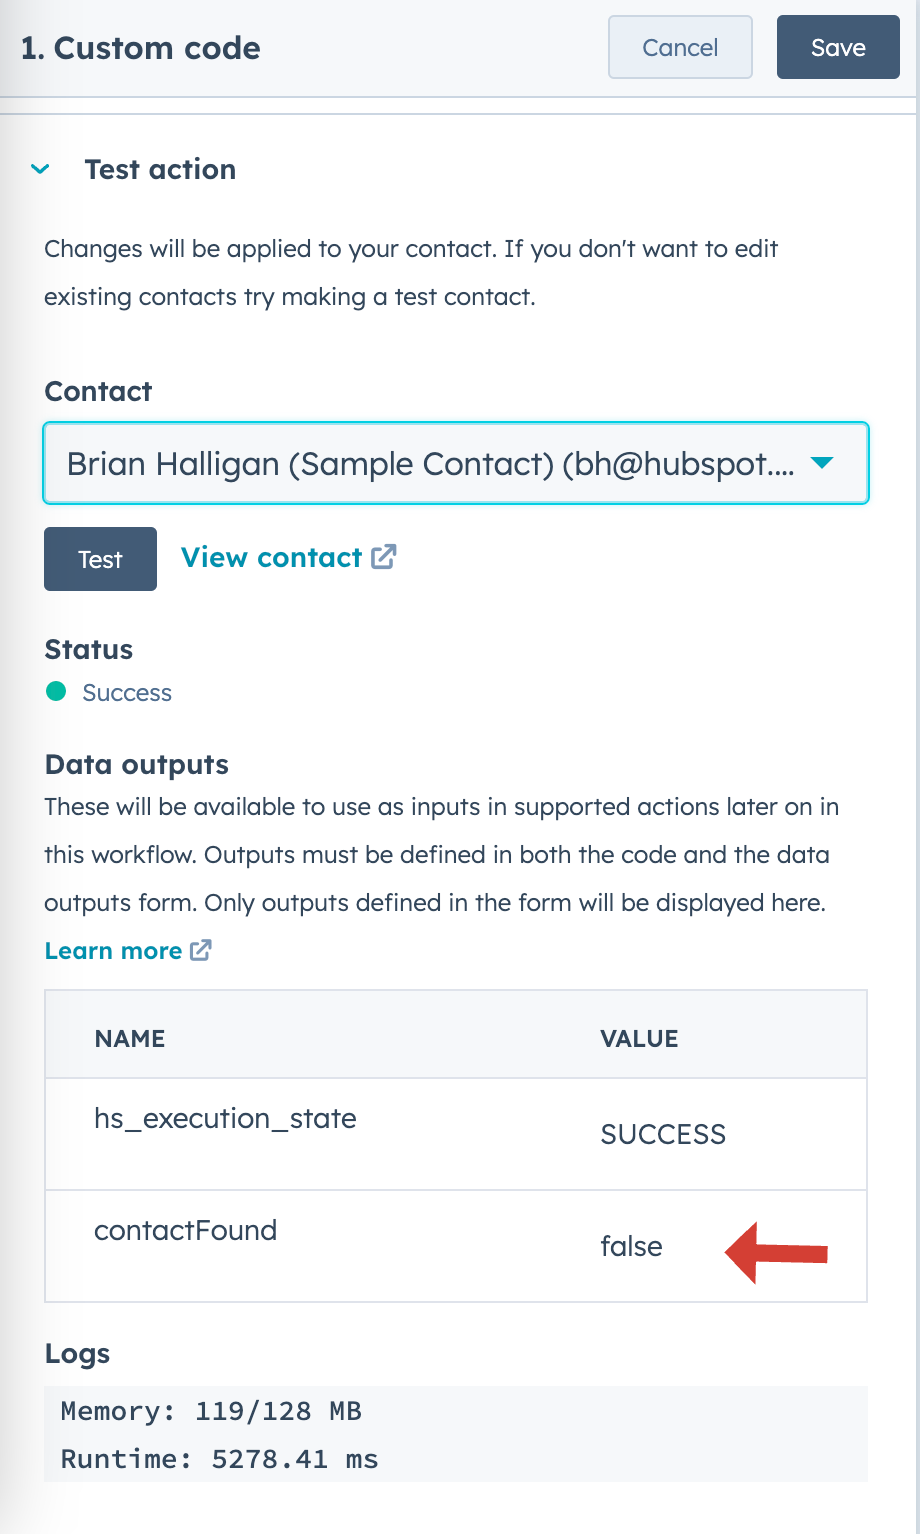
- My test contact has an email `bh@hubspot.com` and it’s not on the list. That’s why the `contactFound` value in output of the action is `false`
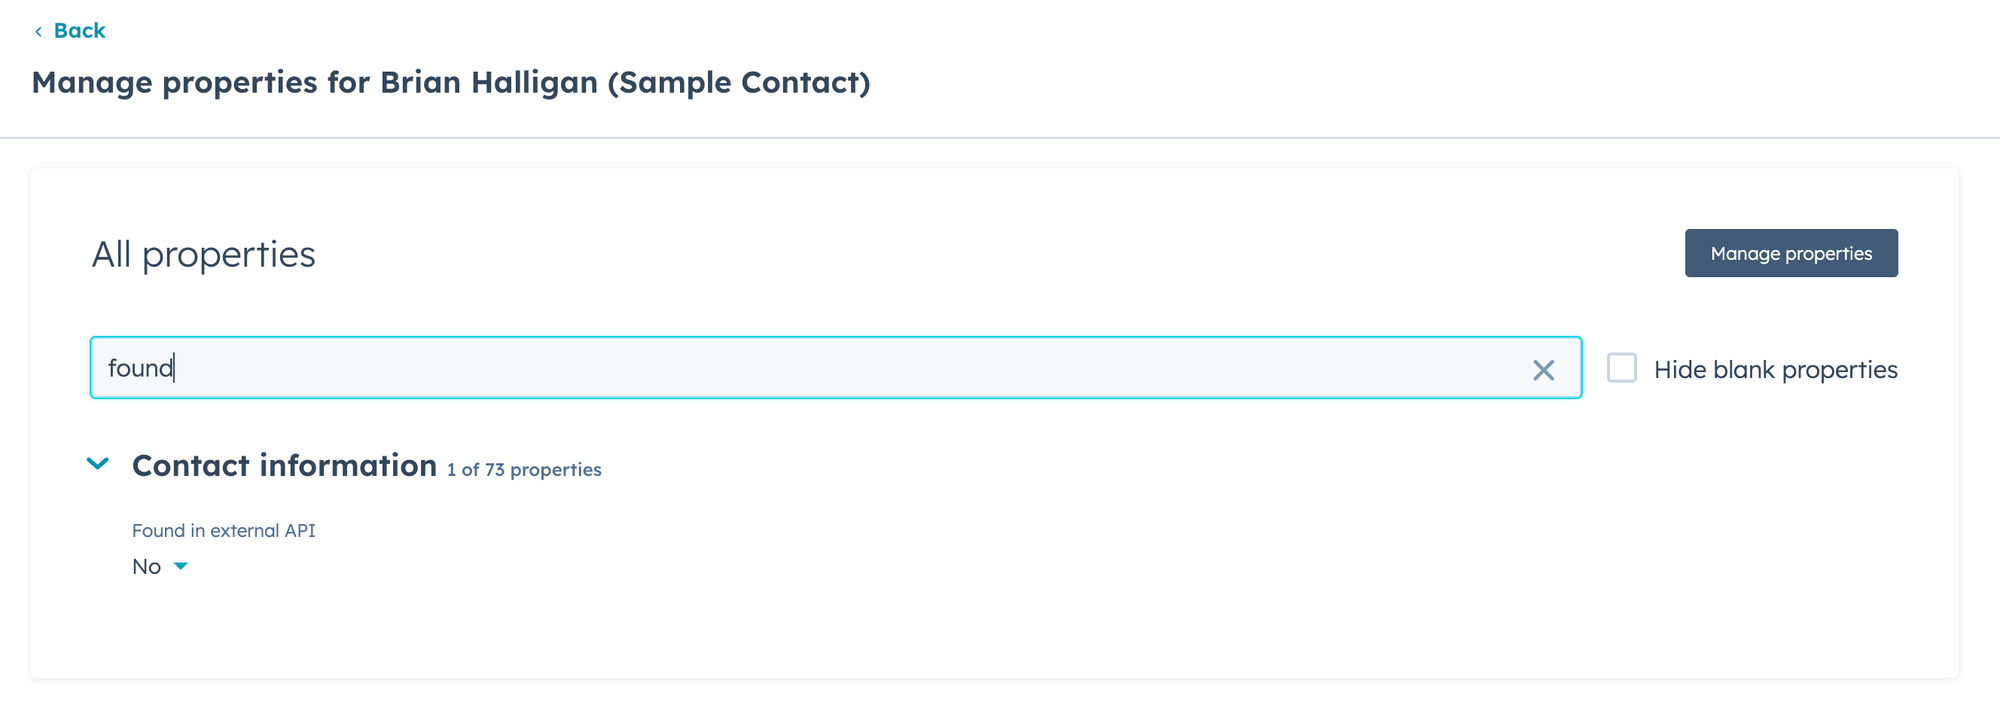
- If you switch to the Contacts view and check all properties for the selected contact, you’ll see that the value of the property `Found in external API` has been set to `No`, which equals to `false`
Before executing next test, I made some adjustments in my API. I added `bh@hubspot.com` email address to the returned list.
Now, after executing the same testing steps as above, this time I got `contactFound` value set to `true`, which means that this email has been found on the list.
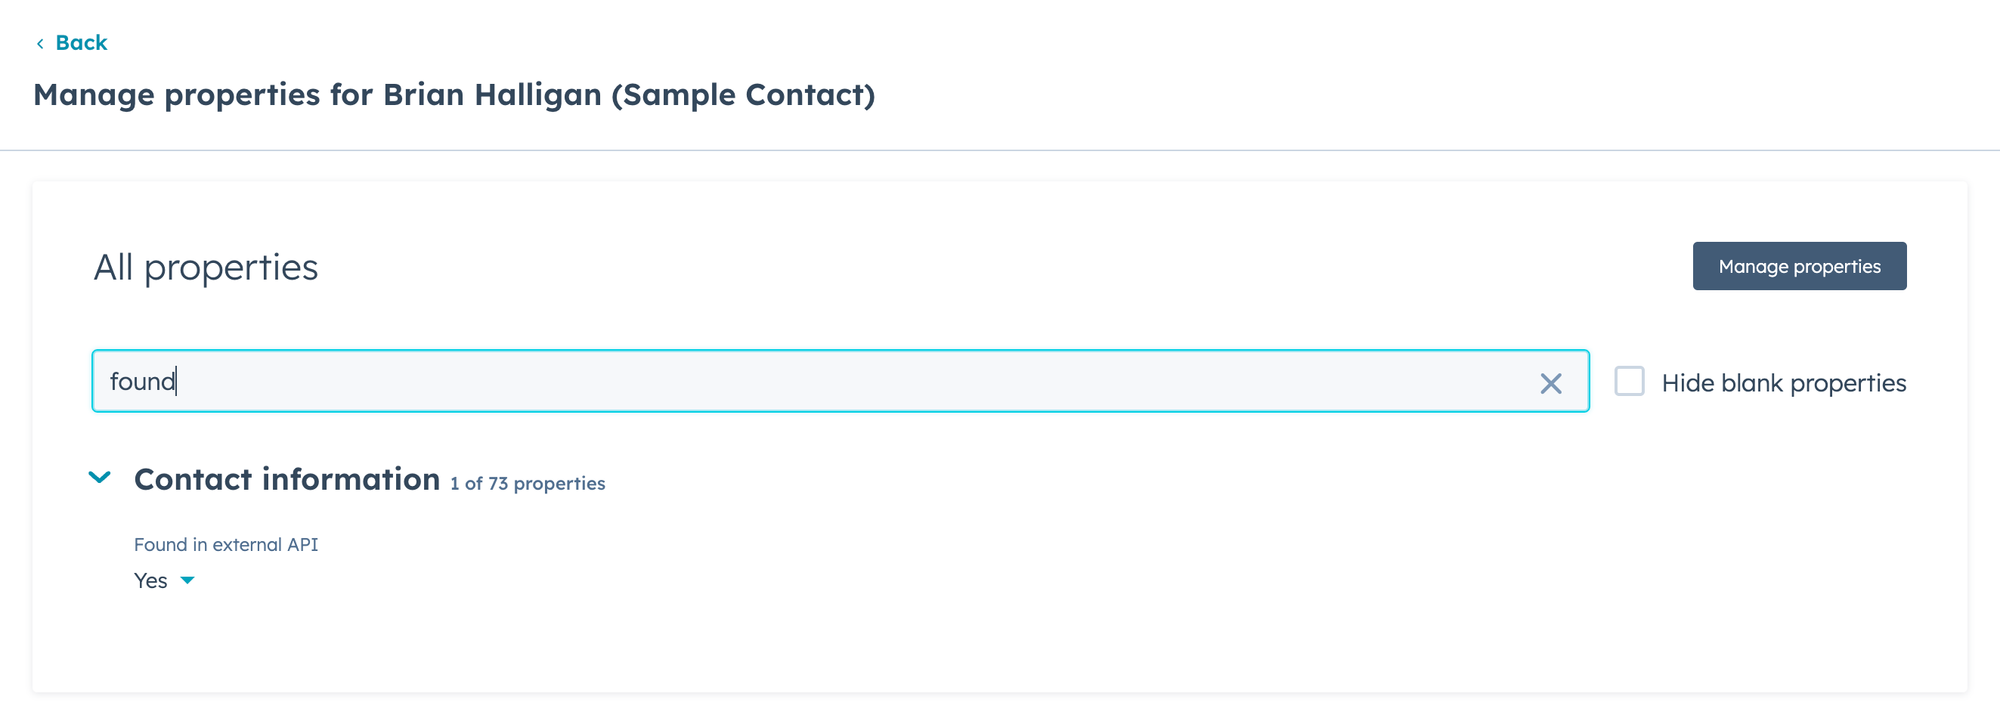
Again, switch to the Contacts view and this time you should see the property `Found in external API` set to `Yes` 🚀
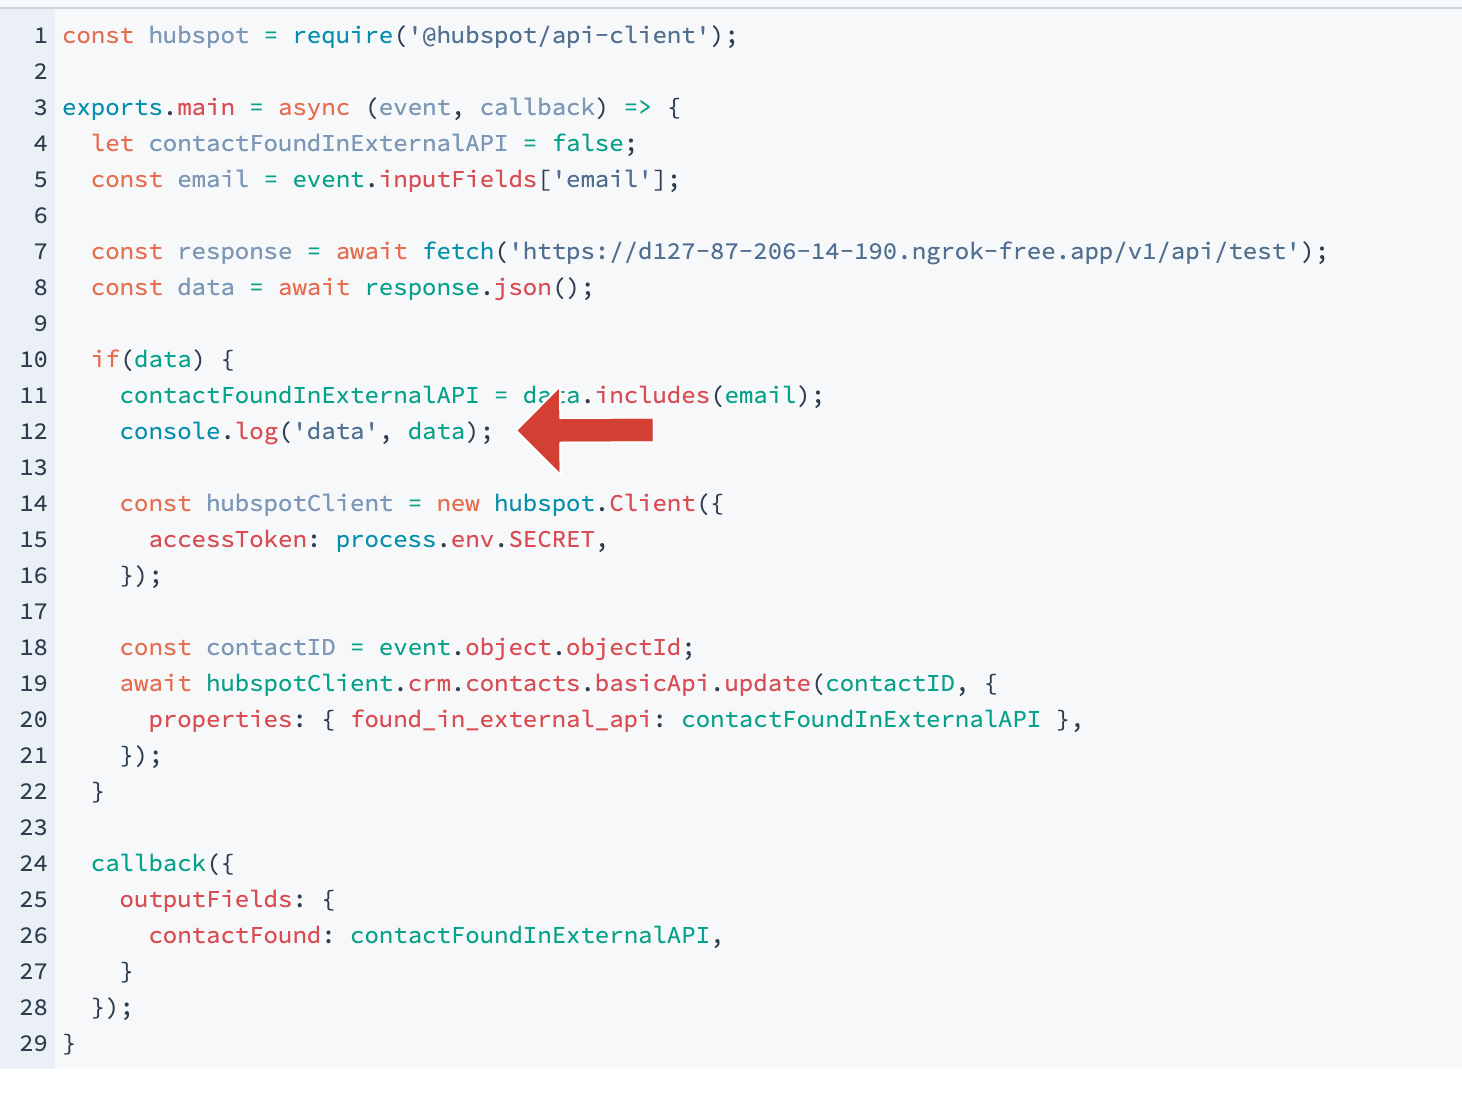
It’s also worth mentioning, that you can use console.log in the code if you want to debug it. For example, when I add console.log(‘data’, data) just to see what comes from the API, I’ll see this log at the bottom after executing the test.
Step 4 - Possible further actions
If you wish to add next action in the workflow and use the property we've just set, you can do it the following way.
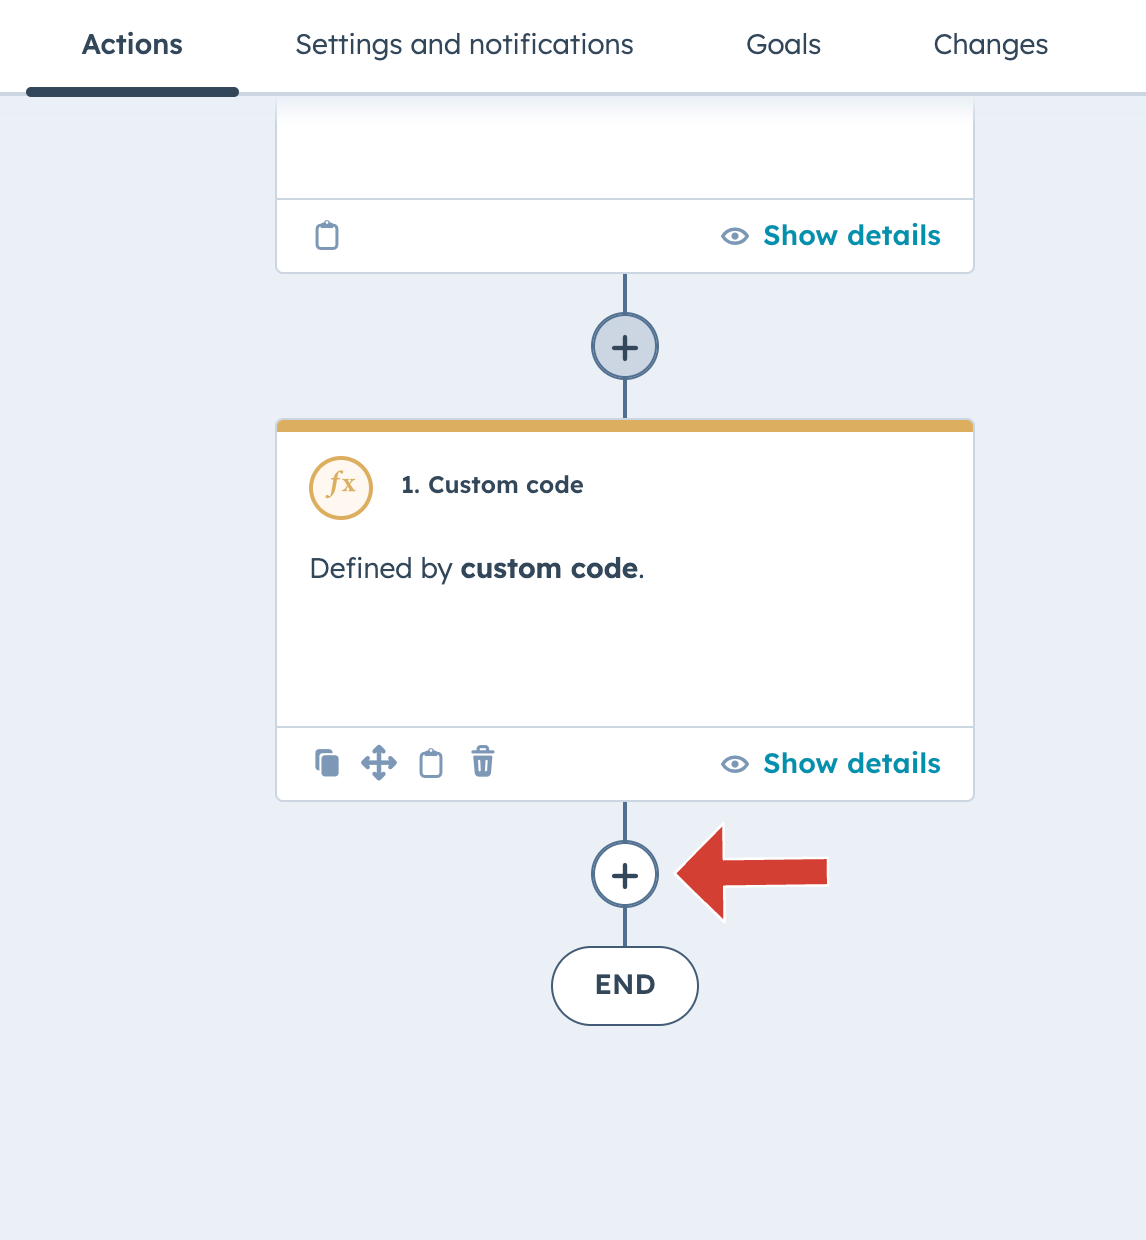
- Click the `plus` icon below the `Custom code` box
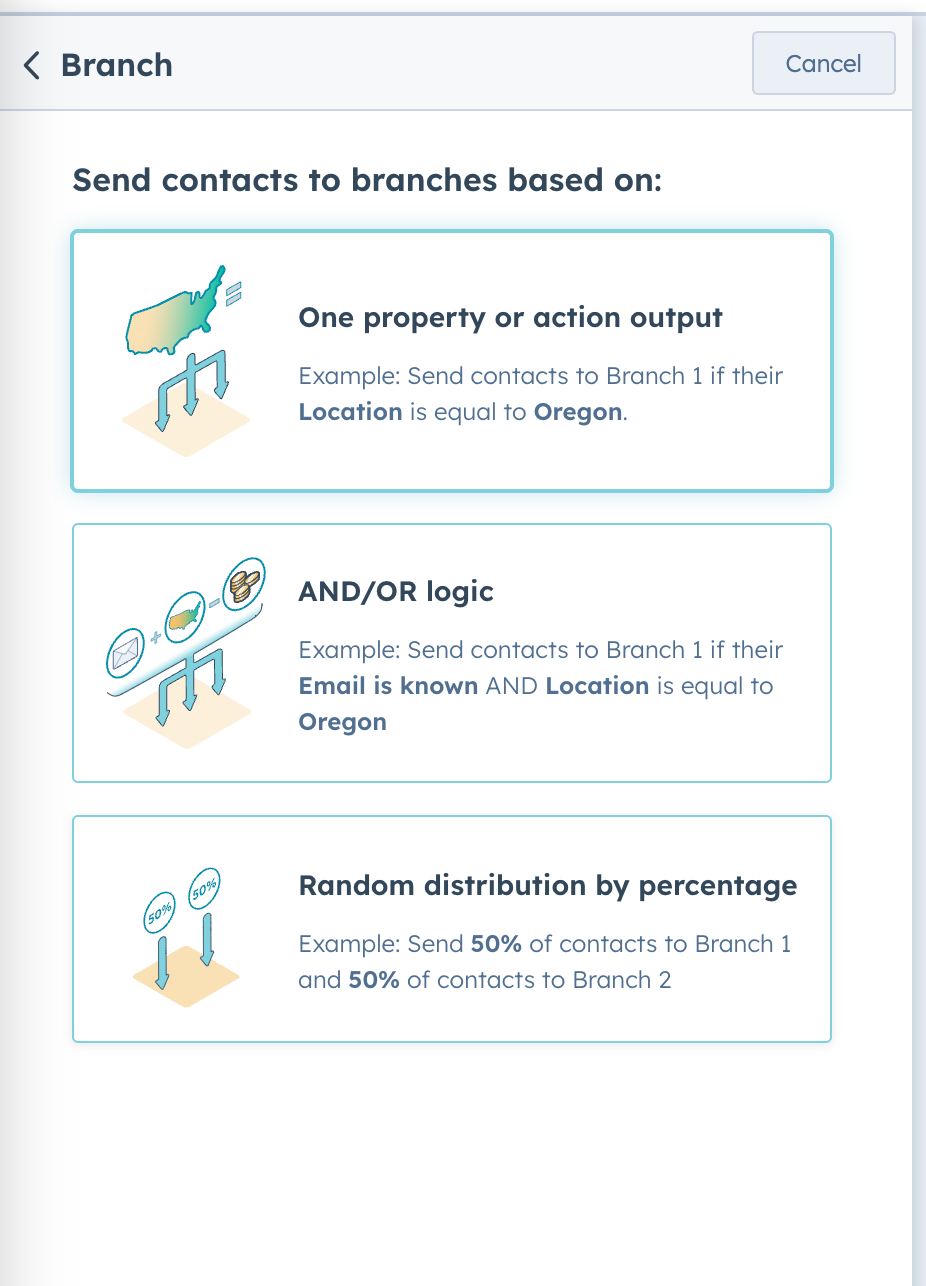
- Select action. Since the property we’ve created is true or false, the natural next action will be `Branch`
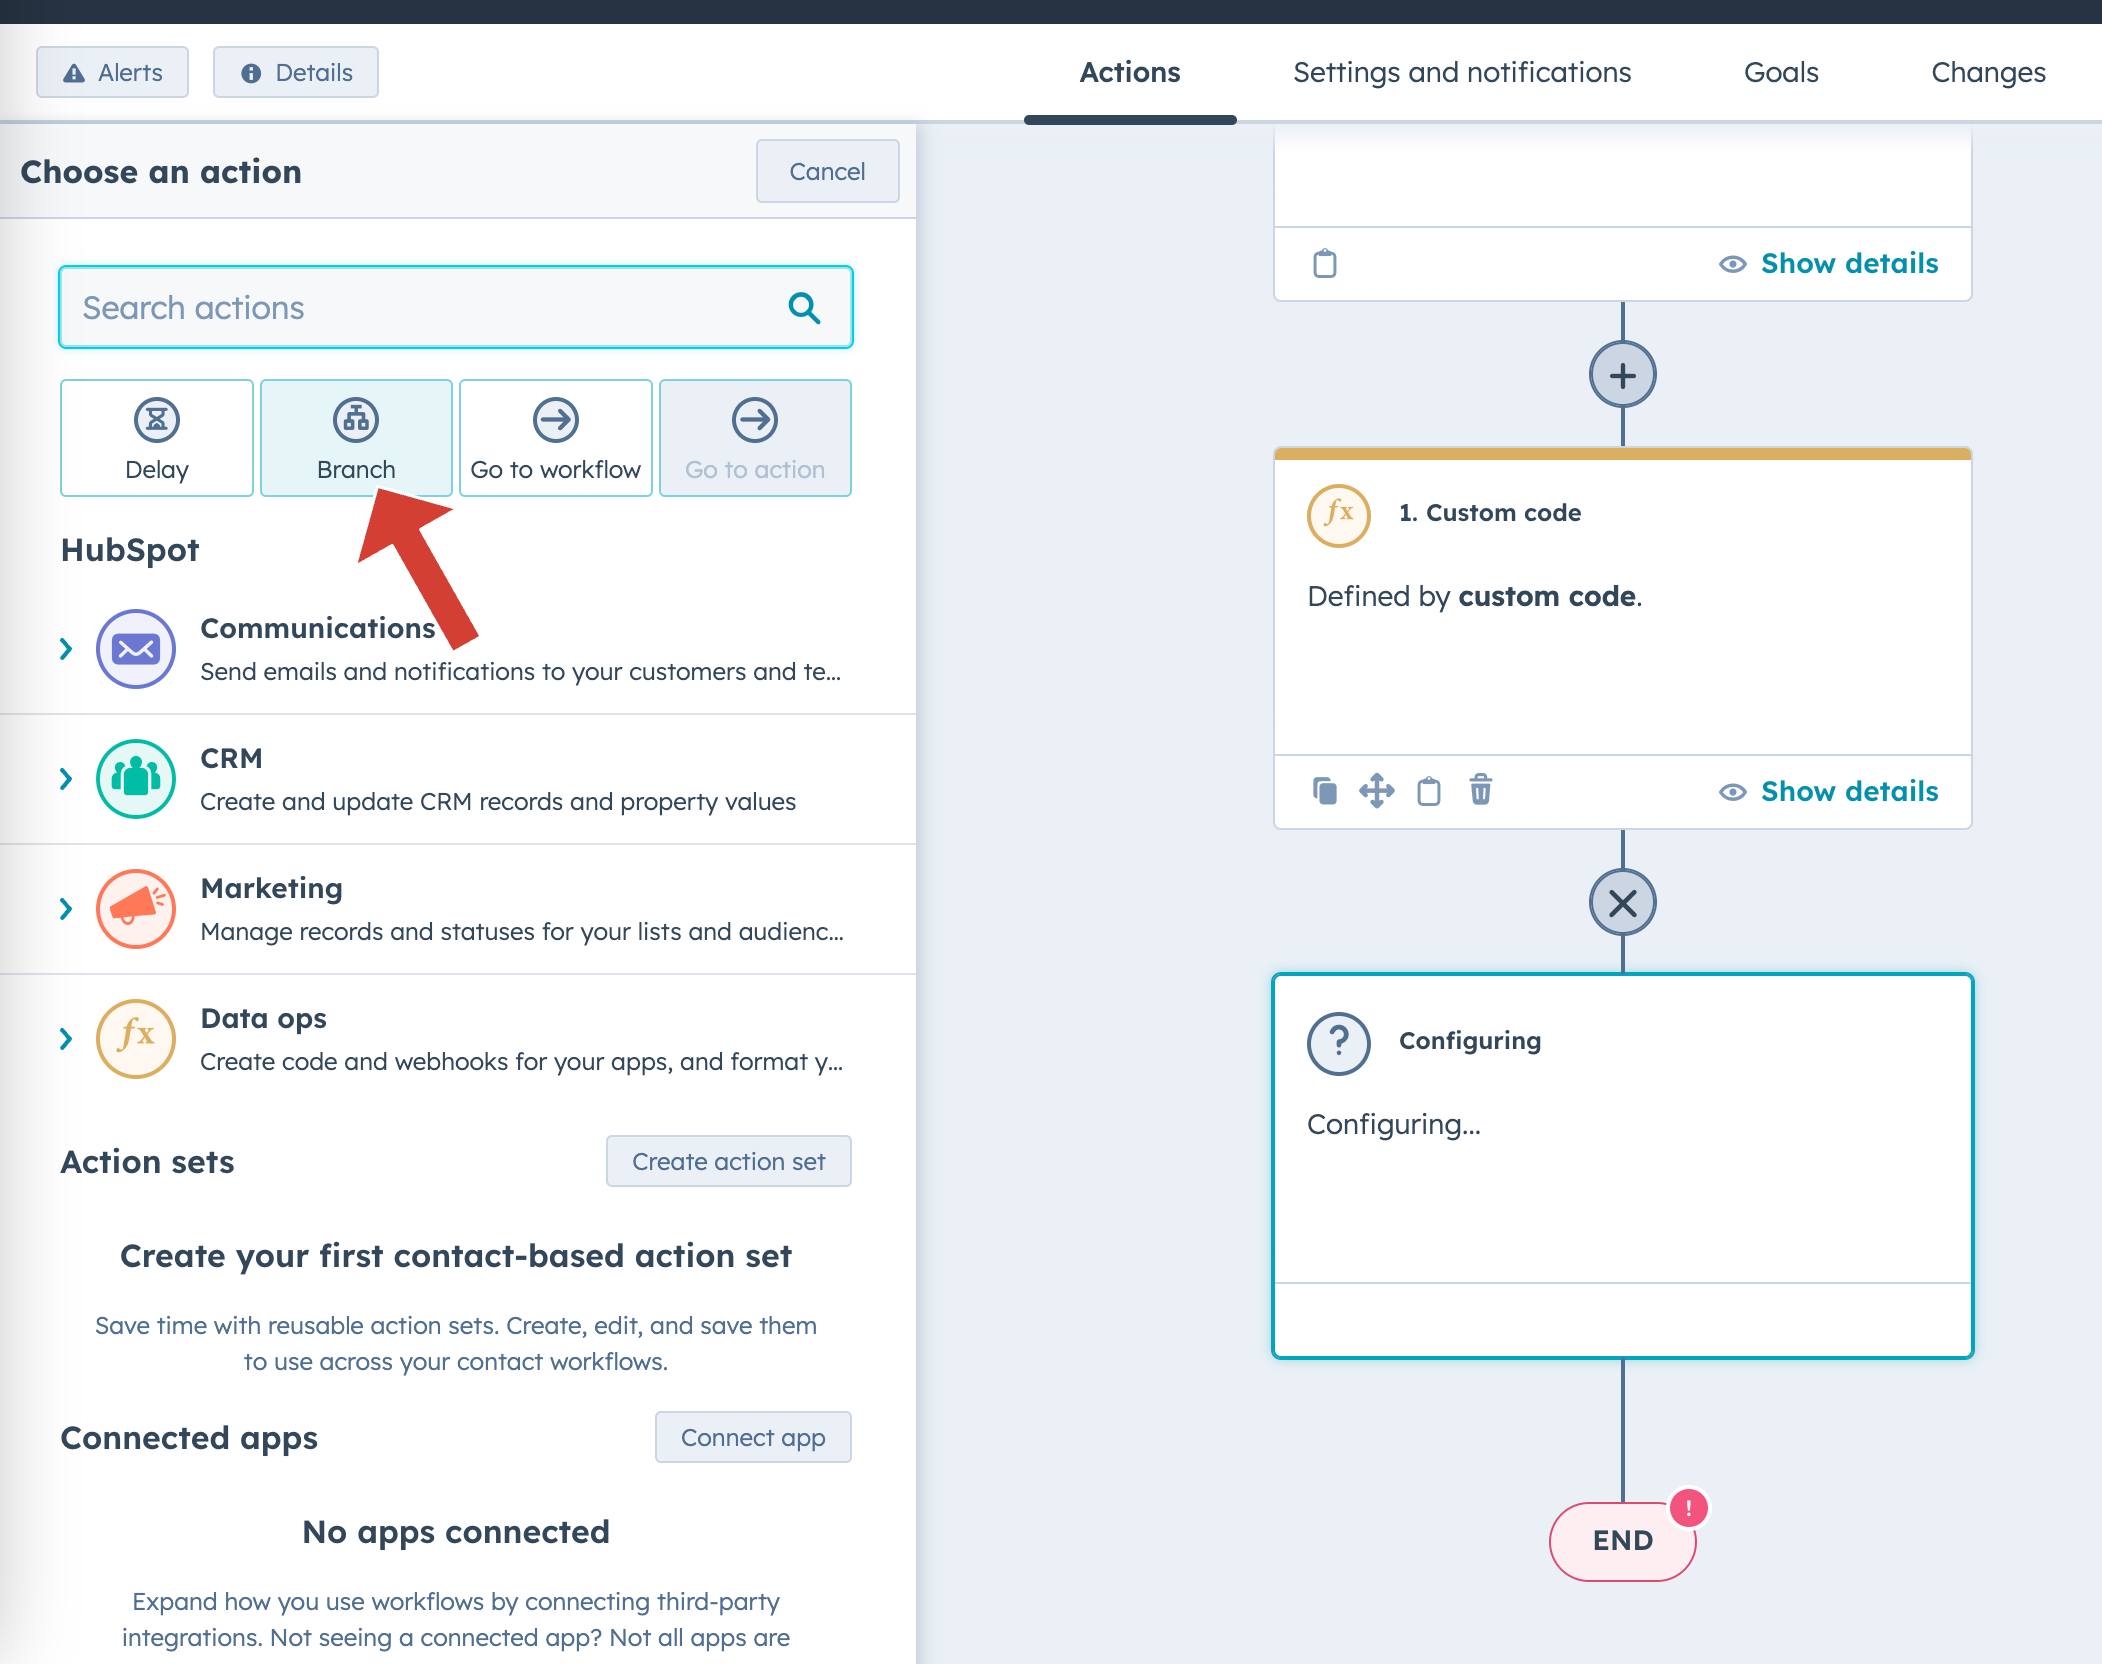
- Select `One property or action input`
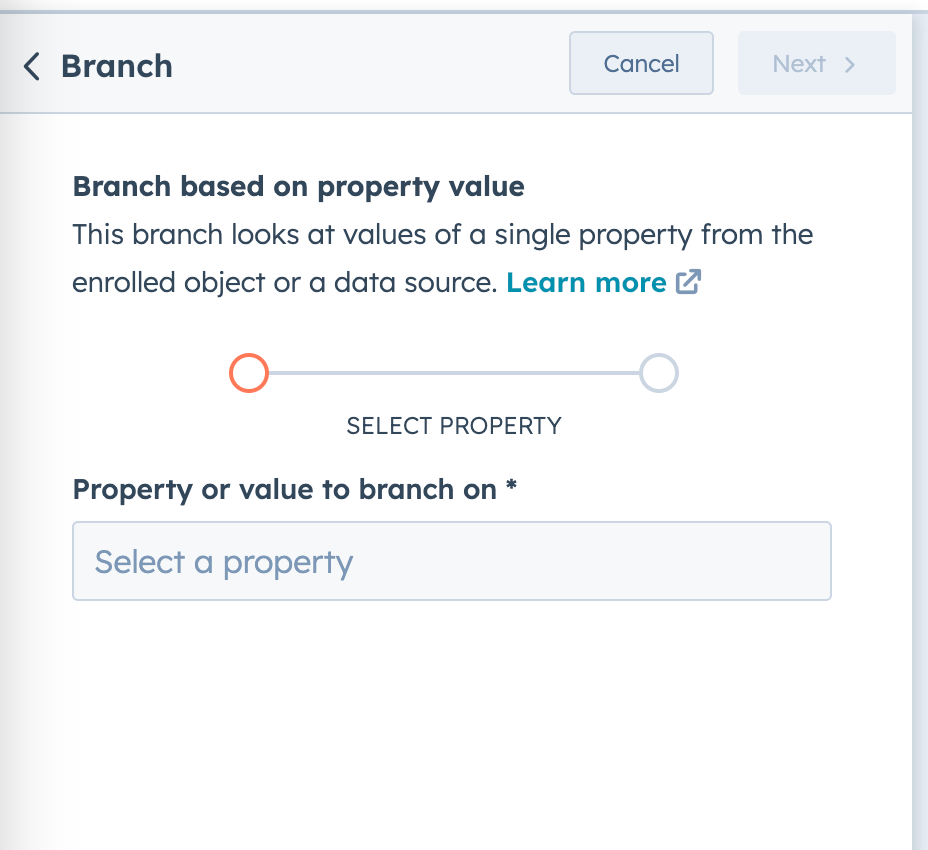
- You’ll see the dropdown with properties. Click it
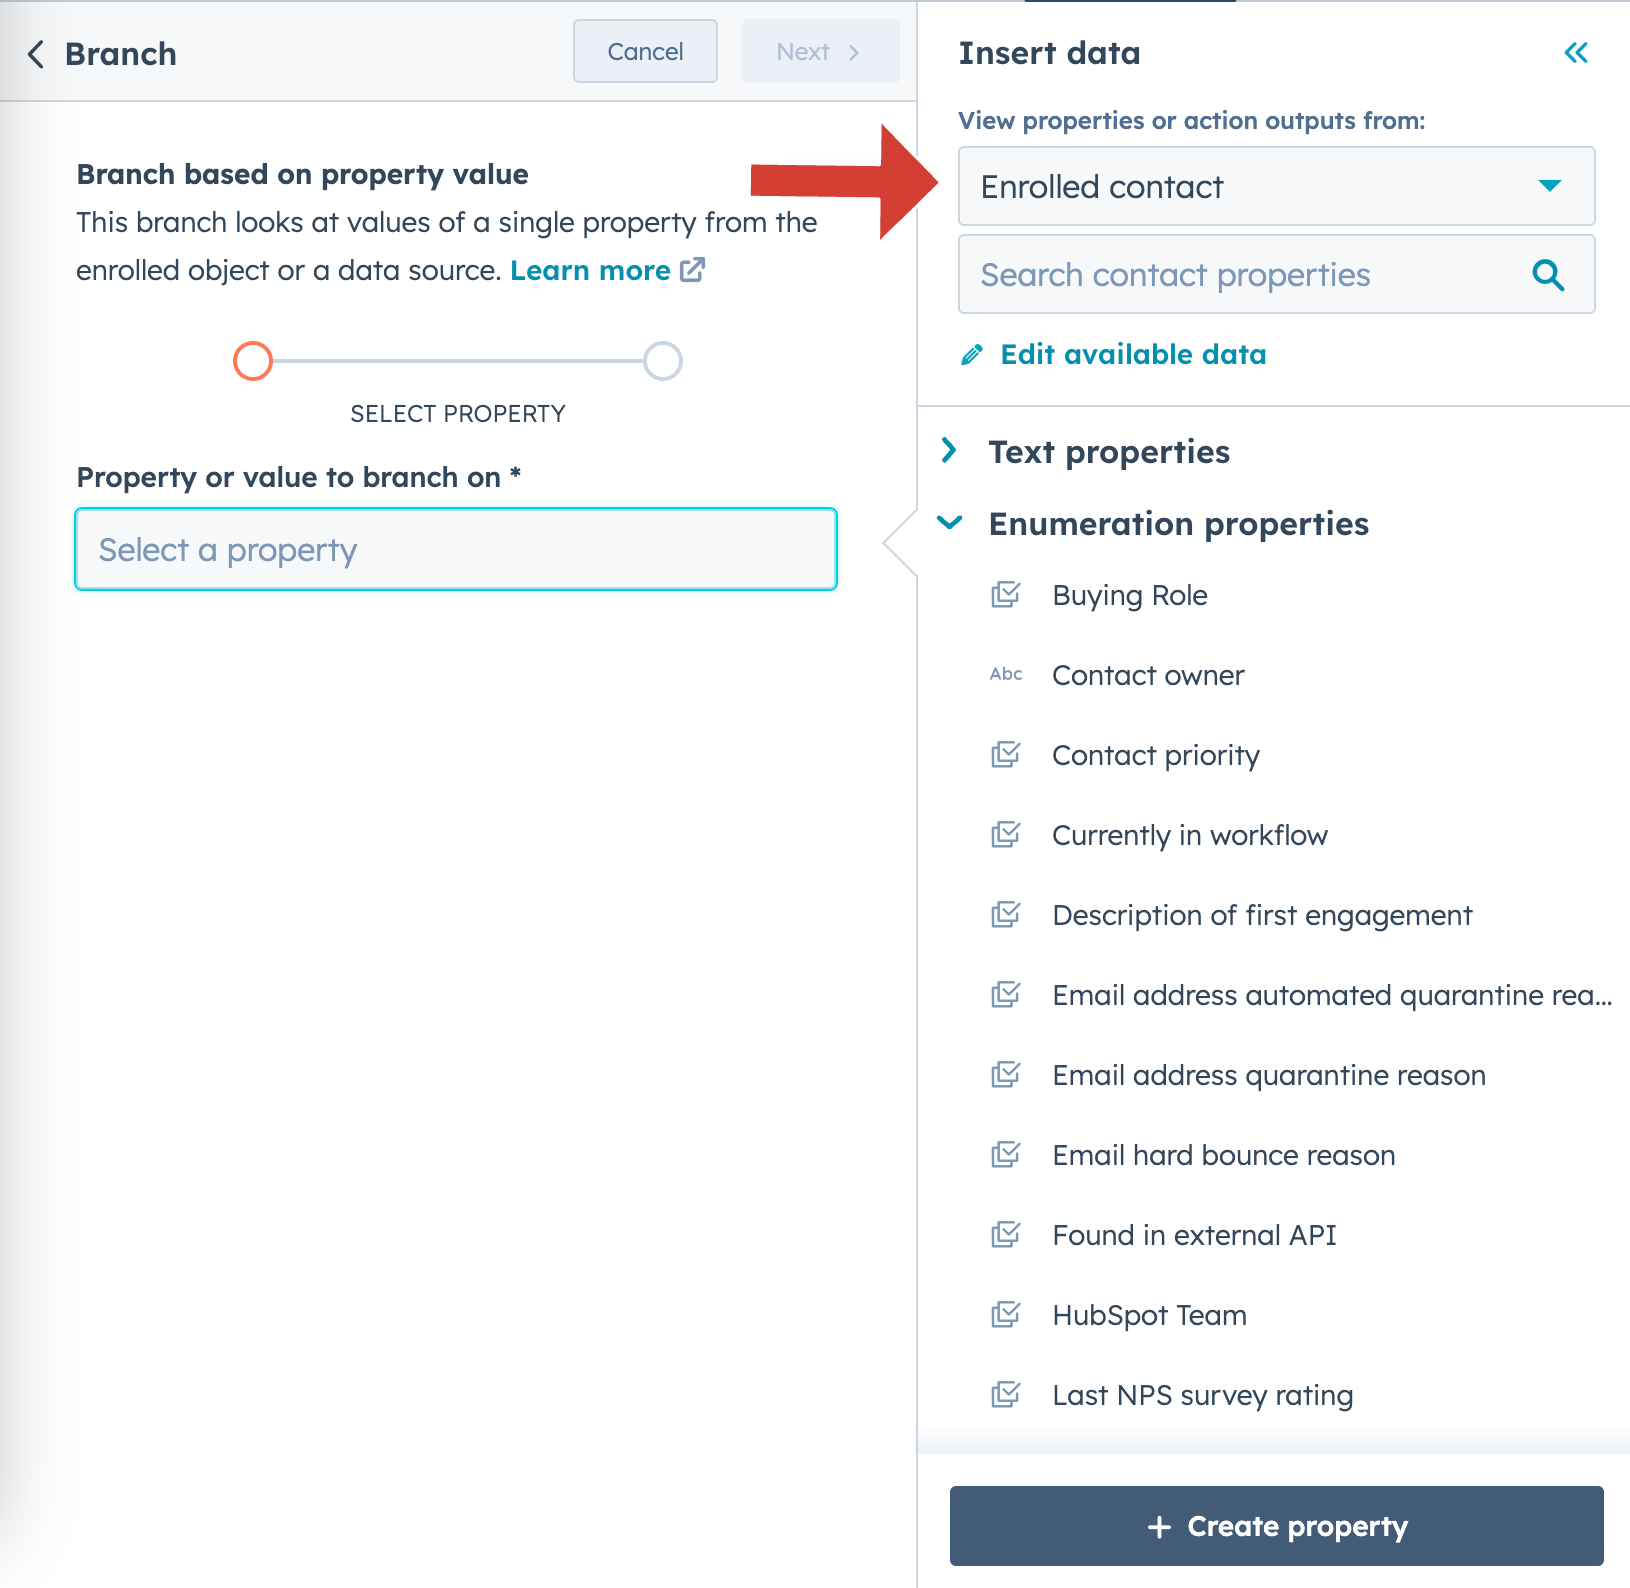
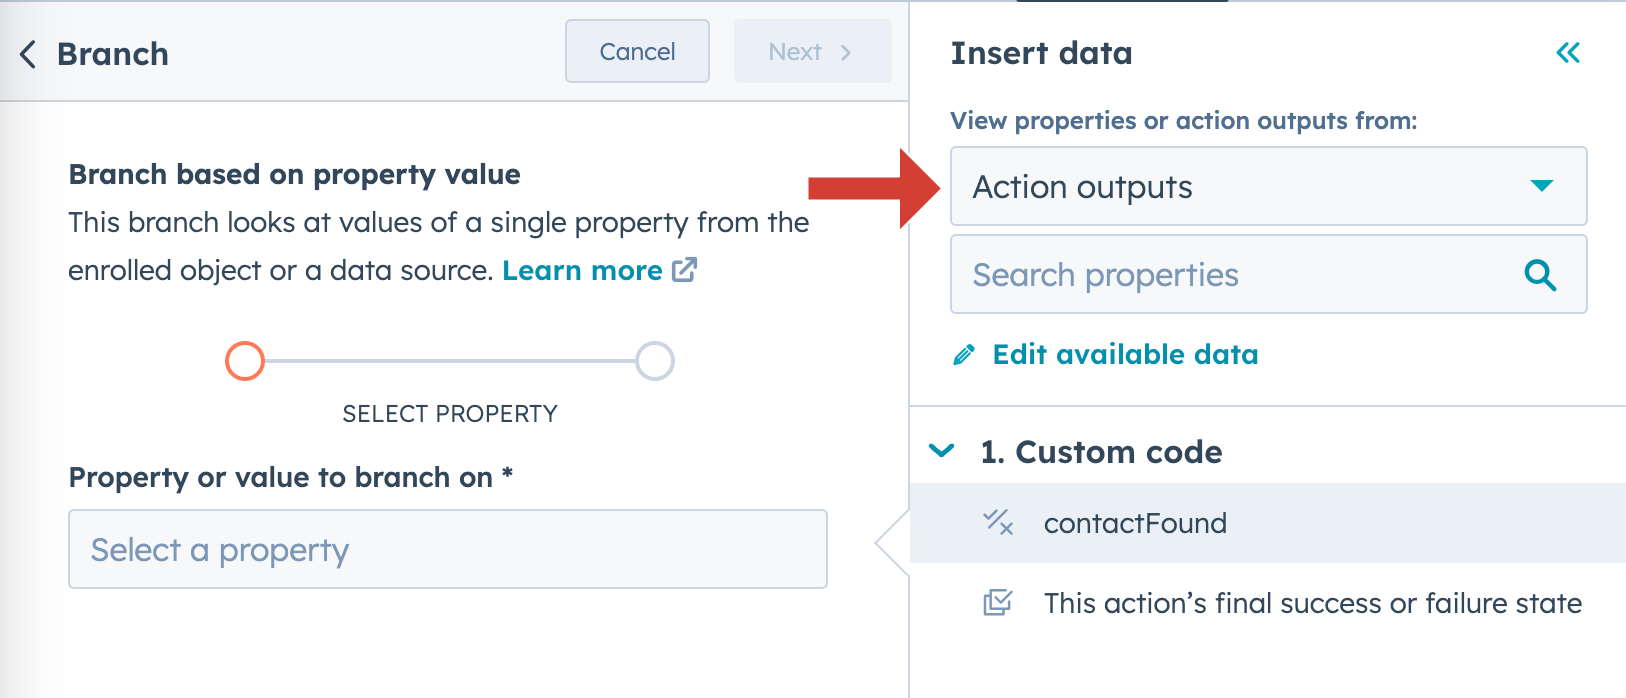
There is a dropdown at the top - `View properties or action outputs from`. If you set `Enrolled contact`, you’ll be able to find our `Found in external API` property in the list below. It will be visible under `Enumeration properties`, because it’s true or false
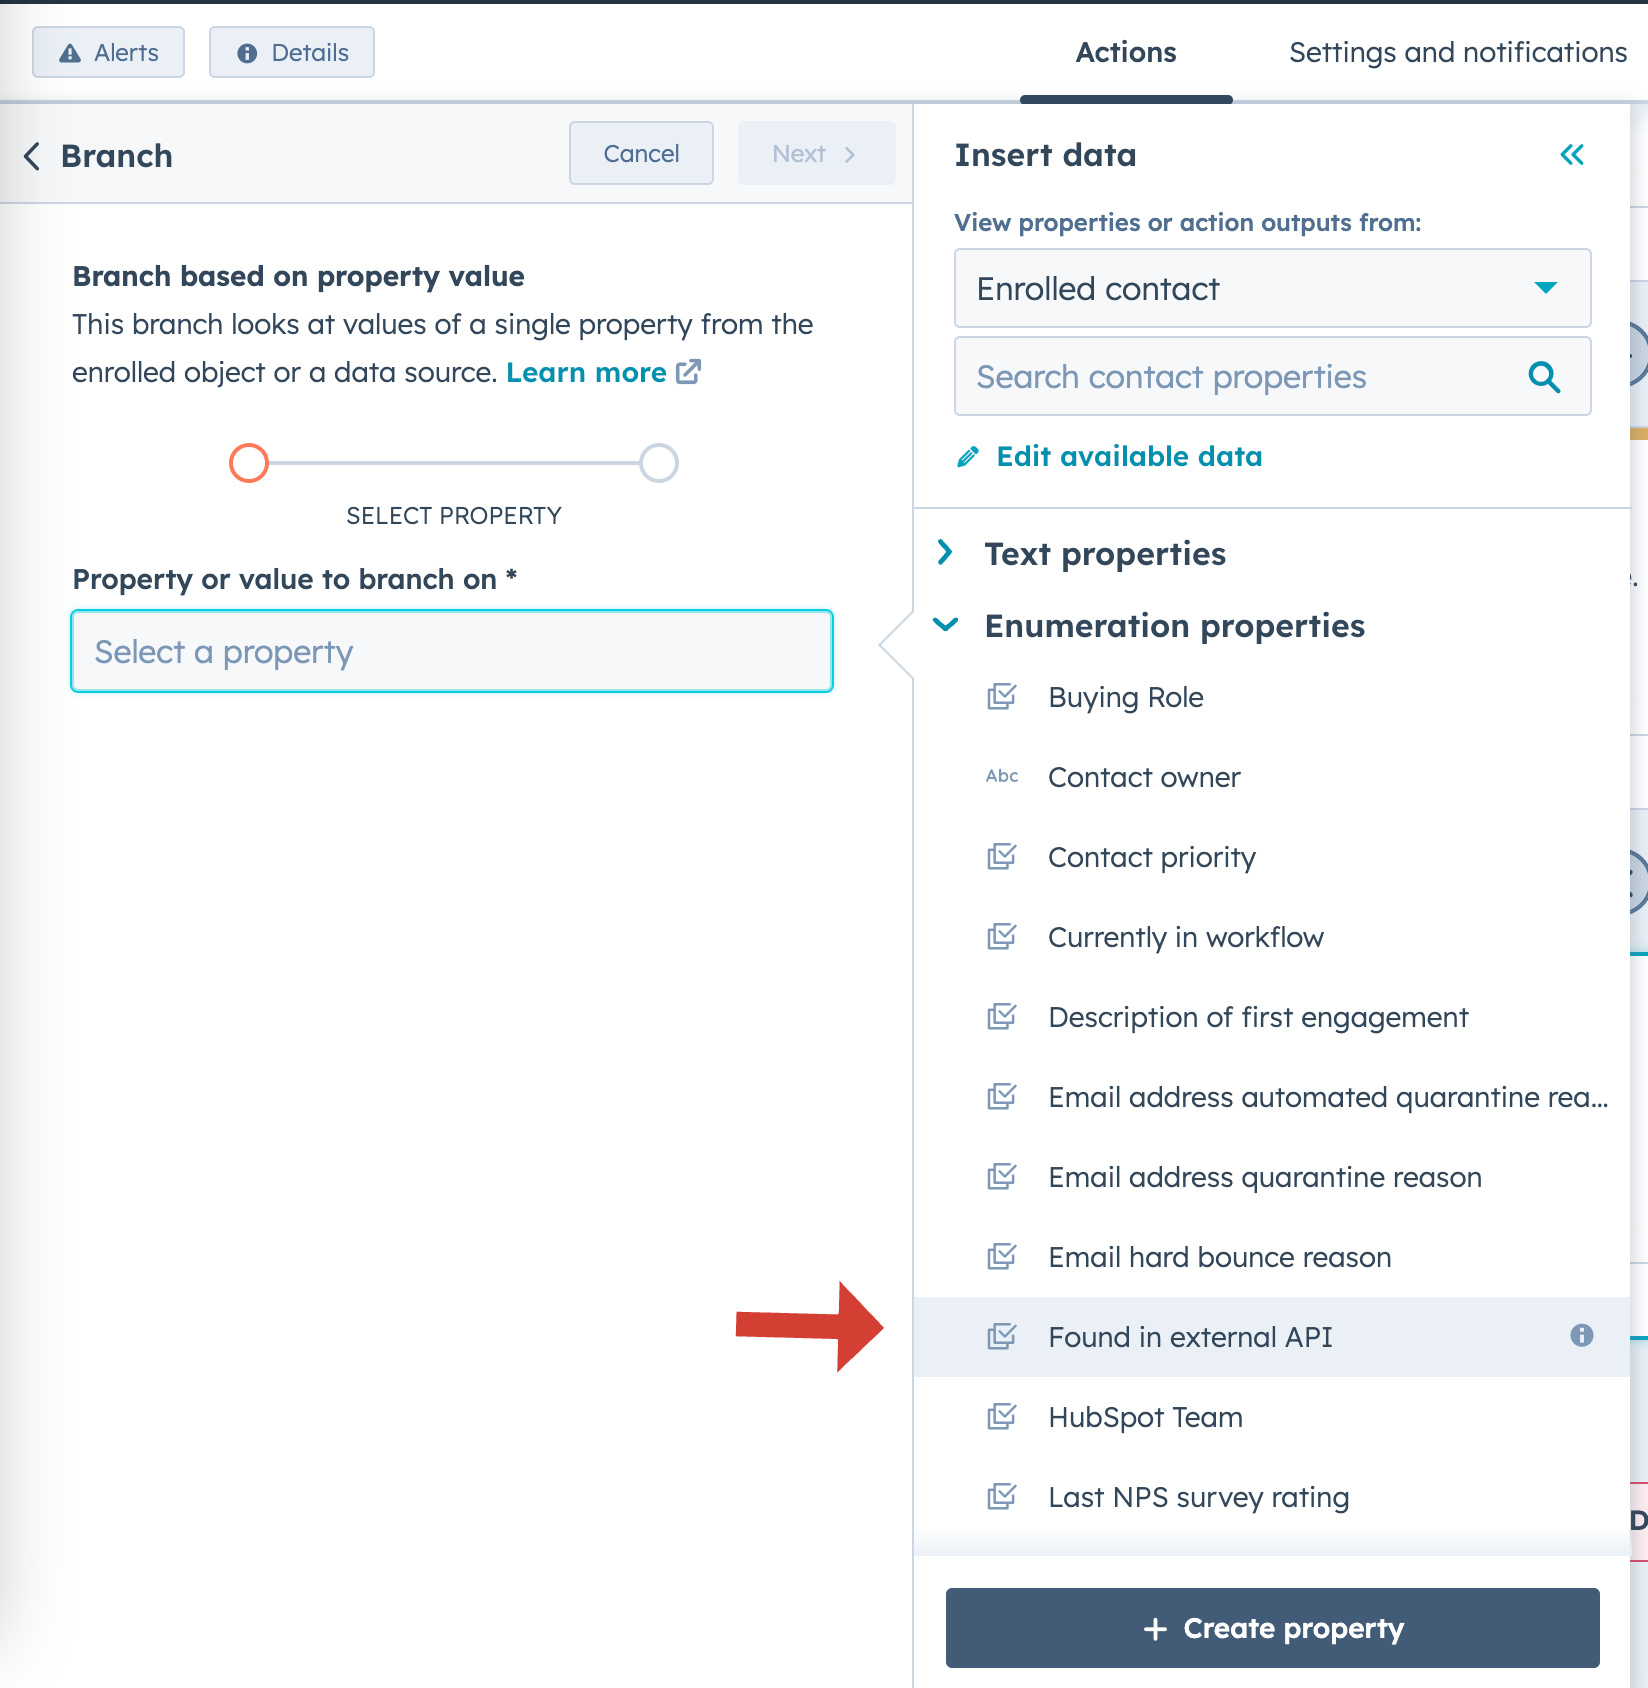
You can also switch to `Action output` in the dropdown and select `contactFound` field, which we created in a step before.
Step 5 - Review and turn on
Only a few steps left to run this workflow on production.
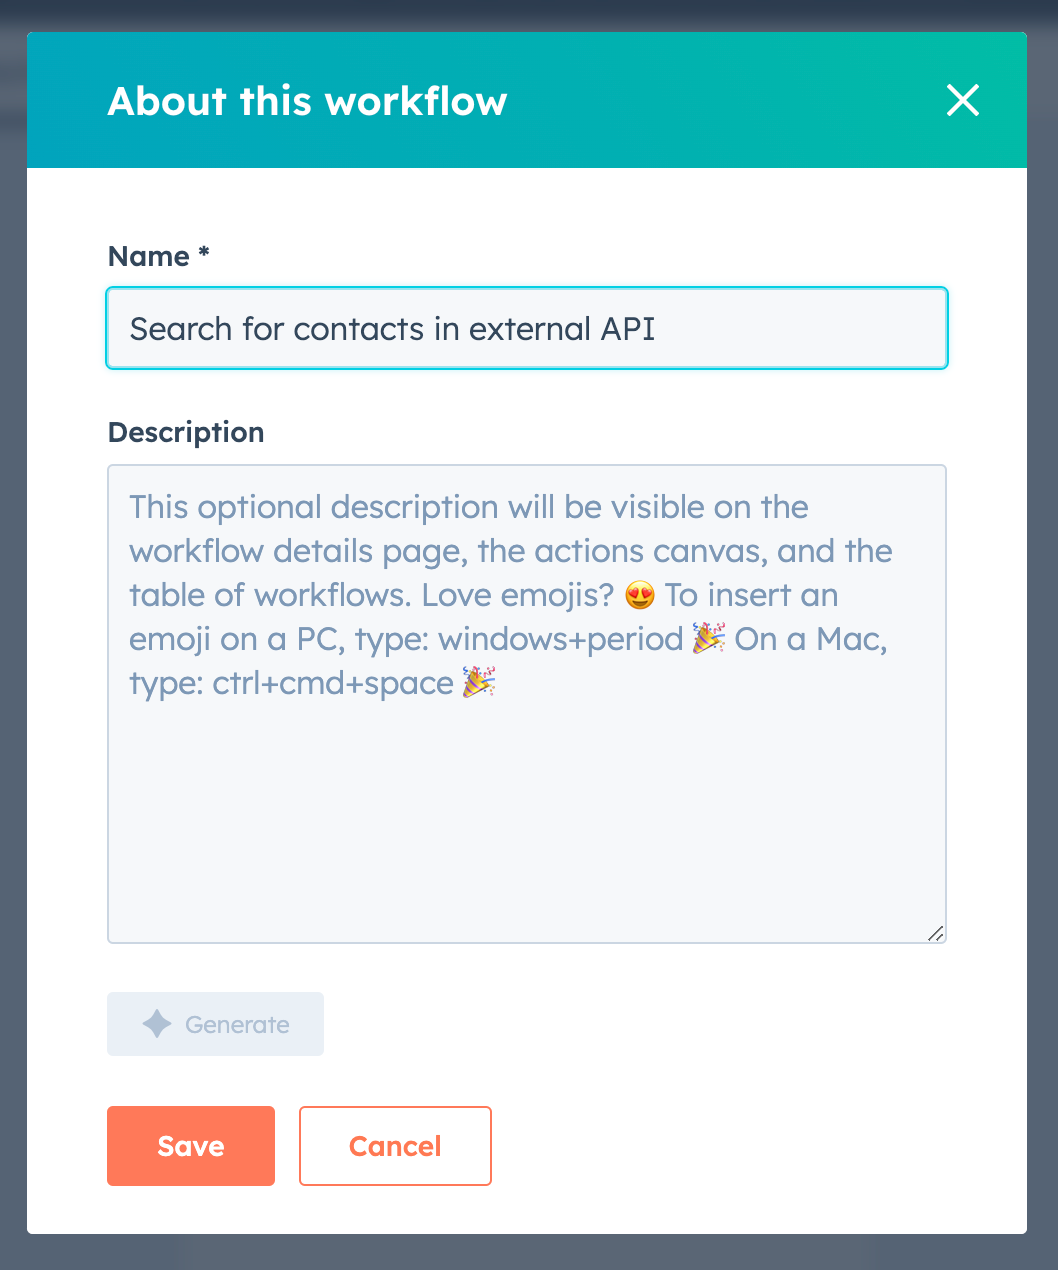
- First, you have to give it a name. Click the pencil icon at the top bar and write a name of your workflow and save it

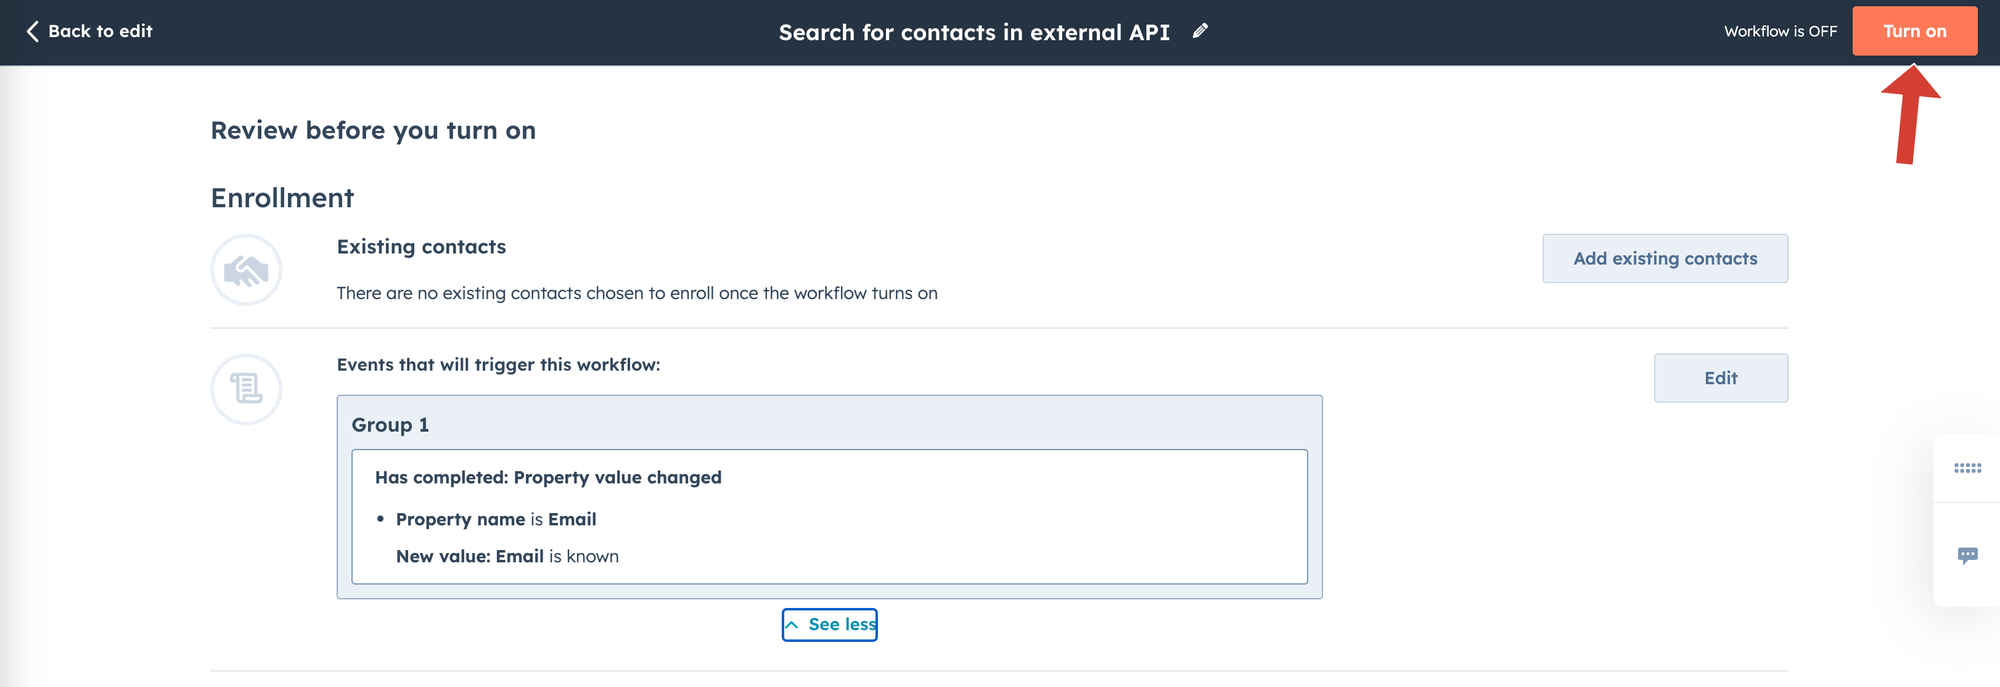
- Click `Review and publish` and you’ll see the review of what does the workflow do

- If everything is ok, click `Turn on`
That’s it! Your workflow is up and running 😎
Conclusion
As you can see, adding a custom code action in workflows opens up a lot of automation possibilities. With such solution you can create highly customized workflows which meet your unique needs.
Cheers!
